Technical problems do not follow a schedule. A system goes down mid-project. A network drops during a critical call. Equipment fails without warning.
And when problems occur, jumping straight to a solution often leads to wasted time and missed root causes.
That’s why following a proven troubleshooting methodology is so important. A structured approach helps you identify the problem, test possible causes, apply the right fix, and prevent the issue from happening again.
In this guide, you’ll learn the essential troubleshooting steps that technicians and professionals use to solve problems efficiently.
Keep reading to understand the complete troubleshooting process and improve your problem-solving skills.
How Does Troubleshooting Methodology Help?
A troubleshooting methodology provides a clear path for finding and fixing problems. Instead of relying on guesswork, it helps you work through issues in a logical way and reach a solution faster.
- Improves problem-solving accuracy: A structured process helps identify the real cause of an issue. This reduces the chance of applying the wrong fix.
- Reduces downtime: Faster troubleshooting means systems and equipment return to normal operation sooner. This minimizes disruptions to work.
- Prevents repeated issues: The methodology focuses on finding root causes, not just symptoms. This helps stop the same problem from happening again.
- Supports consistent results: Everyone follows the same troubleshooting process. This creates reliable and repeatable outcomes across teams.
- Lowers repair and maintenance costs: Accurate diagnosis helps avoid replacing working parts or making unnecessary changes. This reduces overall expenses.
- Improves documentation and knowledge sharing: Recording troubleshooting steps and solutions creates valuable reference material. Future issues can often be resolved more efficiently.
Understanding the Essential Troubleshooting Steps
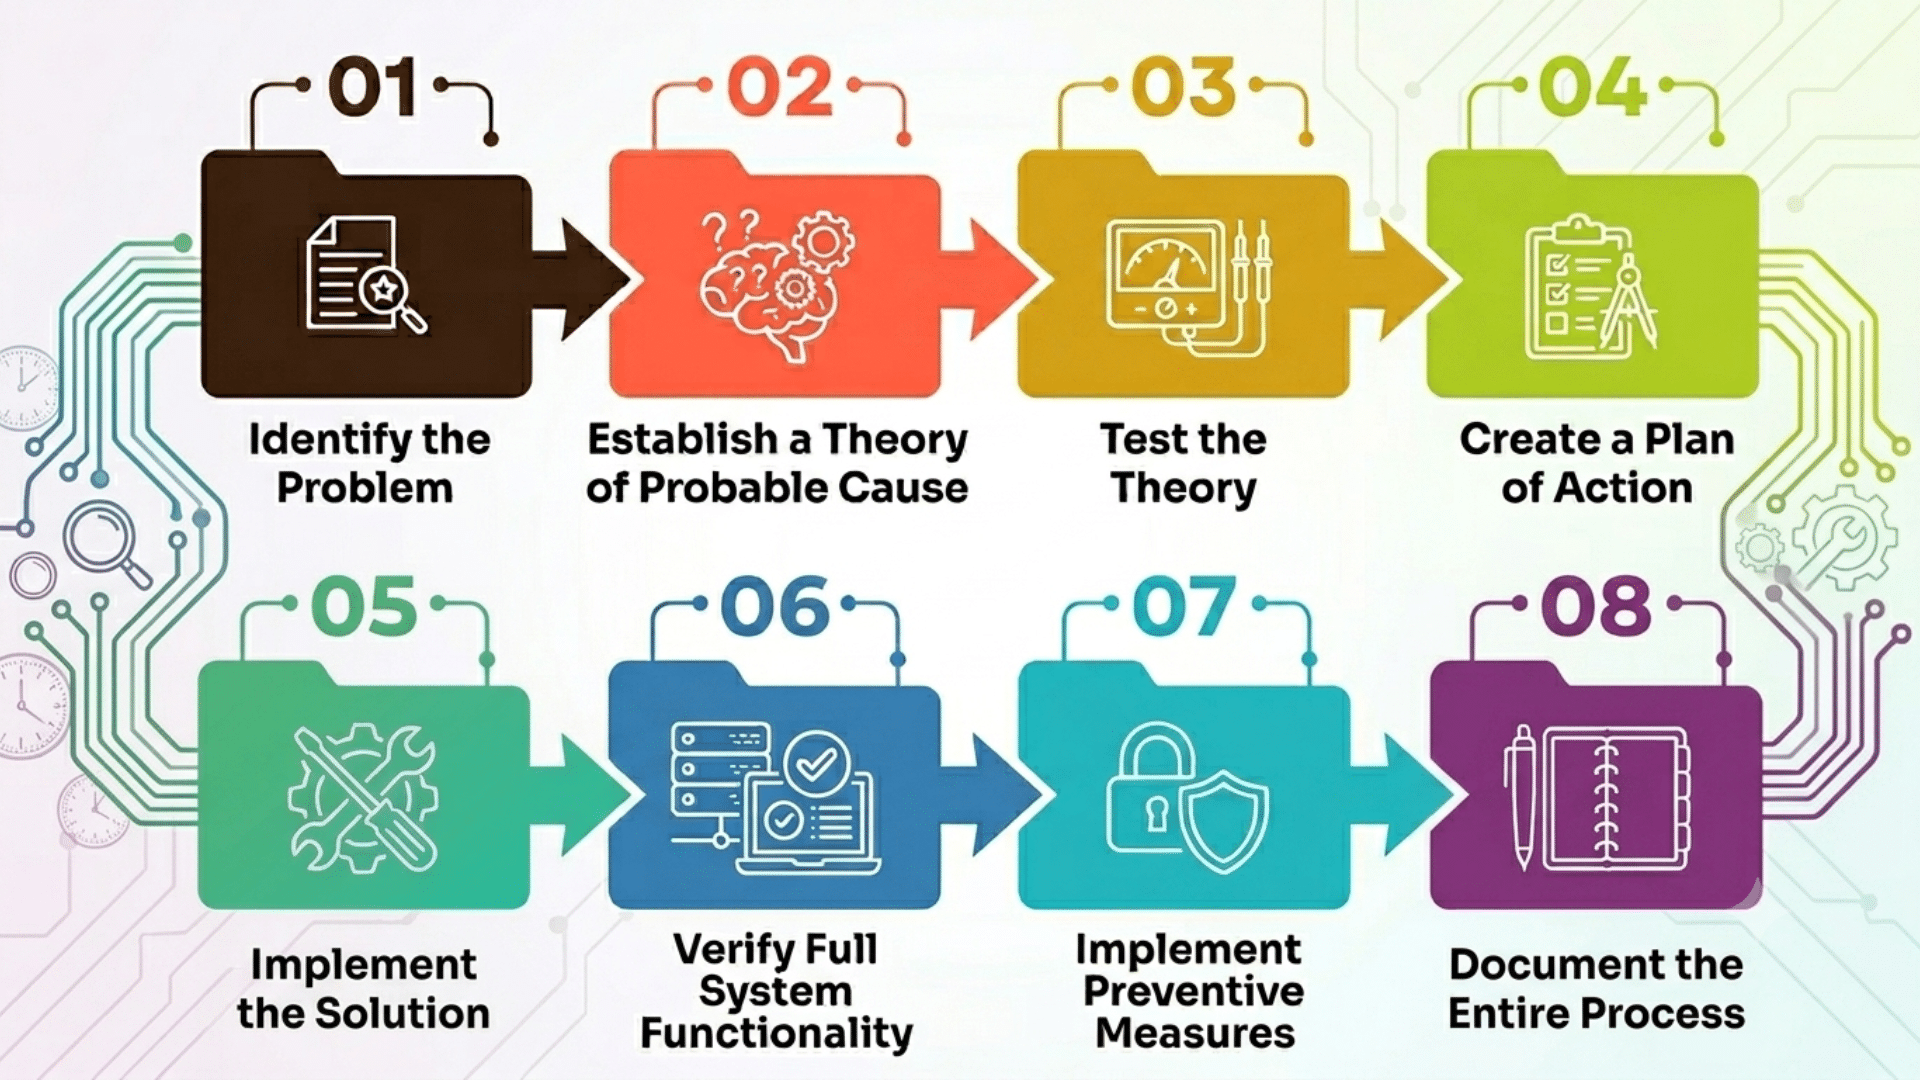
The framework below is aligned with the CompTIA A+ troubleshooting model, one of the most widely adopted standards in IT support and technical training. Each step builds on the previous one to ensure nothing is missed.
1. Identify the Problem
The first step in any troubleshooting methodology is identifying the problem accurately. Before making changes or testing solutions, gather as much information as possible about the issue.
Review error messages, observe system behavior, and speak with users to understand what happened and when it started.
Determine which systems, devices, or processes are affected and whether the problem can be reproduced.
A clear understanding of the issue helps eliminate guesswork and creates a strong foundation for the remaining troubleshooting steps, making it easier to find the correct solution.
2. Establish a Theory of Probable Cause
Once the problem is identified, develop one or more possible explanations for why it is happening. Review logs, system alerts, configurations, and previous incidents to identify likely causes.
Consider both common and uncommon possibilities, including hardware failures, software errors, user mistakes, and environmental factors.
Creating a reasonable theory helps narrow the scope of the investigation and provides a clear direction for testing.
This step prevents random guessing and supports a more organized troubleshooting process.
3. Test the Theory
After developing a theory, perform tests to determine if it accurately explains the problem.
Use diagnostic tools, run system checks, replace suspected components, or compare results with normal system behavior.
The goal is to gather evidence that either confirms or disproves the suspected cause. If the theory is incorrect, return to the previous step and develop a new one.
Testing allows technicians to focus on facts instead of assumptions and helps ensure the actual cause is identified.
4. Create a Plan of Action
Once the root cause is confirmed, decide how the issue will be fixed. Evaluate available solutions and choose the one that offers the best results with the least risk.
Consider factors such as downtime, cost, system impact, and available resources. If major changes are required, create backups and prepare a rollback plan.
Developing a clear action plan helps reduce mistakes during implementation and ensures the solution is applied in a controlled and organized manner.
5. Implement the Solution
The next step is to apply the selected fix according to the action plan. This may involve updating software, replacing hardware, changing configurations, or correcting user settings.
Follow established procedures carefully and monitor the system during implementation.
Avoid making additional changes that are unrelated to the issue, as this can complicate troubleshooting efforts.
Proper implementation helps ensure the problem is resolved effectively while minimizing the risk of creating new issues within the system.
6. Verify Full System Functionality
After applying the solution, confirm that the original issue has been resolved. Test all affected systems, applications, or equipment to ensure they are operating correctly.
Verify that no new problems have been introduced and that users can perform their normal tasks without difficulty.
This step is critical because a fix that appears successful may still leave hidden issues behind. Thorough verification ensures the solution works as intended and restores confidence in system performance.
7. Implement Preventive Measures
Troubleshooting should not end after fixing the immediate problem. Review the root cause and identify actions that can prevent the issue from recurring.
This may involve updating software, improving maintenance schedules, revising procedures, or providing additional training.
Preventive measures help improve system reliability and reduce future disruptions.
By addressing the underlying cause rather than only the symptoms, organizations can minimize recurring problems, lower support costs, and maintain smoother operations over time.
8. Document the Entire Process
The final step is to record everything learned during the troubleshooting process. These records create a valuable knowledge base that helps teams resolve similar issues more quickly in the future.
Proper documentation records every stage of the troubleshooting process, including symptoms, diagnostic steps, root causes, solutions, and test results.
Documentation supports training, improves team communication, and keeps problem-solving consistent.
Keeping accurate records saves time, reduces repeated work, and helps organizations build a stronger and more efficient troubleshooting framework.
How Can Troubleshooting Be Used for Different Devices?
While devices vary in function, most technical issues can be solved using the same troubleshooting methodology. The table below shows common examples across different devices.
| Device | Common Problem | Basic Troubleshooting Steps |
| Laptop | Won’t turn on | Check the power supply, test the charger, inspect the battery, and restart the device. |
| Smartphone | Not charging | Test a different charger, clean the charging port, and restart the phone. |
| Printer | Not printing | Verify connectivity, check paper supply, clear jams, and restart the printer. |
| Wi-Fi Router | No internet access | Restart the router, inspect cables, and confirm the ISP connection is active. |
| Smart TV | Apps not working | Check internet access, update software, and reinstall the affected app. |
| Gaming Console | Frequent crashes | Clear cache files, update firmware, and ensure enough storage space is available. |
| External Hard Drive | Not detected | Try another USB port, test on another computer, and update drivers. |
| Security Camera | No video feed | Check the power supply, inspect the network connections, and restart the camera. |
| Tablet | Screen freezing | Close unused apps, free up storage space, and install software updates. |
What Tools Are Used for Effective Troubleshooting?
The right tools and resources make troubleshooting faster and more accurate. They help technicians collect information, identify root causes, and verify solutions with greater confidence.
- Diagnostic Software: Diagnostic tools scan systems for errors, performance issues, and hardware failures. They provide valuable data that helps narrow down possible causes.
- System and Event Logs: Logs record system activities, warnings, and errors. Reviewing these records can reveal patterns and point directly to the source of a problem.
- Hardware Testing Equipment: Devices such as multimeters, cable testers, and component analyzers help detect physical faults. They are useful when troubleshooting electrical or hardware-related problems.
- Vendor Support and Technical Communities: Manufacturer support teams and online forums can provide expert guidance. They often share solutions for known issues and uncommon problems.
- Security Information and Event Management (SIEM) Platforms: In cybersecurity troubleshooting, SIEM tools aggregate log data across systems and flag anomalies in real time.
What Are the Best Troubleshooting Techniques?
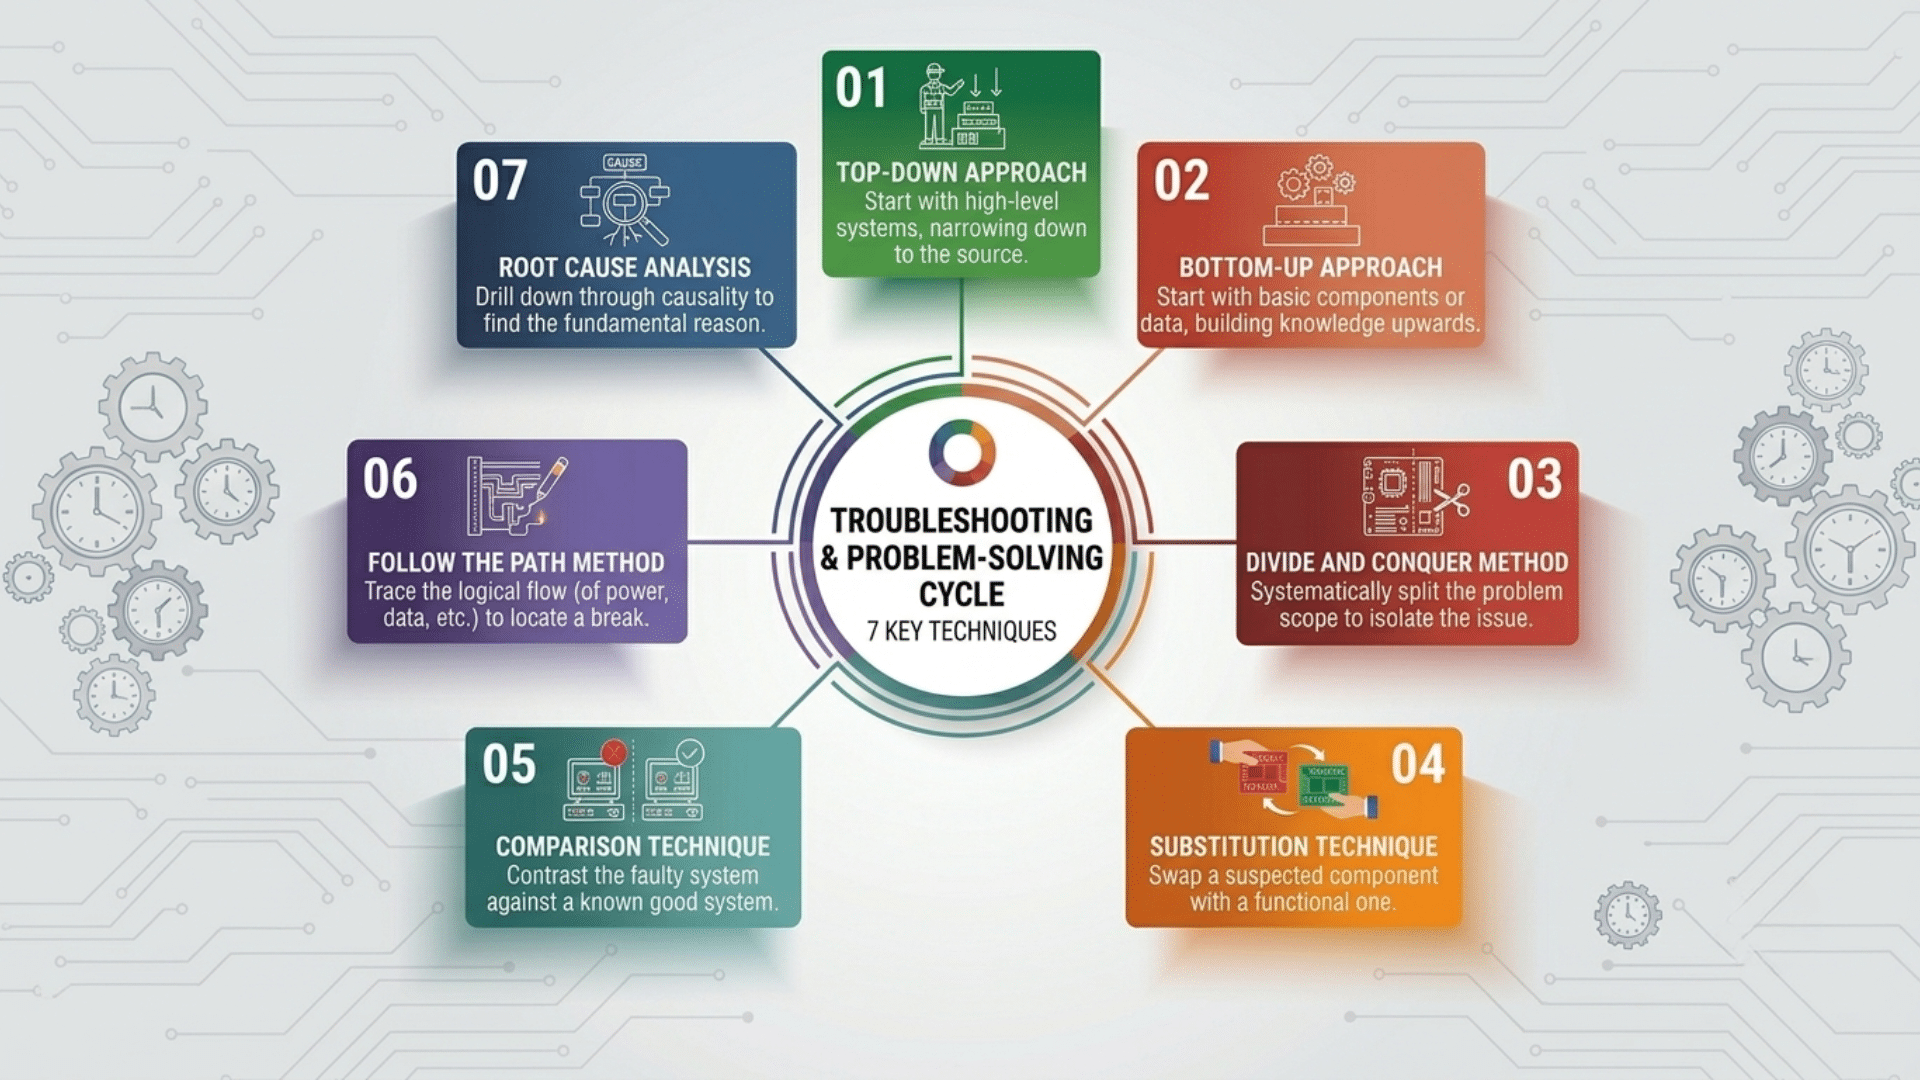
Different troubleshooting techniques help technicians isolate problems and identify the root cause more efficiently. Choosing the right approach depends on the type of issue, the system involved, and the available information.
1. Top-Down Approach
The top-down approach starts at the highest layer of a system, usually where users interact with applications or services.
Technicians first examine software settings, user permissions, and application performance before moving down to network and hardware components.
This method works well when the issue appears to be software-related or limited to a specific application.
By focusing on the user-facing side first, technicians can often identify problems quickly and avoid unnecessary investigation of lower-level components.
2. Bottom-Up Approach
The bottom-up approach begins with the physical components of a system and gradually moves upward through each layer.
It works by inspecting hardware, power supplies, cables, ports, and network connections before checking software or application settings.
This technique is especially useful when there are signs of hardware failure or connectivity issues.
By confirming that the foundation of the system is working correctly, technicians can eliminate many possible causes early and create a more focused troubleshooting process.
3. Divide and Conquer Method
This method narrows the search area by testing a midpoint within a system or process.
Based on the test results, technicians determine which side of the system contains the issue and continue dividing the affected area until the root cause is found.
This technique is widely used in network troubleshooting because it reduces the number of components that need to be checked.
It saves time and resources while providing a systematic way to isolate and identify faults.
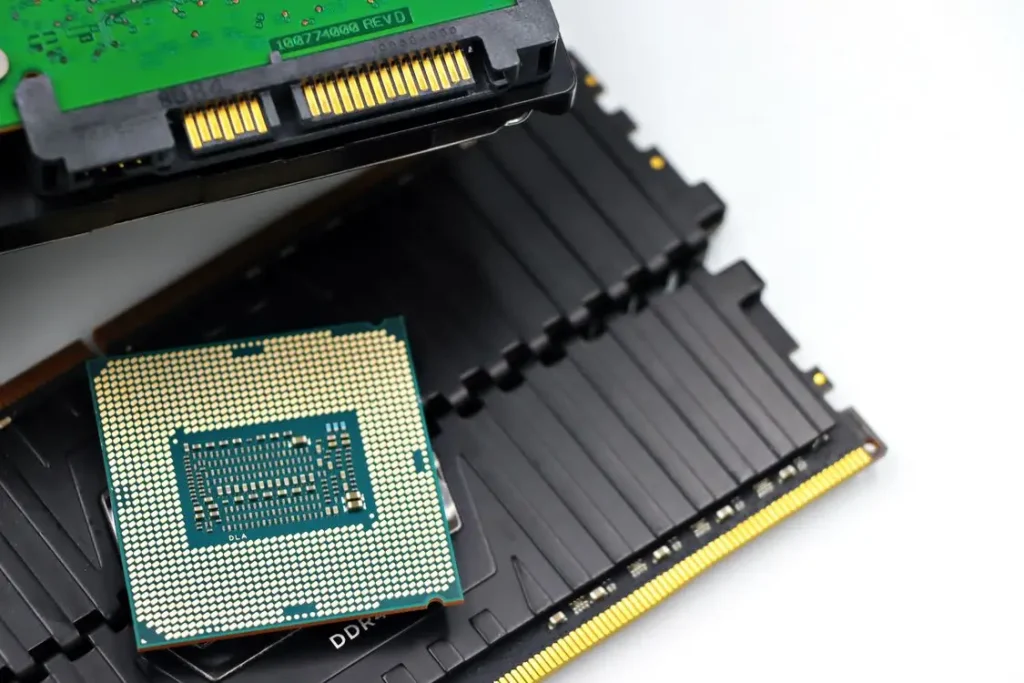
4. Substitution Technique
The substitution technique replaces a suspected faulty part with a working one to check if the problem is fixed.
This method is commonly used for troubleshooting hardware such as cables, power supplies, memory modules, and network devices.
If the replacement resolves the issue, the original component is likely defective.
The substitution technique provides quick confirmation without requiring extensive testing and is often one of the fastest ways to verify hardware-related problems in a system.
5. Comparison Technique
Its major focus lies on evaluating a malfunctioning device or system against another device that is functioning correctly.
Technicians compare settings, software versions, hardware, and performance data to spot differences.
Any mismatch may reveal the source of the problem. This approach is particularly useful in organizations where multiple devices use identical configurations.
Comparing a working system with a faulty one helps technicians find issues faster and fix them with confidence.
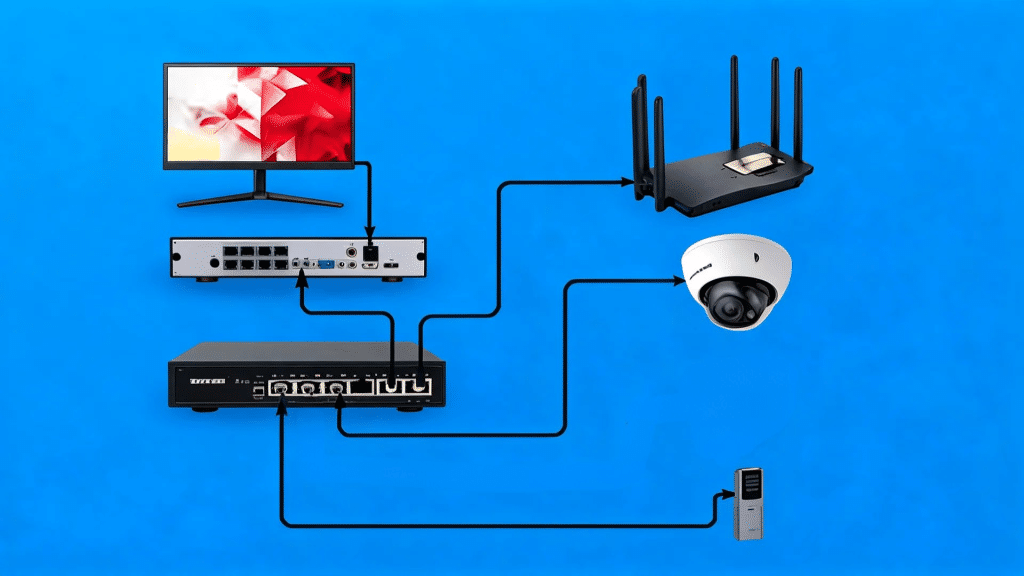
6. Follow the Path Method
This method works by following the traces of the flow of power, data, or communication signals through a system from start to finish.
Technicians inspect each connection point and component in sequence until they find where the process breaks down.
This technique is frequently used in electrical systems, communication networks, and industrial equipment.
Following the path helps technicians find disconnected cables, damaged parts, faulty ports, or configuration issues causing failures.
7. Root Cause Analysis
Root cause analysis focuses on identifying the underlying reason a problem occurred instead of only fixing its symptoms. Finding the root cause helps prevent the same problem from happening again.
Technicians collect evidence, analyze contributing factors, and investigate how different events led to the issue.
This method often involves reviewing logs, maintenance records, and system history.
Organizations that prioritize root cause analysis often experience improved reliability, reduced downtime, and more effective long-term problem resolution.
What Are the Common Causes of Technical Problems?
Technical issues can come from many sources, including hardware, software, networks, and human errors. Understanding these causes helps narrow down the problem and choose the right troubleshooting approach.
- Hardware Failures: Damaged components, worn-out parts, overheating, or power supply issues can cause devices to malfunction or stop working completely.
- Software Errors: Bugs, corrupted files, failed updates, or incompatible applications can lead to crashes, slow performance, and unexpected behavior.
- Network Connectivity Issues: Faulty cables, router problems, incorrect settings, or internet service disruptions can interrupt communication between devices.
- Configuration Mistakes: Incorrect system settings, permission changes, or misconfigured applications can prevent systems from operating properly.
- Security Threats: Malware, viruses, ransomware, and unauthorized access attempts can disrupt normal operations and compromise system stability.
- Environmental Factors: Excessive heat, dust, moisture, power fluctuations, and poor ventilation can damage equipment and reduce reliability.
- Outdated Systems: Older hardware, unsupported software, or missing updates can create compatibility issues and increase the risk of failures.
What Is the Difference Between Troubleshooting and Root Cause Analysis?
Both approaches are important for resolving technical issues and improving system reliability. Understanding when to use each one helps teams solve problems more effectively and prevent future disruptions.
| Aspect | Troubleshooting | Root Cause Analysis |
|---|---|---|
| Purpose | Focuses on identifying and fixing an immediate problem. | Focuses on finding the underlying reason the problem occurred. |
| Goal | Restore normal operation as quickly as possible. | Prevent the issue from happening again. |
| Approach | Uses testing, diagnosis, and corrective actions to resolve symptoms. | Uses investigation and analysis to identify the source of the issue. |
| Time Frame | Usually performed during or immediately after a problem occurs. | Often conducted after the issue is stabilized or resolved. |
| Outcome | A working system or restored service. | Long-term improvements that reduce recurring issues. |
| Common Methods | Top-down, bottom-up, divide and conquer, and substitution techniques. | 5 Whys, fishbone diagrams, fault tree analysis, and trend analysis. |
| Example | Restarting a server to restore access after an outage. | Investigating why the server failed and implementing measures to prevent future outages. |
Common Troubleshooting Mistakes to Avoid
Many troubleshooting efforts take longer than necessary because of avoidable errors. Recognizing these mistakes can help improve accuracy, reduce downtime, and speed up problem resolution.
- Skipping Information Gathering: Starting without collecting error messages, logs, or user feedback can lead to incorrect assumptions.
- Ignoring Simple Causes: Overlooking basic checks such as power connections, cables, or settings can delay resolution.
- Changing Multiple Things at Once: Making several changes together makes it difficult to determine which action affected the outcome.
- Not Documenting the Process: Failing to record findings and solutions can make future troubleshooting more difficult.
- Overlooking Recent Changes: Software updates, configuration changes, or new hardware installations often contribute to technical issues.
- Using the Wrong Tools: Inaccurate or outdated diagnostic tools can produce misleading results and slow down the investigation.
- Stopping After a Quick Fix: Resolving the symptom without finding the root cause can allow the same problem to return later.
How Long Does the Troubleshooting Process Take?
The time required to troubleshoot a problem depends on its complexity. Simple issues, such as incorrect settings, disconnected cables, or minor software glitches, can often be resolved within a few minutes.
More complex problems involving hardware failures, network outages, or multiple systems may take several hours or longer to diagnose and fix.
The process is usually faster when clear error messages, diagnostic tools, and accurate documentation are available.
Technician experience can also play a major role in reducing resolution time.
Following a structured troubleshooting process helps narrow down possible causes, avoid unnecessary testing, and reach the correct solution more efficiently.
What Are the Best Practices for Effective Troubleshooting?
A structured approach helps reduce guesswork and saves time during diagnosis. These practices also improve accuracy and make issue resolution more consistent.
- Gather Information: Collect error messages, logs, user feedback, and details about recent changes before investigating.
- Define the Problem Clearly: Identify the exact symptoms, affected systems, and when the issue occurs.
- Start With Simple Checks: Inspect power sources, cables, connections, and basic settings before testing complex causes.
- Test One Change at a Time: Make a single adjustment and verify the result before applying another fix.
- Document Your Findings: Record observations, actions taken, and outcomes to support future troubleshooting.
- Verify the Solution: Confirm that the issue is resolved and that the system is working as expected.
Conclusion
A structured troubleshooting methodology is a valuable skill that works across many technical fields, from consumer devices to enterprise systems and security incidents.
The eight steps, from identifying the problem to documenting the solution, provide a framework that reduces guesswork and delivers results.
Over a decade in cybersecurity, I watched teams that used a structured process resolve incidents two to three times faster than those that relied on intuition alone. That gap closes quickly once you commit to the process.
Apply it consistently and document your findings to build a knowledge base that helps your entire team.
Frequently Asked Questions
What Is a Troubleshooting Methodology?
A troubleshooting methodology is a structured process used to identify, analyze, and resolve technical problems. It provides a step-by-step approach that helps find the root cause and apply the correct solution.
What Are the Basic Troubleshooting Steps?
The basic troubleshooting steps include identifying the problem, establishing a theory, testing the theory, creating a solution plan, implementing the fix, verifying results, applying preventive measures, and documenting the process.
Why Is Troubleshooting Important?
Troubleshooting helps resolve issues efficiently, reduce downtime, and improve system reliability. It also prevents unnecessary repairs by ensuring the actual cause of a problem is identified.
What Is the Most Effective Troubleshooting Technique?
The most effective technique depends on the situation. Common methods such as divide and conquer, root cause analysis, and top-down troubleshooting are widely used because they help narrow down issues quickly.
How Can Troubleshooting Prevent Future Problems?
Troubleshooting focuses on identifying root causes rather than only fixing symptoms. By applying preventive measures and documenting solutions, organizations can reduce the chances of similar issues occurring again.