Most smart home gadgets don’t work with Apple’s Home app right out of the box.
That means if you own non-Apple devices, you end up juggling multiple apps to control a light or check your doorbell. It gets frustrating fast.
With over a decade of testing home tech and audio systems, I have seen this fragmentation problem grow worse every year: more brands, more apps, more walls between devices that should work together.
I hit this exact wall when I tried pulling Ring cameras and a Nest thermostat into my Apple setup.
They didn’t talk to each other. That is when I found Homebridge HomeKit, a free, open-source Node.js server that connects almost any smart device to Apple Home through a lightweight local server and community-built plugins.
The best part? It is completely free!
The entire codebase lives on GitHub under the Apache-2.0 license, and thousands of developers around the world build, maintain, and improve it.
Anyone can read the code, submit a pull request, create a new plugin, or fork the project entirely.
That kind of open-source power is what makes Homebridge stand out from every other option on the market right now.
What is Homebridge HomeKit?
Homebridge HomeKit, in short: Homebridge is a free, open-source Node.js server that emulates the iOS HomeKit API, allowing non-HomeKit smart home devices to appear in Apple’s Home app and be controlled with Siri, automations, and scenes.
Created by Nick Farina in 2015, it allows users to manage devices via Siri commands and automations, such as “Siri, turn on the living room lights.”
The project is licensed under Apache-2.0, and its entire codebase lives on GitHub for anyone to inspect, improve, or fork.
Homebridge supports two classes of devices: Accessories, which are locally controlled devices like smart plugs and light switches, and Platforms, which cover cloud-connected devices such as security cameras and thermostats.
The platforms class is where Homebridge does its most important work, connecting to devices that HomeKit cannot certify because they rely on manufacturer servers.
With its origins in Apple’s HomeKit launch in 2014, Homebridge now supports over 2,000 community-built plugins spanning brands like Ring, Nest, Govee, Meross, and Aqara.
It can also run on platforms such as Raspberry Pi, macOS, Windows, Docker containers, and Debian/Ubuntu Linux.
Those seeking a simpler solution can use HOOBS, which packages Homebridge into a user-friendly hardware device.
HOOBS removes the command-line setup entirely and provides a plug-and-play box that connects to your router.
I have pointed a few less-technical readers toward HOOBS over the years, and the feedback has been consistent: they get the full plugin ecosystem without ever opening a terminal window.
For anyone who wants the benefits of Homebridge HomeKit without flashing SD cards or running terminal commands, HOOBS is worth a serious look.
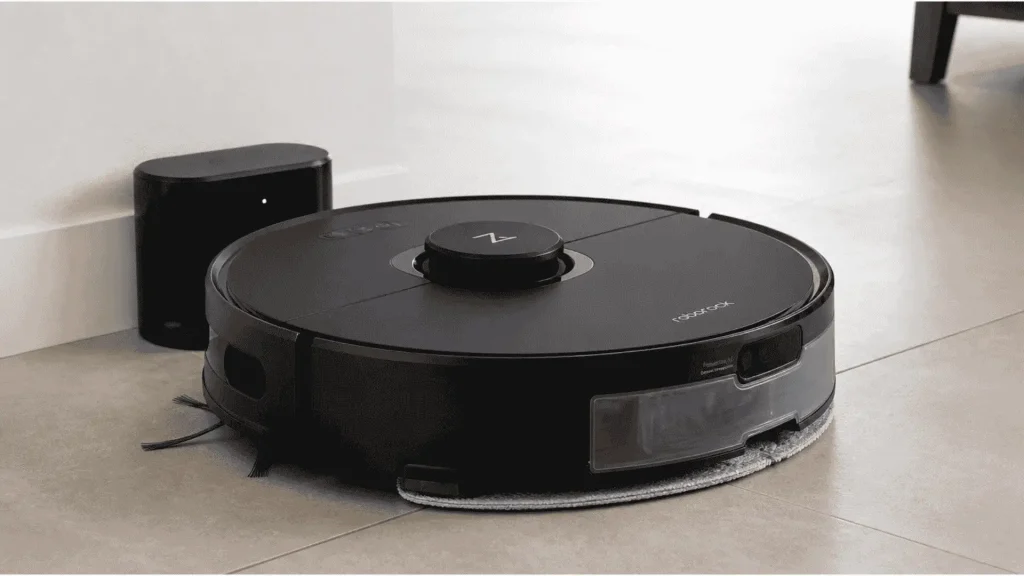
9to5Mac’s HomeKit Weekly series reviewed the HOOBS Starter Kit and had it up and running with a Neato robot vacuum in under 5 minutes.
Connecting Homebridge to HomeKit
Setting up Homebridge HomeKit is only half the job. The other half is pairing it with Apple’s Home app so all connected devices actually show up on your iPhone, iPad, or Mac.
1. Pairing Homebridge HomeKit With the Home App
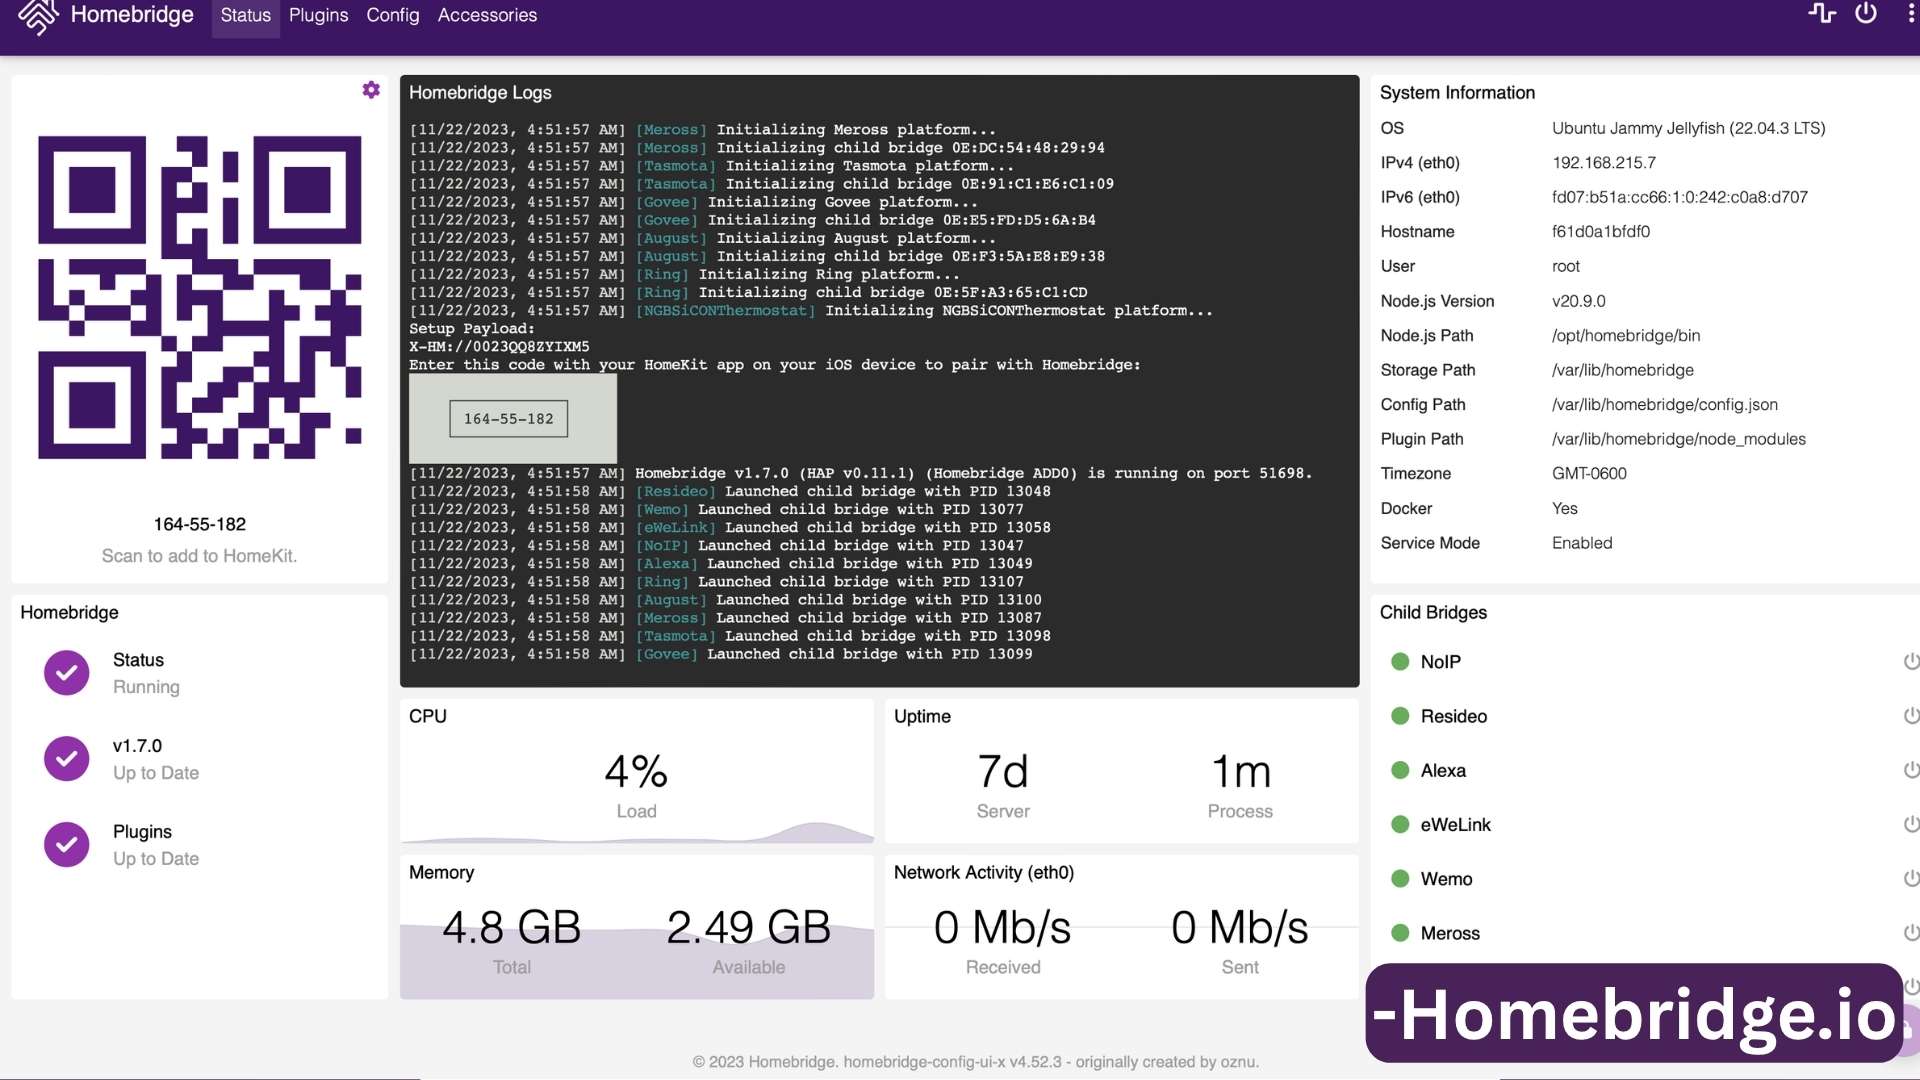
After installation, the Homebridge UI displays a QR code on the dashboard.
Give your Homebridge device a static IP address through your router’s DHCP reservation settings before pairing. This prevents the bridge from dropping off your network if its IP address changes after a reboot.
Open the Home app on your Apple device, tap the “+” icon, select Add Accessory, and scan that QR code. The bridge pairs within seconds.
The default login for the Homebridge UI is admin/admin; change this immediately after your first login.
If no plugins are installed yet, Apple may show a message saying “Additional Setup Required.”
That is completely normal. As plugins load new devices, those accessories appear in the Home app automatically without needing to pair again.
One thing that caught me off guard during my first setup: Siri will almost always prioritize its own default commands over HomeKit device names.
If you name a speaker “Radio” and say, “Siri, turn on the Radio,” Siri will likely start an iTunes Radio station instead of controlling your device.
In audio setups specifically, this naming issue is more common than most guides acknowledge.
I learned to use specific, unique names for every accessory: “Office Lamp” instead of “Light,” “Den Speaker” instead of “Sonos,” and “Kitchen Display” instead of “TV.”
This small naming habit saves a lot of frustration down the line.
2. Adding Cameras and TVs Separately
Cameras and most TV accessories work differently from regular devices.
Homebridge HomeKit exposes them as separate accessories outside the main bridge. Each one needs its own manual pairing process.
To add them, open the Home app, tap Add Accessory, then select “I Don’t Have a Code or Cannot Scan.”
Pick the camera or TV from the list and enter the Homebridge PIN shown under the QR code in the UI. This extra step exists because of how Apple handles video streaming accessories in HomeKit.
3. Resetting and Re-Pairing Homebridge
Sometimes pairing fails, or users need to remove and re-add the bridge after troubleshooting. In the Homebridge UI, go to Settings and select “Unpair All Bridges” to perform a clean reset.
After resetting, the bridge can be paired again using the same QR code method.
Users who prefer manual cleanup can also delete the persist and accessories folders in the Homebridge storage directory and restart the service.
First-time setup tip: Always back up your config.json and Homebridge storage directory regularly. A weekly backup can quickly save you from issues if your Raspberry Pi’s SD card gets corrupted.
How does the Homebridge Plugin Ecosystem Work?

Homebridge uses plugins to connect devices to Apple HomeKit, with each plugin acting as a translator between a manufacturer’s proprietary API and Apple’s HomeKit protocol.
Plugins are installed and managed through the Homebridge Config UI, a browser-based dashboard that removes the need to edit JSON files by hand for most tasks.
1. Verified Plugin Program
The Homebridge project runs a Verified Plugin program to maintain quality across the ecosystem. The core team has reviewed plugins with the green shield badge in the UI.
To earn verified status, a plugin must use the dynamic platform type, publish its source code on a public GitHub repository with issues enabled, and run on all supported Node.js LTS versions (currently Node v18 and v20).
It must not execute post-install scripts that modify the user’s system, must not include any analytics or user-tracking code, and must implement the Homebridge Plugin Settings GUI so users can configure it without editing JSON files directly.
Every new version must include a proper GitHub release with notes.
This program helps users quickly spot trustworthy, well-maintained Homebridge HomeKit plugins when building a setup for the first time.
When I first started browsing plugins, the sheer number of options for a single brand like Tuya was overwhelming.
I counted at least five plugins claiming to do the same thing for TP-Link Kasa devices alone. The green shield became my filter.
If a plugin does not have that badge and a verified alternative is available, I always go with the verified one first. It has saved me hours of troubleshooting over the years.
2. Popular Homebridge Plugins for HomeKit
Some of the most installed plugins connect widely used smart devices to Apple Home. The Ring plugin brings video doorbells and cameras into HomeKit with motion alerts.
The Nest plugin adds thermostat and camera control through Siri.
The TP-Link Kasa plugin connects affordable smart plugs and light switches to the Apple Home app. Other popular choices include the Govee, Meross, Tuya, Aqara, and UniFi Protect plugins.
Each one fills a gap left by the manufacturer, giving Apple users far more HomeKit-compatible devices to choose from.
For users who want to manage their Homebridge installation from an iPhone without opening a browser, the Homemanager iOS app provides monitoring tools, log access, and basic config editing in a mobile-friendly interface.
A note on the Ring plugin from experience: Video feeds from Homebridge have 2–3 seconds of additional latency compared to native HomeKit cameras; for real-time video, a native camera is preferable.
Known Limitations and Real-World Workarounds
Homebridge HomeKit is powerful, but it comes with a few limitations that users should know before setting it up.
1. The 150 Accessory Cap
Apple’s HomeKit protocol limits a single bridge to 150 accessories.
For users with a large smart home setup, this cap can become a real problem. The workaround is to run plugins as Child Bridges.
Each Child Bridge operates as its own independent HomeKit bridge, carrying its own set of accessories. Users can also run multiple Homebridge instances on the same device for even more room.
2. Third-Party API Cutoffs
Because Homebridge HomeKit relies on unofficial plugins to connect with manufacturer servers, those connections can break without warning.
I experienced this firsthand. Chamberlain, the maker of myQ garage door openers, cut off all third-party API access in November 2023, calling it “unauthorized usage.”
One morning, my garage door just stopped responding in the Home app.
No warning, no transition period. The Homebridge-MyQ plugin was officially retired shortly after, and the developer recommended switching to a hardware solution called Ratgdo for local control.
It was a good reminder that any cloud-dependent plugin can disappear overnight if the manufacturer decides to lock down their API.
3. Single Point of Failure
Homebridge runs as a server on a local device.
If that Raspberry Pi crashes, loses power, or needs a reboot, every connected Apple Home accessory goes offline until the server comes back up.
Keeping the server on a stable power source and enabling auto-restart on boot helps reduce this risk.
From experience: I run Homebridge on a Raspberry Pi 4B with a $30 UPS to protect it from power flickers. Worth every penny for smart home reliability.
4. Plugin Token Expiration
Some plugins require authentication tokens from manufacturer accounts.
The Nest plugin, for example, historically required users to pull a cookie token from a browser’s developer tools. These tokens expire after a few months, and when they do, the integration stops working silently.
Regularly checking plugin logs catches these issues early.
5. Automation Limitations
This is a point that surprises many new users: Homebridge itself cannot create or manage automations.
All automation logic runs through Apple’s Home app (or a HomeKit hub like HomePod or Apple TV).
Homebridge makes devices visible to HomeKit; it does not add automation capabilities beyond what Apple already provides.
If you need advanced conditional automations, a platform like Home Assistant is better suited for that role.
6. mDNS and Network Discovery Issues
A less-discussed but common issue: Homebridge relies on mDNS (multicast DNS) for network discovery.
If your router blocks multicast traffic or your iOS DNS cache becomes stale, HomeKit accessories can disappear even when the server is running normally.
The fix is usually to toggle airplane mode on and off to flush the iOS DNS cache, or to swap between the Bonjour HAP and Ciao mDNS advertiser options in Homebridge settings.
Who Should Skip Homebridge?
Homebridge HomeKit is not for everyone.
If you are not comfortable with occasional troubleshooting, plugin updates, and the possibility that things will break after a firmware change, this setup will frustrate you.
Users who want a pure plug-and-play experience should stick with native HomeKit devices or wait for broader Matter adoption.
Homebridge rewards patience and a willingness to tinker, but it does ask for both.
Technical Setup and System Requirements
![]()
Running Homebridge HomeKit requires modest hardware; a Raspberry Pi 2 or newer is the most popular choice.
It can also run on various OS, such as macOS, Windows, and Linux, as well as in Docker containers.
Minimum requirements include the latest LTS version of Node.js (currently Node v18 or v20), a stable network connection, and a HomeKit hub (HomePod, Apple TV 4th generation or later, or a home iPad).
Installation involves running a single npm command and accessing the web dashboard to pair with the Apple Home app:
“sudo npm install -g --unsafe-perm homebridge homebridge-config-ui-x“
A Raspberry Pi 4B costs around $35-45, plus an SD card, power supply, and case, totaling about $60-75.
While Homebridge can integrate many non-HomeKit devices, it may expose user data to third-party servers, which raises privacy concerns.
How to Contribute to Homebridge HomeKit?
Homebridge appreciates contributions from individuals of all levels of expertise, as every effort enhances the project.
For developers, the API documentation at developers.homebridge.io provides the full Homebridge API reference, available service and characteristic types, and plugin examples.
The GitHub Plugin Template gives a ready-made foundation for building a new plugin, complete with the dynamic platform structure required for verified sta
For developers, the API documentation at developers.homebridge.io provides essential guidance, while the GitHub Plugin Template offers a foundation for creating new plugins.
Non-developers can contribute by testing beta releases and filing detailed bug reports, improving documentation, or translating the UI.
Financial contributions via GitHub Sponsors are vital for the project’s infrastructure, covering hosting and maintenance costs.
The Homebridge community is welcoming, with platforms like Discord and the r/homebridge subreddit where users of all skill levels can connect, ask questions, and share insights about home automation.
Homebridge HomeKit and the Matter Standard
Matter is the cross-platform smart home standard backed by Apple, Google, Amazon, and others, and a common question is whether it makes Homebridge obsolete.
The short answer is no, at least not yet. Matter’s rollout has been gradual, and thousands of existing devices, including popular ones like Ring doorbells and older ones.
Nest thermostats have no confirmed Matter upgrade path. Homebridge remains the most practical free solution for bridging that gap.
Homebridge and Matter operate independently on the same network. Apple Home displays accessories from both without conflict.
For users who want a Matter-native bridging approach as an alternative or complement, the open-source Matterbridge project allows Homebridge-style plugins to be exposed as Matter devices to any ecosystem, including Apple Home, Google Home, and Amazon Alexa.
What the Community Says About Homebridge HomeKit?

Users on Reddit and forums share varied experiences with Homebridge HomeKit.
One long-time user found it “extremely easy and pretty reliable” after five years, while another considered Home Assistant too complex.
A Medium post discussed the Nest plugin’s token expiration issues, prompting some to switch to native HomeKit devices.
However, an XDA reviewer praised using Homebridge on a Raspberry Pi 4B, noting its integration with devices like Roomba and Arlo.
Overall, users appreciate Homebridge’s flexibility with various devices but mention challenges with extensive plugin options and the need to restart after changes.
After initial setup, it runs quietly, requiring attention mainly for updates or API changes.
Conclusion
I hope this breakdown gave you a clear look at how Homebridge HomeKit works as an open-source project and where it fits in the broader smart home picture.
From the community-driven plugin ecosystem to the real limitations that users face daily.
Homebridge has earned its place as one of the most useful tools for Apple smart home users who refuse to throw out perfectly good hardware.
It is not perfect, and the risks are real. But for now, nothing else brings this many devices into Apple Home for free.
If you have been thinking about building a smarter home without replacing your current gear, Homebridge is a solid starting point.
Check out the official Homebridge GitHub repository to look at the code, try a plugin, or build your own. Drop your experience in the comments below!
Frequently Asked Questions
Can Homebridge Run Alongside Matter Devices?
Absolutely. Homebridge and Matter operate independently. Users can run both on the same network, and Apple Home displays accessories from both without any conflict.
How Many Devices Can Homebridge Support?
A single bridge supports up to 150 accessories due to Apple’s HomeKit limit. Running Child Bridges or multiple Homebridge instances removes this cap and allows hundreds of devices.
Can I Use Homebridge and Home Assistant Together?
Many users run both platforms: Home Assistant for advanced automations and its HomeKit Bridge for Apple Home integration, while Homebridge adds more plugin-based devices.
Is Homebridge Safe to Use?
Homebridge is safe with verified, up-to-date plugins. The core project doesn’t track users, but checks third-party plugin source code on GitHub for privacy before installation.