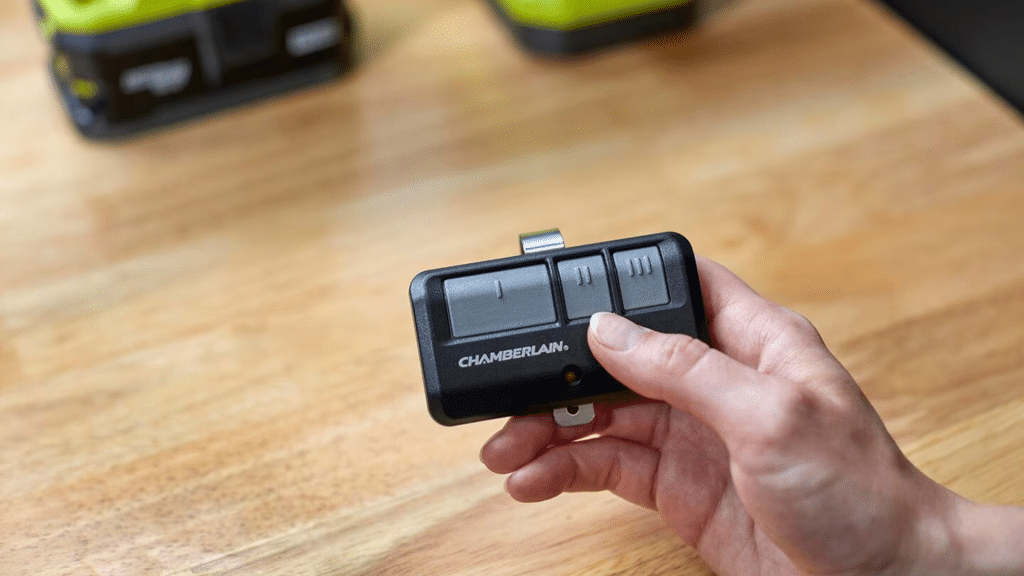
Looking to enhance your smart home experience? MyQ HomeKit integration lets you control your garage door and other devices directly from your iPhone or iPad.
While the setup might seem tricky, it’s actually quite straightforward once you’re connected.
With MyQ, you can remotely open and close your garage door, set schedules, and receive notifications when your door is activated.
There are also many ways to integrate MyQ with other HomeKit devices, enabling easy automation and control.
If linking it to your voice assistant or creating custom routines, MyQ offers flexibility and convenience. It’s all about making your home smarter and more efficient.
Ready to get started? Let’s look into the best ways to use MyQ with HomeKit.
Does MyQ Work with HomeKit Natively?
As of now, myQ no longer works natively with Apple HomeKit, despite previously offering limited compatibility through their HomeKit bridge.
Chamberlain ended the myQ Home Bridge in 2022 and removed MyQ HomeKit support in 2024, leaving no direct link with Apple Home.
As a result, MyQ garage door openers cannot be added to HomeKit without using third-party solutions.
The MyQ app itself still provides full functionality, but users seeking HomeKit access must rely on integrations on other platforms to bridge the gap.
Chamberlain has not announced plans to restore native HomeKit compatibility, and Matter support has not been extended to MyQ devices.
As a result, HomeKit users must use an alternative connection method to get MyQ to appear in Apple’s smart home ecosystem.
Working Methods to Connect MyQ to HomeKit
The methods listed below range from simple workarounds to more advanced integrations, depending on the level of flexibility and automation someone wants.
Method 1: Using Homebridge

Using Homebridge is one of the most reliable ways to connect MyQ to HomeKit.
With Homebridge, the MyQ plugin can be installed, which exposes the garage door directly inside the Home app as if it were a native accessory.
Homebridge runs on small devices such as a Raspberry Pi, a Mac, or even a Docker container, offering plenty of flexibility.
After setting up the plugin and linking the MyQ account, the garage door can be controlled using Siri, Home automations, and scenes.
Method 2: Using HOOBS

HOOBS is a preferred method for those seeking the power of Homebridge without extensive technical setup. It offers a user-friendly interface, making the installation of the MyQ plugin simple and straightforward.
After plugging in the HOOBS device or installing the software version, users can search for the MyQ plugin, enter their MyQ credentials, and see the integration appear in the Home app almost instantly.
HOOBS also organizes everything into a clean dashboard, allowing users to monitor logs, update plugins, and manage settings with ease.
This solution streamlines the process, making it an ideal choice for those looking for a hassle-free MyQ HomeKit integration.
Method 3: Using Home Assistant
MyQ can be added through Home Assistant’s built-in integrations, and once connected, the garage door is exposed to HomeKit using the HomeKit Bridge feature.
Home Assistant provides complete control over how the garage door behaves, offering advanced automations, conditions, and triggers that go beyond basic HomeKit features.
It also provides detailed status updates and logs, making it easier to track activity.
With this integration, MyQ becomes a fully functional HomeKit accessory. Home Assistant is the ideal choice for those seeking deeper customization and powerful automation capabilities.
Method 4: Third-Party Smart Relays (Meross, etc.)

Using a third-party intelligent garage controller, like the Meross HomeKit-enabled opener, offers a reliable and straightforward workaround.
Instead of relying on native MyQ support, the Meross controller is connected directly to the existing garage door motor.
This setup provides full HomeKit functionality without depending on Chamberlain. Installation is simple, typically requiring just two low-voltage wires and pairing through the Home app.
Once set up, the garage door can be controlled with Siri, Home automations, and scenes instantly. While the MyQ app still operates separately, HomeKit is primarily used for daily control.
Method 5: Siri Shortcuts with MyQ App (Limited Control)

Using Siri Shortcuts offers a quick, though limited, way to control MyQ with Apple devices. This method requires no additional hardware or software, as everything is handled through the MyQ app.
The MyQ app supports Shortcuts, allowing users to create voice commands like “Open the garage” or “Close the garage” without relying on HomeKit directly.
However, the downside is that door status cannot be viewed in the Home app, and full automation capabilities, such as those available with Homebridge or HOOBS, are not possible.
While it’s a simple and efficient solution, it lacks the deeper control offered by other integration methods.
Security Notes When Integrating MyQ With HomeKit
Security notes for integrating MyQ with HomeKit are crucial to ensure safe and easy operation. Below are five key points:
- Strong passwords: Use a unique, strong password for both MyQ and HomeKit accounts to prevent unauthorized access.
- Two-factor authentication: Enable two-factor authentication for MyQ and HomeKit to add an extra layer of security.
- Regular updates: Keep both MyQ and HomeKit devices up to date with the latest firmware to patch security vulnerabilities.
- Network security: Use a secure, private Wi-Fi network for your MyQ device to prevent external threats.
- Monitor access: Regularly check who has access to your HomeKit and MyQ setups to ensure only trusted individuals can control devices.
Troubleshooting Connectivity Issues With MyQ HomeKit
Troubleshooting connectivity issues with MyQ HomeKit can help resolve common problems for smoother integration. Here are five key issues:
- Wi-Fi interference: Ensure a strong Wi-Fi signal near the MyQ device to avoid connection drops.
- Firmware updates: Check if both MyQ and HomeKit devices have the latest firmware installed for better compatibility.
- Incorrect setup: Revisit the setup steps to ensure the correct MyQ plugin or integration is being used.
- HomeKit pairing: If pairing fails, reset the HomeKit settings and try re-adding the MyQ device to the Home app.
- Router settings: Adjust router settings to ensure proper communication between devices, including checking port forwarding and firewall rules.
Conclusion
Choosing how to connect MyQ with HomeKit comes down to how much control and flexibility you want inside your smart home setup today.
Using tools like MyQ Homebridge can unlock deeper automation options that feel more personal and easier to manage every single day.
I like how this setup lets us move beyond basic garage access and shape routines that actually fit our daily habits.
You get smoother control through the Home app while keeping your garage connected to the rest of your smart devices.
Once you start using it daily, the setup feels less technical and more like a natural part of your home life.
Are you using myQ Homebridge already or planning to try a different setup with HomeKit? Tell us, share with us in the comments below.