A wireless printer should make life easier, yet setup problems can turn a quick task into a frustrating one. I know how annoying it feels when your printer cannot find the network, rejects the password, or stays offline.
This guide explains how to connect a printer to WiFi through clear steps you can follow at home or work.
You will learn how to prepare the printer, choose the correct network, enter the WiFi password, and confirm the connection.
I will also share setup through the printer screen, a mobile app, WPS pairing, and a computer.
By the end, you can expect clear setup steps, pairing options, and practical fixes for common wireless connection problems.
What Do You Need Before Connecting a Printer to Wi Fi?
Before starting the wireless setup, gather a few details and check that each device is ready. This can prevent password errors, failed pairing, and repeated setup attempts.
- WiFi network name: Find the correct network name, also called the SSID, before opening the printer settings.
- WiFi password: Keep the exact password nearby and check uppercase letters, numbers, and special characters.
- Powered printer: Turn on the printer and confirm that no error lights or warning messages appear.
- Stable internet router: Make sure the router is working and that other devices can connect to the same network.
- Connected phone or computer: Use a device already connected to the WiFi network you want the printer to join.
- Printer app or software: Install the official app or setup software provided by the printer manufacturer.
- Supported WiFi bands: Check whether the printer supports 2.4 GHz, 5 GHz, or both.
How to Connect a Printer to WiFi?
Follow these steps to connect your printer through WPS and confirm that it is ready for wireless printing.
1. Open the Printer’s Wireless Settings
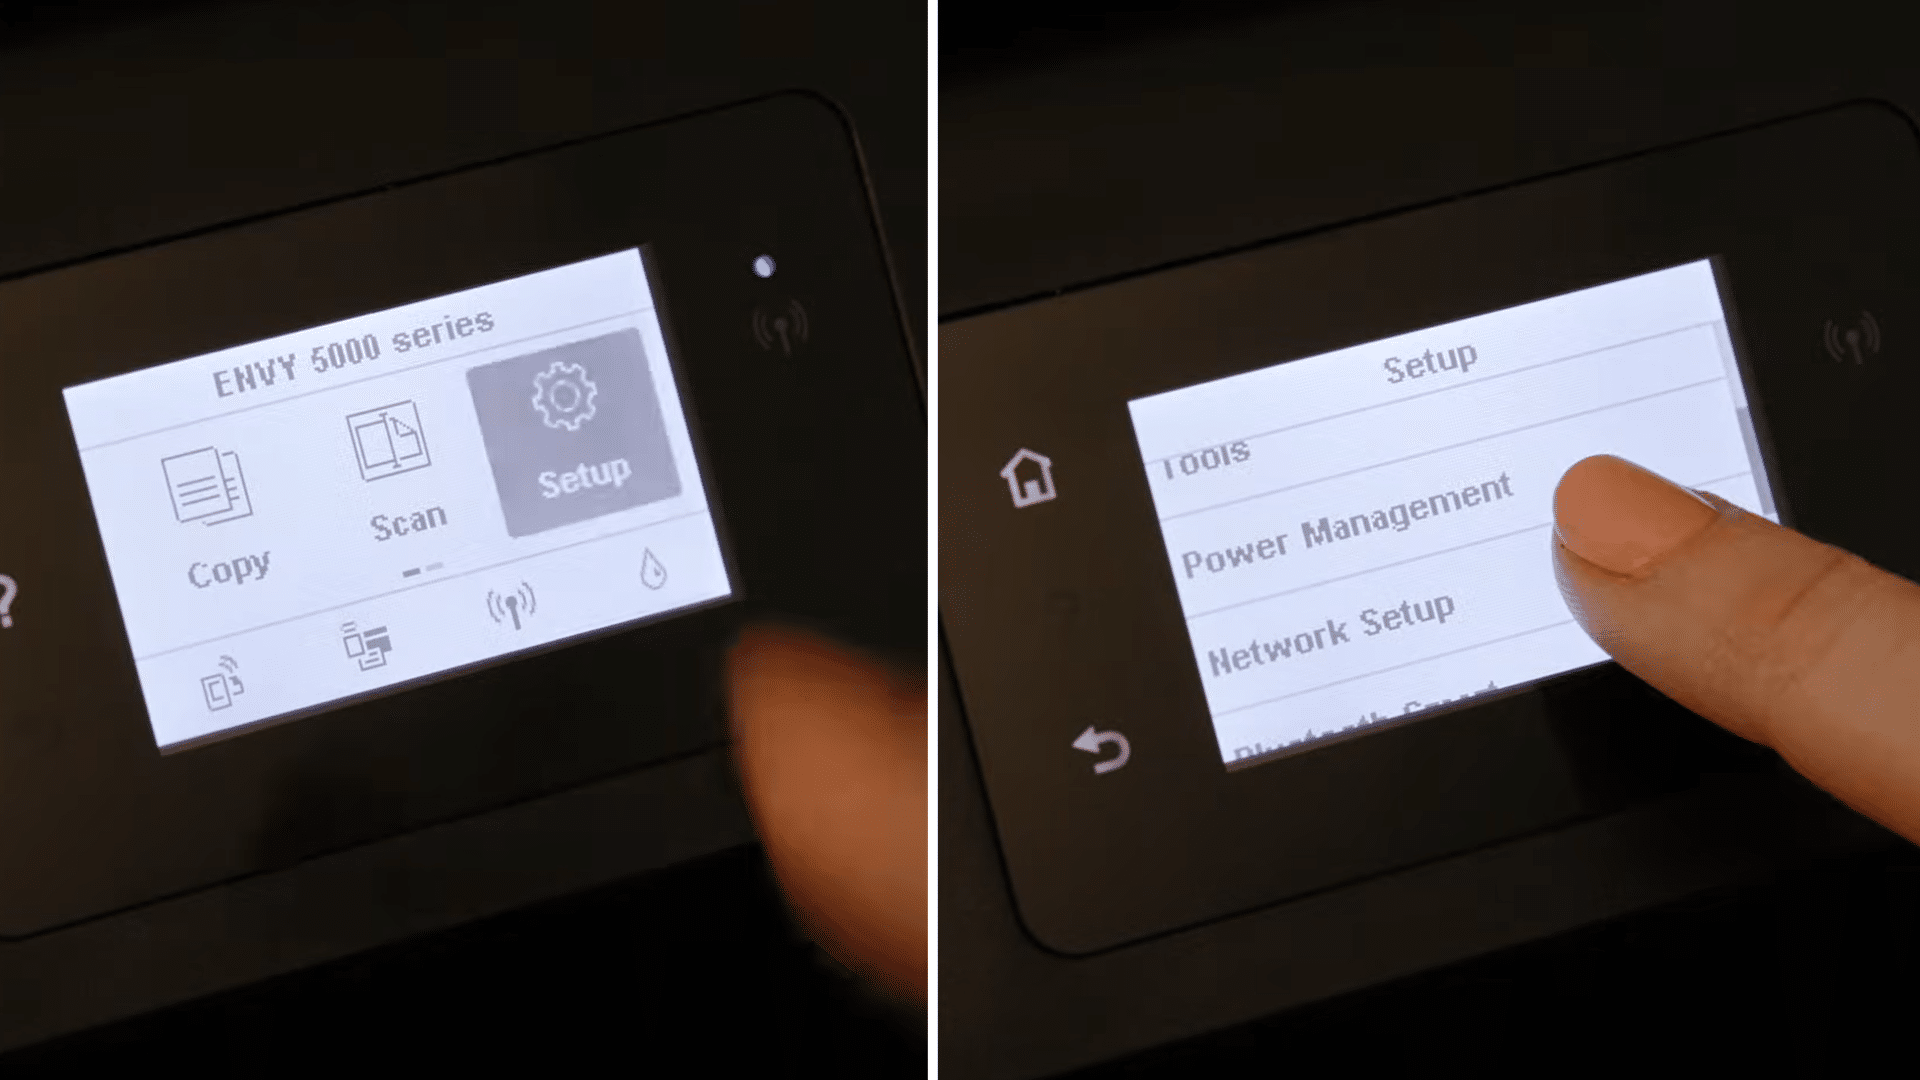
Turn on the printer and place it within range of the WiFi router before starting the setup.
Open the Wireless, Network, or WiFi Settings menu from the printer’s control panel.
Some printer brands use different names for the same menu, so check the network-related options if you do not immediately see wireless settings.
This menu is where you begin connecting the printer to your home or office WiFi network.
2. Connect Through the Wireless Setup
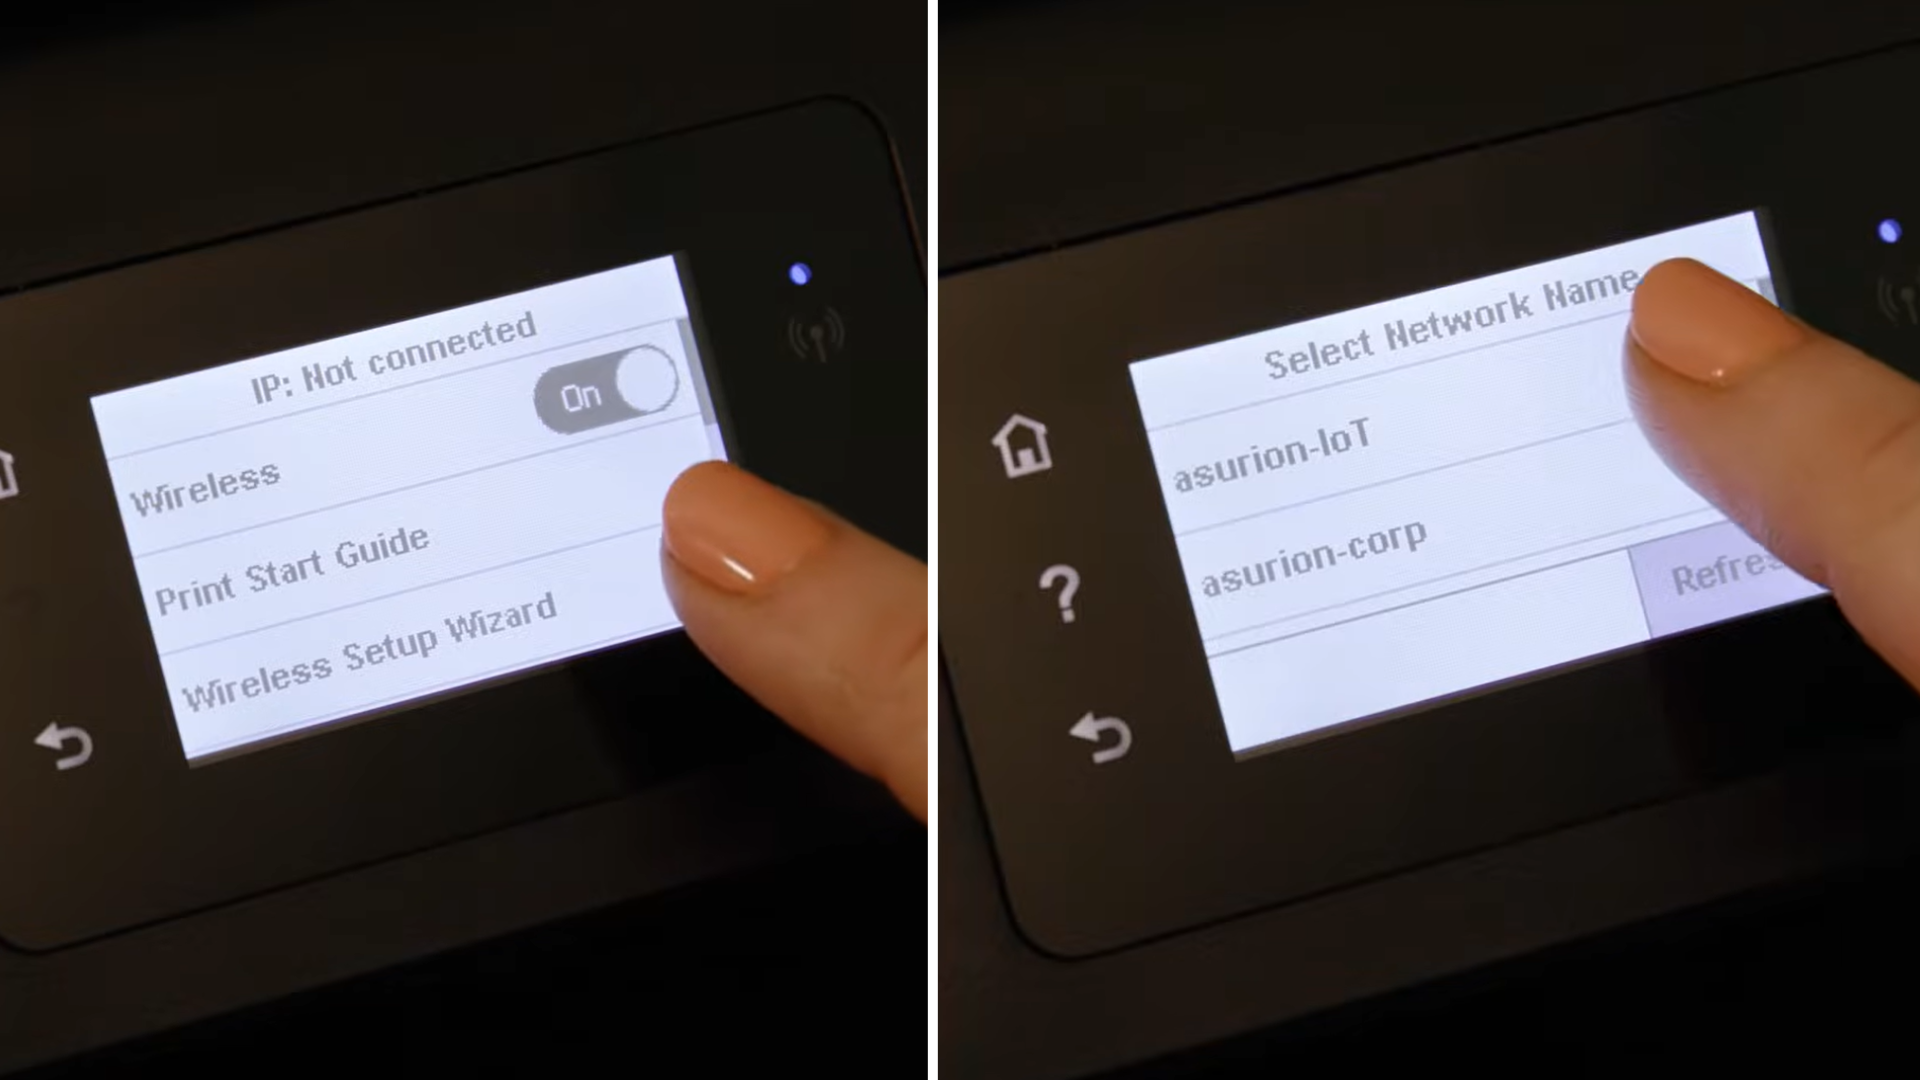
Select Wireless Setup Wizard or WiFi Setup Wizard from the network menu. The printer will scan for nearby wireless networks and display the available options.
Choose your WiFi network from the list, enter the correct password, and follow the prompts shown on the screen.
Once the setup finishes, the printer should confirm that it has successfully joined the wireless network.
3. Pair the Printer Using the WPS Button
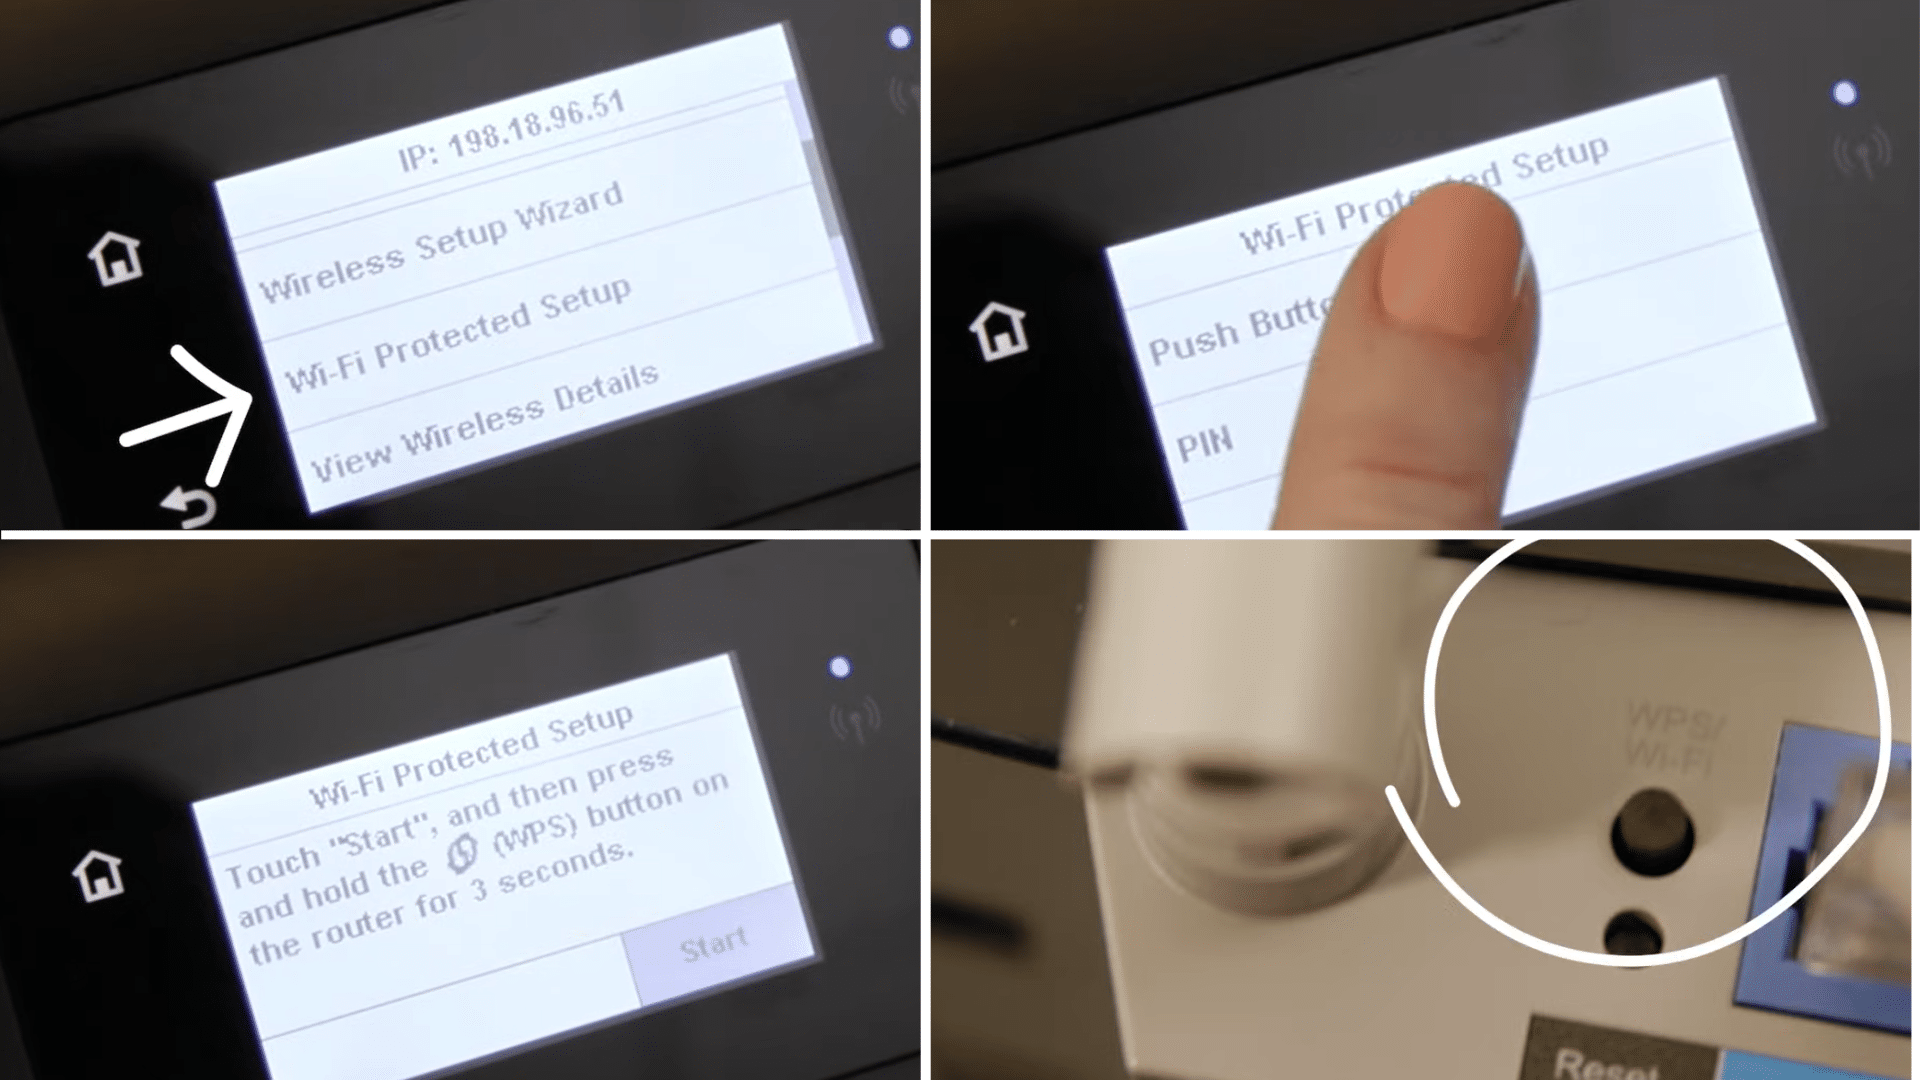
If your router and printer both support Wi-Fi Protected Setup (WPS), you can connect without entering the Wi-Fi password.
Press the WPS button on the router first. After that, activate WPS or the wireless button on the printer.
Many printers display this option on the touchscreen, while others use a dedicated button. The devices will begin pairing automatically.
4. Wait for the Wireless Connection to Finish
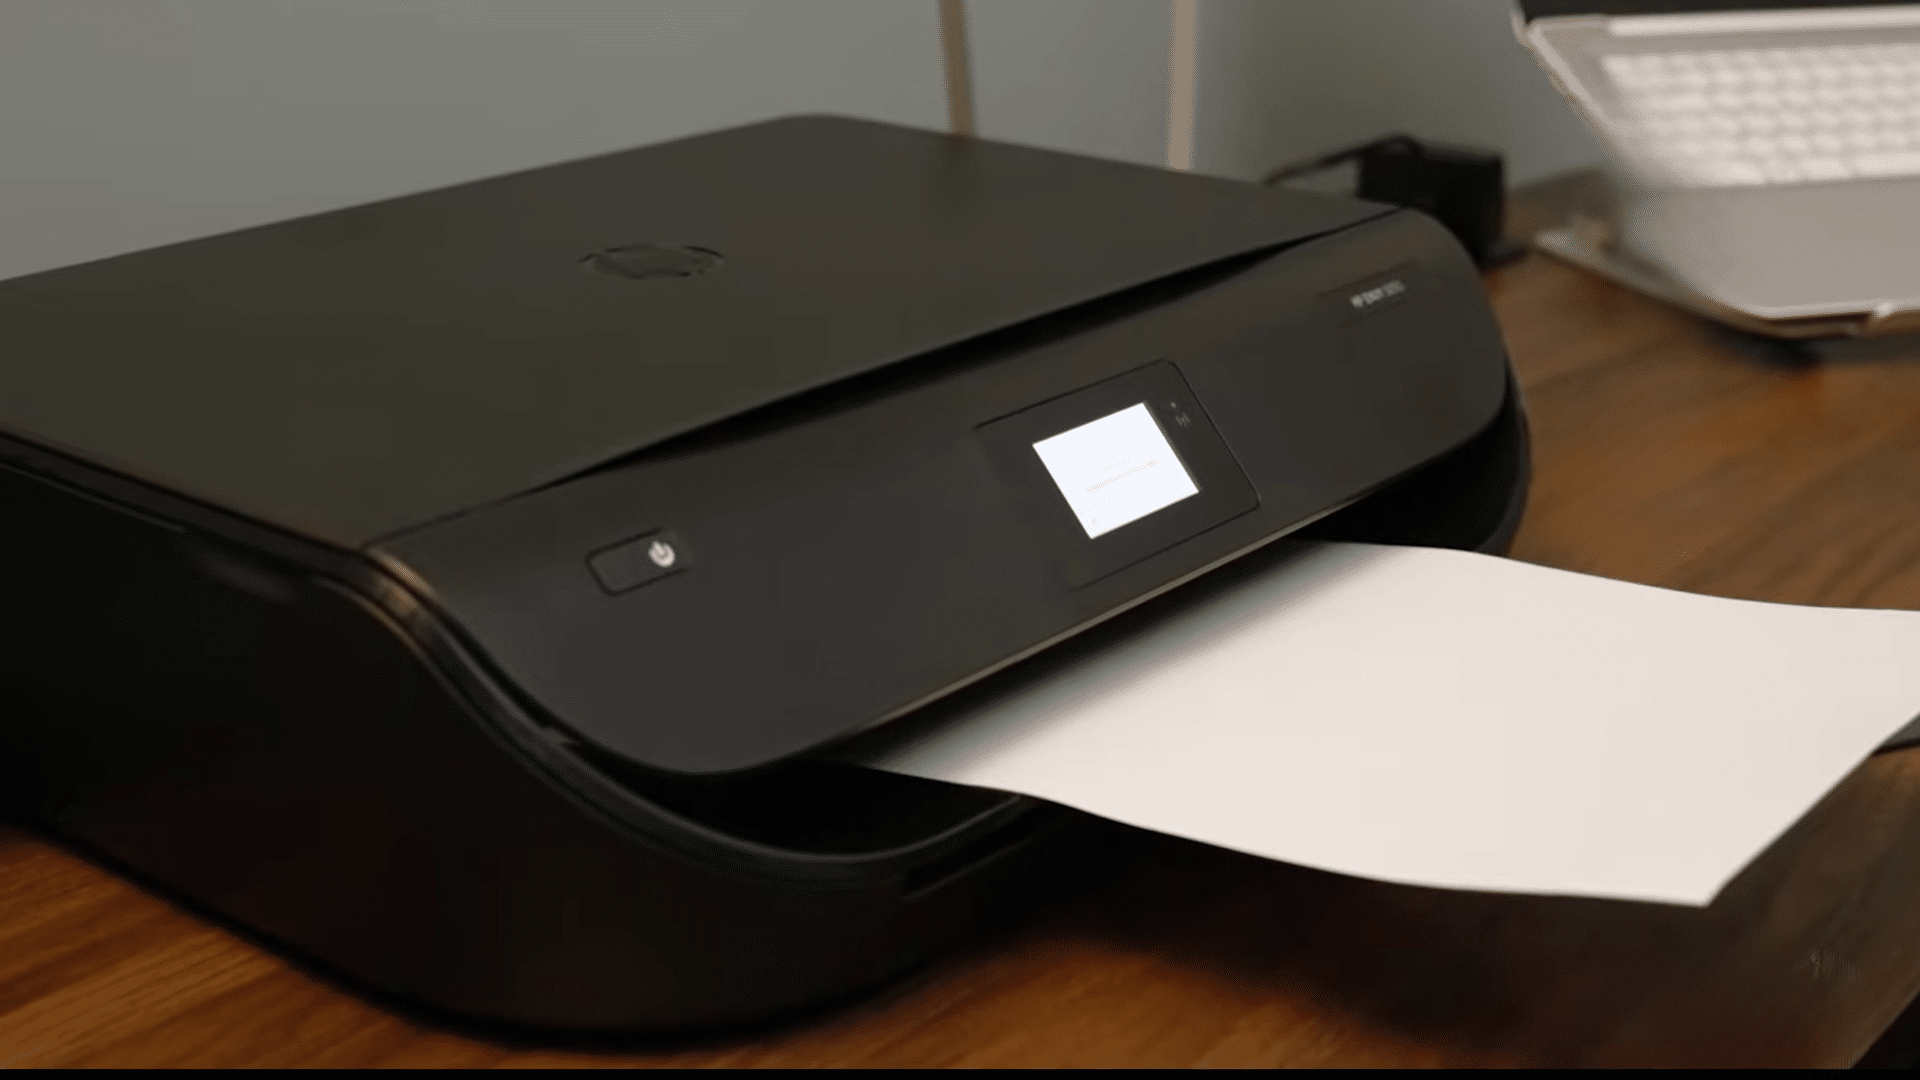
After WPS is activated, leave both the printer and router powered on while they complete the connection.
During this time, the wireless light may blink as the devices exchange network information.
Once the process finishes, the printer usually displays a confirmation message or shows a steady WiFi indicator, letting you know the wireless connection is ready.
5. Confirm the Setup Before Printing
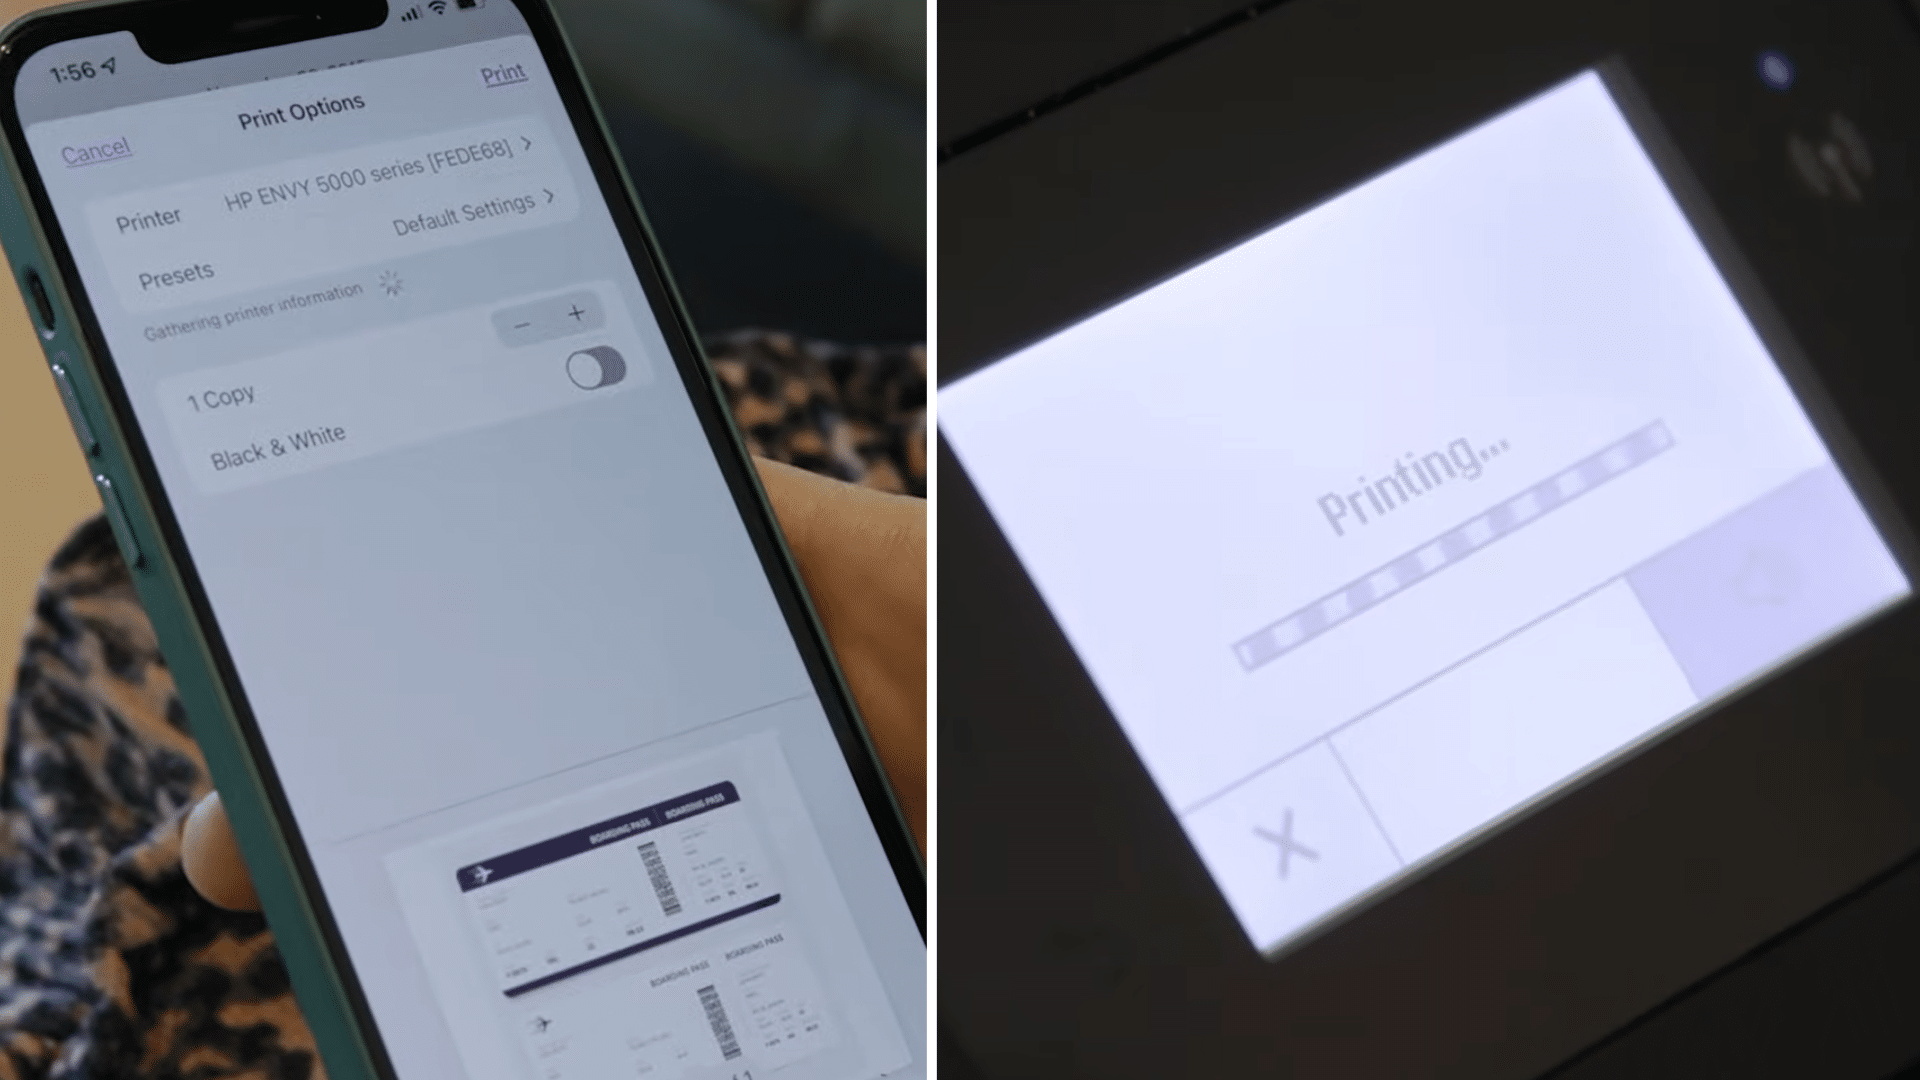
After the printer joins the WiFi network, complete any remaining prompts shown on the printer display. Check that the wireless icon remains visible and no connection errors appear.
At this stage, the printer is ready to receive print jobs from devices connected to the same WiFi network.
Verifying the connection now can help prevent printing problems later.
This tutorial is based on a helpful video by Asurion. You can check out the original video on their YouTube channel here or watch it below.
How to Connect a Printer to WiFi Using a Computer and USB Cable?
A temporary USB connection lets the computer send your WiFi details to the printer.
- Connect the printer with a USB cable: Plug the printer into the computer using a compatible USB cable and turn the printer on.
- Install the printer software: Download and open the official setup software from the printer manufacturer’s website if it is not already installed.
- Choose the wireless setup option: Select Wireless Connection or a similar option when the setup program asks how you want to connect the printer.
- Select the WiFi network: Pick your home or office WiFi network from the list shown by the setup program.
- Enter the WiFi password: Type the correct network password and allow the software to send the wireless settings to the printer.
- Disconnect the USB cable: Remove the USB cable after the setup finishes and confirm that the printer stays connected to the WiFi network.
- Print a test page: Send a test print from the computer to verify that the printer is working over the wireless connection.
Why Is the Printer Not Connecting to WiFi?
Your printer may not connect to WiFi because of network, settings, or hardware issues.
A wrong WiFi password is one of the most common causes, even if only one character is incorrect. The printer may also be too far from the router, resulting in a weak signal during setup.
Many older printers work only with 2.4 GHz networks, so connecting them to a 5 GHz network can fail.
Temporary router or printer glitches may also interrupt the connection and usually disappear after a restart. If the printer was previously connected to another network, it may still be trying to rejoin it.
Outdated printer firmware or drivers can also prevent a successful connection. Checking each of these issues one by one usually helps identify the problem and restores the wireless connection.
How to Fix a Printer that Keeps Disconnecting from WiFi?
A printer that disconnects from WiFi repeatedly usually has a signal, network, or software issue. Try these fixes to keep the connection stable.
| Fix | How It Helps |
|---|---|
| Restart the Printer and Router | Turn both devices off for about 30 seconds, then power them back on to refresh the WiFi connection and clear temporary network issues. |
| Move the Printer Closer to the Router | Reducing the distance improves signal strength and helps prevent frequent wireless disconnections. |
| Update the Printer Firmware | Install the latest firmware from the printer manufacturer to fix known WiFi bugs and improve connection stability. |
| Connect to the Correct WiFi Band | If the printer supports only 2.4 GHz, make sure it is connected to that network instead of the 5 GHz band. |
| Assign a Static IP Address | A fixed IP address prevents the router from assigning a new address each time the printer reconnects, reducing connection issues. |
| Remove and Re-add the Printer | Delete the saved printer from your computer or mobile device, then add it again to refresh its wireless settings. |
| Check Router Settings | Make sure the printer is not connected to a guest network and verify that MAC filtering or access control settings are not blocking it. |
How to Check If Your Printer Is Connected to the Internet?
You can check if your printer is connected to the internet by verifying its network status and testing the connection.
Check the printer’s WiFi icon. A steady symbol usually confirms a wireless connection.
You can also print a network configuration or status report from the printer’s settings menu to view the current network name and IP address.
If your printer has a companion mobile app, open it and check whether the printer appears online.
Another option is to send a test print from a computer or phone connected to the same WiFi network.
If the print job starts without errors, the connection is working. If the printer shows offline or cannot receive print jobs, reconnect it to the network and test the connection again.
How to Connect a Printer to WiFi without a Router Using Wi-Fi Direct
Wi-Fi Direct lets your printer create its own wireless network, allowing a phone, tablet, or computer to connect without using a WiFi router or internet connection.
- Turn on Wi-Fi Direct on the printer: Open the printer’s network settings and enableWi-Fi Direct if it is not already active.
- Find the Wi-Fi Direct name and password: Check the printer display or print a network information page to view the Wi-Fi Direct network name and password.
- Connect the device to the printer: Open the Wi-Fi settings on your phone or computer, then select the printer’s Wi-Fi Direct network.
- Enter the Wi-Fi Direct password: Type the password shown by the printer to complete the wireless connection between the devices.
- Add the printer if needed: If the printer does not appear automatically, use your device’s printer settings to add it manually.
- Print a test document: Open any document or photo, choose the connected printer, and print a test page to confirm the setup works correctly.
Wireless Setup Wizard vs WPS Connection
Use this comparison to choose the setup method that best matches your printer, router, and preferred connection method.
| Feature | Wireless Setup Wizard | WPS Connection |
|---|---|---|
| Setup Method | Select WiFi manually | Press the WPS buttons |
| WiFi Password | Required | Not required |
| Router Support | All wireless routers | WPS-enabled routers only |
| Setup Time | 2–5 minutes | About 1 minute |
| User Control | Choose the network manually | Automatic pairing |
| Best For | Most home users | Quick supported setups |
| Common Limitation | Password entry needed | WPS unavailable on some routers |
Common Mistakes to Avoid During Wireless Printer Setup
A few small mistakes during setup can stop the printer from joining your wireless network. Check these common issues before trying the setup again.
- Entering the wrong WiFi password: Even a single incorrect character can prevent the printer from connecting to the network.
- Selecting the wrong wireless network: Make sure you choose your own WiFi network, especially if several nearby networks have similar names.
- Placing the printer too far from the router: A weak signal can interrupt the setup process or cause connection failures.
- Using an unsupported WiFi band: Many older printers work only with 2.4 GHz networks and cannot connect to 5 GHz alone.
- Skipping firmware or driver updates: Outdated software may cause connection errors or prevent the printer from being detected.
- Turning off the router during setup: Keep the router powered on until the printer finishes joining the wireless network.
- Leaving the printer in an old network profile: Remove previous WiFi settings or reset the network configuration before connecting to a new network.
Conclusion
Connecting a printer to WiFi becomes much easier when you follow the correct setup steps and carefully check each network detail.
Connect using the wireless setup wizard, WPS, a phone, or a computer.
Keeping the printer near the router, entering the correct password, and selecting a supported WiFi band can prevent many setup problems.
If the printer disconnects or appears offline, restarting the devices, updating the software, and checking the saved network settings may restore the connection.
Once the setup is complete, print a test page to confirm everything works properly.
Follow the steps in this guide and share your experience in the comments to help other readers.
Frequently Asked Questions
Can a Printer Connect Through a Mobile Hotspot?
Yes, a printer can connect through a mobile hotspot if it supports wireless networking. Keep the hotspot active and connect the printing device to the same network.
Can a Printer Connect to WiFi without a Computer?
Yes, many printers can connect to a network without a computer via a touchscreen, WPS button, or mobile app. Follow the printer menu prompts to complete wireless setup.
Why Can’t a Phone Detect a Wireless Printer?
A phone may not detect the printer when both devices use different networks, the printer is offline, permissions are blocked, or the wireless signal is weak.
Does a Wireless Printer Require Internet Access?
A wireless printer does not always need internet access for local printing. Both devices usually only need to share the same WiFi network for print jobs.