Clear plastic always seems to turn foggy at the worst time. Car headlights pick up that yellow haze, security camera covers go milky, and storage lids lose their clarity. It all comes down to oxidation.
The good part is that you do not have to replace it. Knowing how to remove oxidation from clear plastic at home can save you money and effort.
After working with everything from camera domes to speaker grilles and old display panels, one thing stands out: most plastic gets replaced when it could be restored.
Once you match the method to the level of damage, the fix is much simpler than it looks. Here is what actually works.
What Causes Clear Plastic to Oxidize?
UV rays gradually break down clear plastic, especially after its protective coating wears off. This makes the surface rough, cloudy, and prone to yellowing.
Heat, humidity, dirt, and temperature changes speed up the process, which is why outdoor and car plastics degrade faster. Regular sun exposure makes it worse.
Using covered parking can slow this down, and the right setup can make a noticeable difference over time.
The result: instead of passing light through cleanly, the surface scatters it. That’s the cloudy look you’re seeing.
How Bad Is Your Oxidation? Assess Before You Start
Before picking a method, take 30 seconds to assess the damage. Run your finger across the surface.
- Light oxidation: Feels slightly rough, but the plastic is still mostly transparent
- Moderate oxidation: Visibly yellowed or cloudy across most of the surface
- Heavy oxidation: Chalky, opaque, or has tiny crackle lines called surface crazing
Each level needs a different approach. Using a heavy-handed approach to light oxidation can cause more damage than the oxidation itself.
Does the Type of Clear Plastic Matter?
Yes, and most guides skip this entirely. There are two main types you’ll run into at home.
Polycarbonate is used in car headlights, security camera domes, and outdoor panels. It’s tough but scratches easily and oxidizes faster without UV protection. It tends to yellow over time.
Acrylic (PMMA) is used in display cases, picture frames, and appliance panels. It’s clearer than polycarbonate but more brittle. It tends to go white and chalky rather than yellow.
A Reddit-Approved Fix That Actually Works
If you spend time in home cleaning forums and Reddit threads on this topic, one method keeps coming up: hydrogen peroxide with sunlight.
It works differently from sanding or polishing. Instead of removing the oxidized layer, it uses UV-activated chemistry to break down yellowing from within.
Apply 3% hydrogen peroxide to a clean surface, wrap it to keep it wet, and leave it in sunlight for 2 to 4 hours, then rinse.
Keep concentration at 12% or lower to avoid damage, and apply a UV protectant afterward to slow re-yellowing.
How to Remove Oxidation from Clear Plastic at Home
Before applying anything, clean the surface with warm water and mild dish soap, then dry it fully.
Working on a dirty surface can cause fine scratches since trapped grit acts like sandpaper. Always test your method on a small hidden area first. A quick spot test can prevent larger damage.
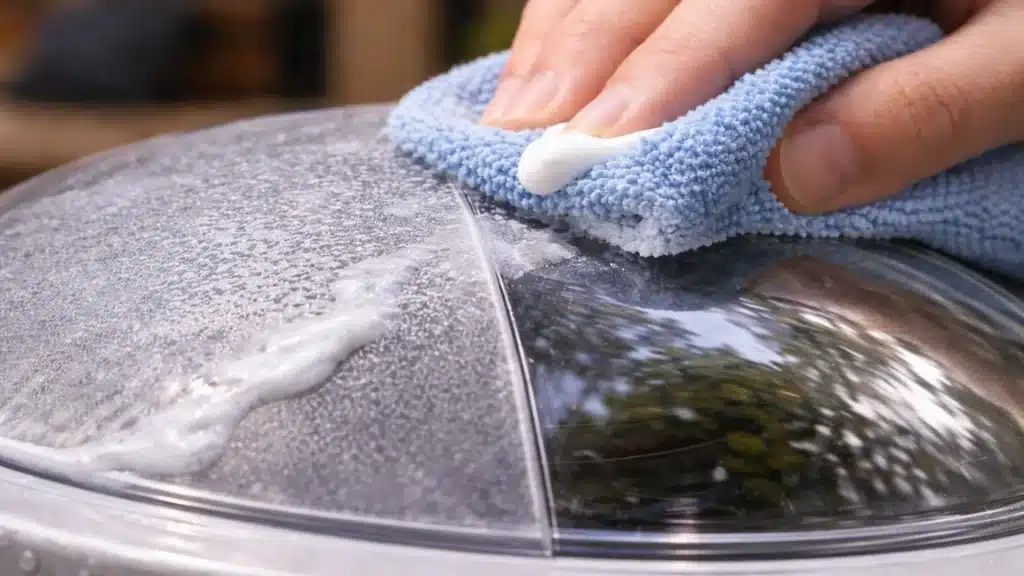
Light Oxidation: Toothpaste or Baking Soda Paste
If the plastic looks slightly hazy but is still mostly clear, start with simple methods.
Toothpaste method: Use plain white toothpaste, not gel. Apply a small amount to a damp microfiber cloth and rub in tight circular motions for 30 to 60 seconds. Rinse, dry, and repeat up to three times if needed.
Baking soda paste: Mix two tablespoons of baking soda with a little water to form a thick paste. Apply it with a soft cloth using circular motions, then rinse well.
Both methods rely on mild abrasives to remove the top oxidized layer. I have used baking soda paste on a polycarbonate panel of an old home theater receiver, and it restored enough clarity to make the display readable again in just a few minutes.
If your phone case has gone hazy, here’s exactly how to clean a clear phone case using the same approach.
Moderate Oxidation: Plastic Polish or Restoration Kit
If the surface is yellowed or cloudy, use a proper plastic polish like Meguiar’s PlastX or Turtle Wax Headlight Lens Restorer.
Apply with a foam or microfiber pad, buff in circular motions, then wipe clean.
For headlights, a $15 to $25 restoration kit is a better option. It includes sandpaper, polish, and a UV sealant.
The sealant is what makes the result last. Skip it, and the yellowing can return within weeks.
Heavy Oxidation: Wet Sanding, Polish, and UV Seal
If the plastic is deeply yellowed, feels rough to the touch, or shows visible crazing, you need to sand it before polishing.
The key is patience and keeping the surface wet at every step. Dry-sanding clear plastic leaves scratches that are harder to fix than the oxidation itself.
Step 1: Wet 800-grit sandpaper and sand in one direction. Keep it wet throughout.
Step 2: Switch to 1500-grit sandpaper and sand at a 90-degree angle to the first pass.
Step 3: Move to 2000-grit, then 3000-grit, changing direction slightly each time.
Step 4: Apply plastic polishing compound with a microfiber cloth in circular motions until the surface clears.
Step 5: Seal with a UV-resistant plastic sealant or 303 Aerospace Protectant.
On a badly oxidized outdoor camera dome, I restored it using this sequence; the result went from opaque white to nearly factory-clear in about 45 minutes.
What Not to Use on Clear Plastic
A few things cause real damage despite being popular online:
- WD-40: Adds an oil layer that temporarily clears the surface but wears off in days and can cloud acrylic with repeated use
- Bug spray (DEET): Solvents can melt polycarbonate. It removes plastic, not oxidation
- Undiluted bleach: Causes discoloration and surface breakdown on clear plastics
- Vinegar soaking: Fine as a diluted spray on vinyl, but soaking acrylic in vinegar degrades the surface over time
- Steel wool: Even 0000-grade leaves scratches on clear polycarbonate or acrylic that are harder to reverse than the original oxidation
A note on alcohol-based cleaners: many people reach for these thinking they’re a safe option, but it depends on concentration and plastic type. Here’s a closer look at whether alcohol wipes are safe for clear plastic before you try it.
Conclusion
After years of working with clear plastic in home tech setups, one thing is clear: oxidation is rarely a reason to replace anything. Most fixes are simple, effective, and cost under $10.
The key is matching the method to the damage. Toothpaste or baking soda works for light haze, plastic polish for moderate yellowing, wet sanding for deeper damage, and hydrogen peroxide with sunlight for stubborn discoloration.
Clear plastic is not just about looks. It affects safety in headlights and clarity in camera lenses. Getting it right matters.
Tried any of these methods? Share what worked for you.
Frequently Asked Questions
What is oxidation on clear plastic?
Oxidation happens when UV rays and oxygen break down the plastic surface after its protective coating wears off. It causes roughness, cloudiness, and yellowing. It is surface damage, not dirt.
Why does clear plastic turn yellow or cloudy?
UV exposure is the main cause. Once the factory coating wears off, sunlight reacts with the bare plastic and causes yellowing, haziness, and chalky texture over time.
How do I know which method to use?
Run your finger across the surface. Slightly rough means start with toothpaste. Visibly yellowed means use plastic polish. Chalky or cracked means you need wet sanding plus UV sealant.