Have you ever taken a photo that looked perfect on your camera screen, only to realize later that it turned out too dark, blurry, or full of grain?
Many beginners experience this frustration without understanding what caused it.
One small camera setting often makes the biggest difference, and that setting is ISO. Learning what is ISO on a camera can completely change the way photos look in different lighting conditions.
Whether taking pictures indoors, outside during sunset, or at night, ISO plays a major role in brightness and image quality.
After years of photographing in challenging light, it is the setting I reach for most when the scene does not cooperate.
Once the connection between light, sharpness, and ISO starts making sense, photography feels far less confusing and much more creative.
What is ISO on a Camera?
ISO on a camera is a setting that controls how sensitive the image sensor is to light, which determines how bright or dark a photo appears.
In photography, ISO works with shutter speed and aperture to create a properly exposed image.
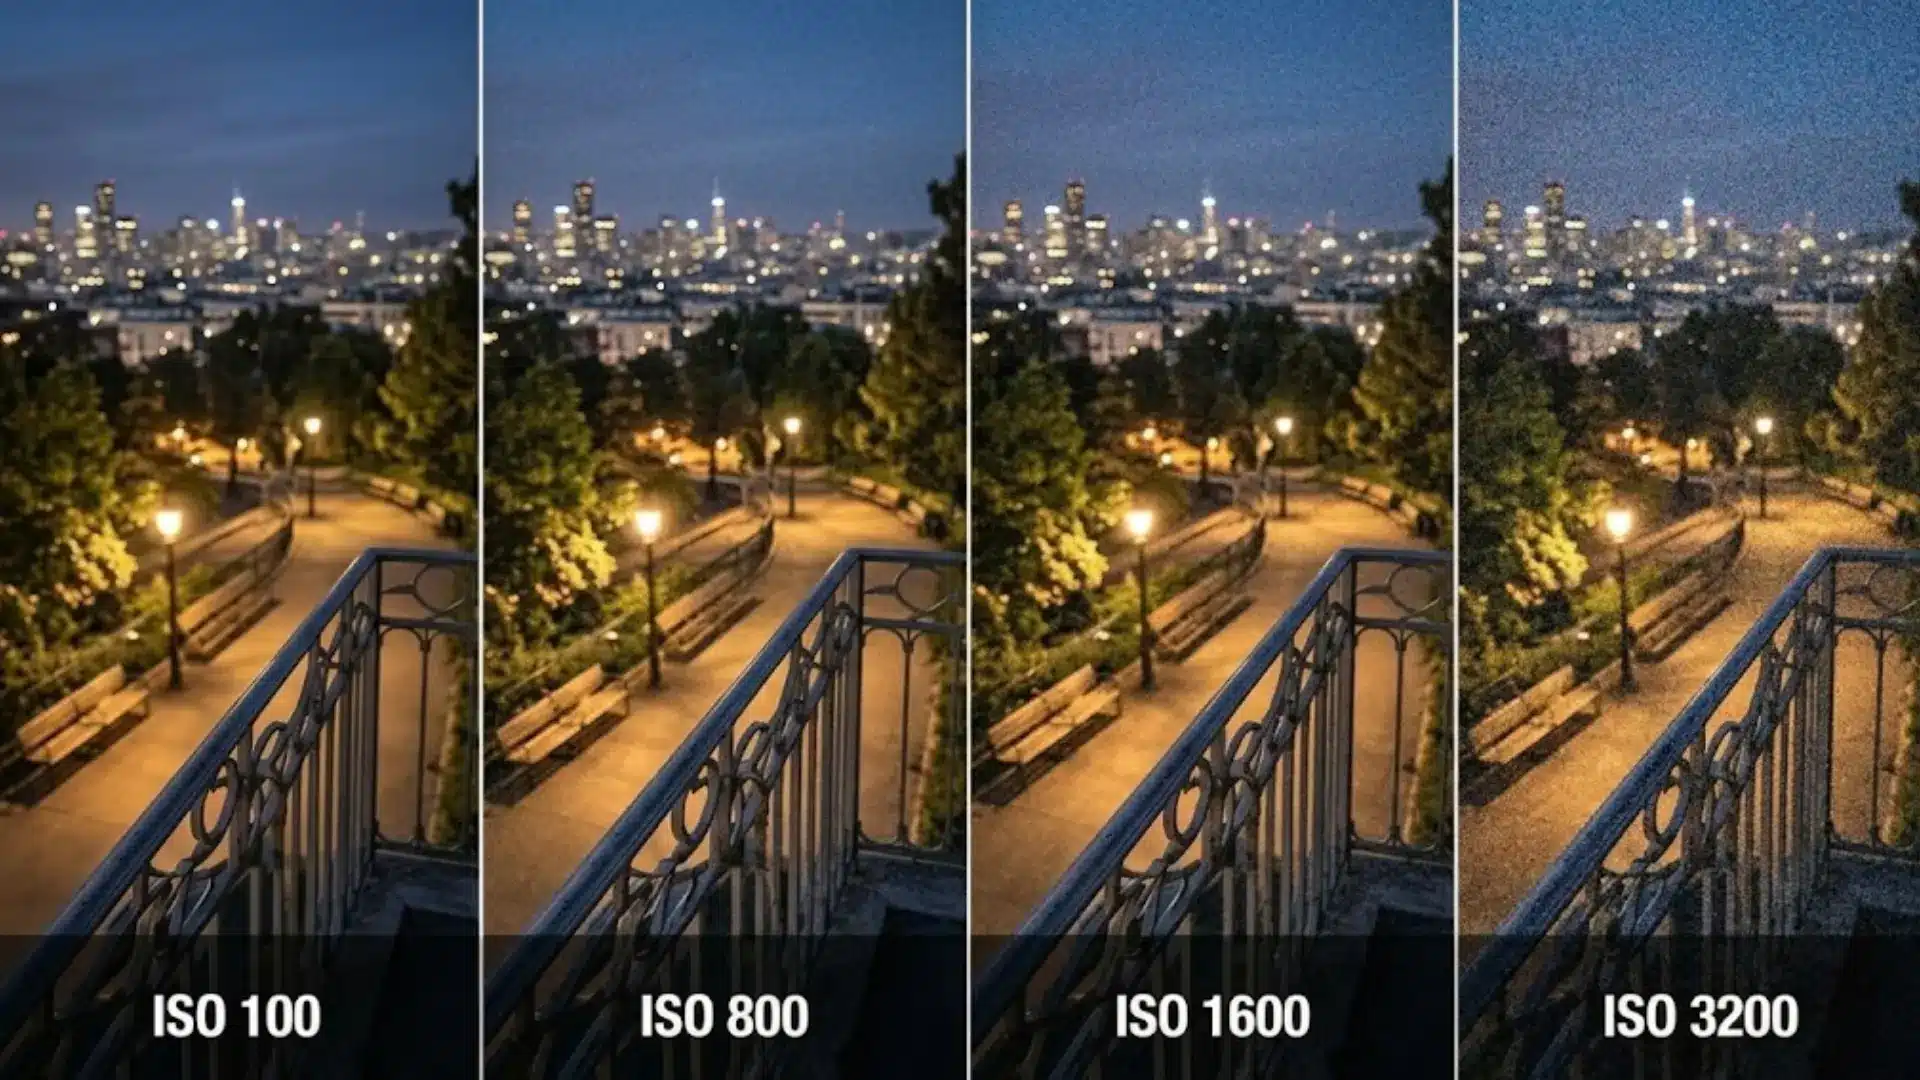
A low ISO, such as 100 or 200, is best for bright daylight because it keeps photos clean and sharp with less grain or noise.
A high ISO, such as 1600 or 3200, is useful in dark places or during night photography because it brightens the image without needing extra light.
However, higher ISO can make photos look grainy or lose detail.
Beginners should remember one simple rule: use the lowest ISO possible while still getting a bright and sharp photo.
Learning how ISO works helps photographers take better pictures in different lighting conditions, whether indoors, outdoors, during the day, or at night.
How ISO Works With the Exposure Triangle?
ISO is one part of the exposure triangle, along with shutter speed and aperture. These three settings work together to control how bright or dark a photo appears. Change one, and the others usually need adjusting to keep the exposure balanced.
- ISO controls image brightness by adjusting sensor sensitivity
- Shutter speed controls how long light enters the camera
- Aperture controls how much light passes through the lens at once
In low light, raising ISO can brighten a photo without forcing a slower shutter speed that causes blur.
For moving subjects, pairing a higher ISO with a fast shutter speed helps freeze action that would otherwise come out smeared.
This is one of the most practical applications of understanding camera ISO settings.
For anyone shooting in tricky conditions, pairing solid ISO knowledge with good low-light photography tips makes a noticeable difference
What Happens When You Increase ISO?
When you increase ISO, the camera makes the image brighter, which helps in dark environments or low-light situations.
Higher ISO settings are useful for indoor photography, night shots, concerts, sports, or any scene where there is not enough natural light.
For example, raising ISO allows photographers to use a faster shutter speed to freeze movement without making the photo too dark.
However, increasing ISO also adds more image noise or grain, which can reduce sharpness and detail. Colors may look less clean, especially in shadows or darker areas of the picture.
Modern cameras handle high ISO better than older models, but very high ISO can still lower image quality.
That is why photographers usually try to keep ISO as low as possible while still getting a bright and sharp image.
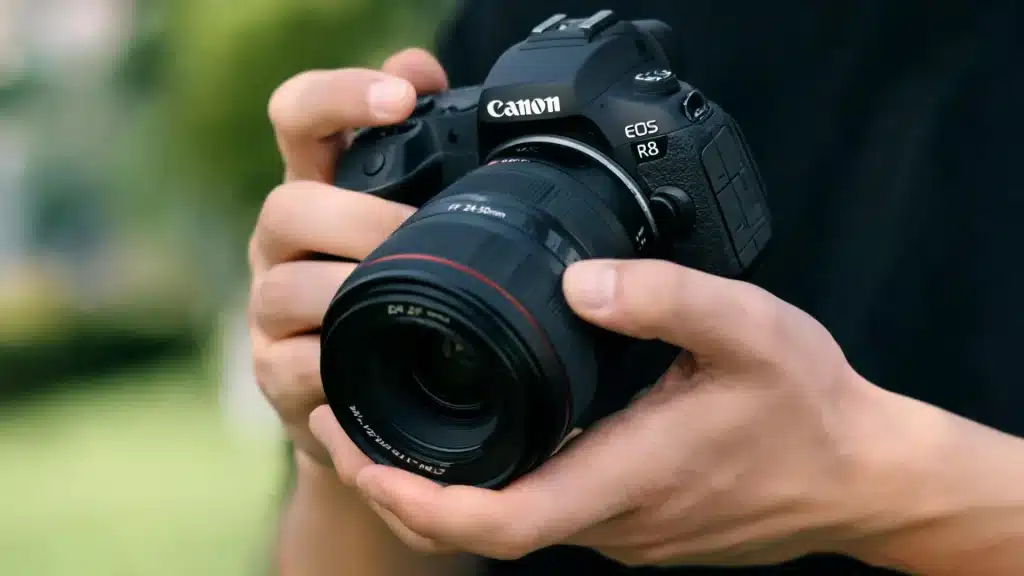
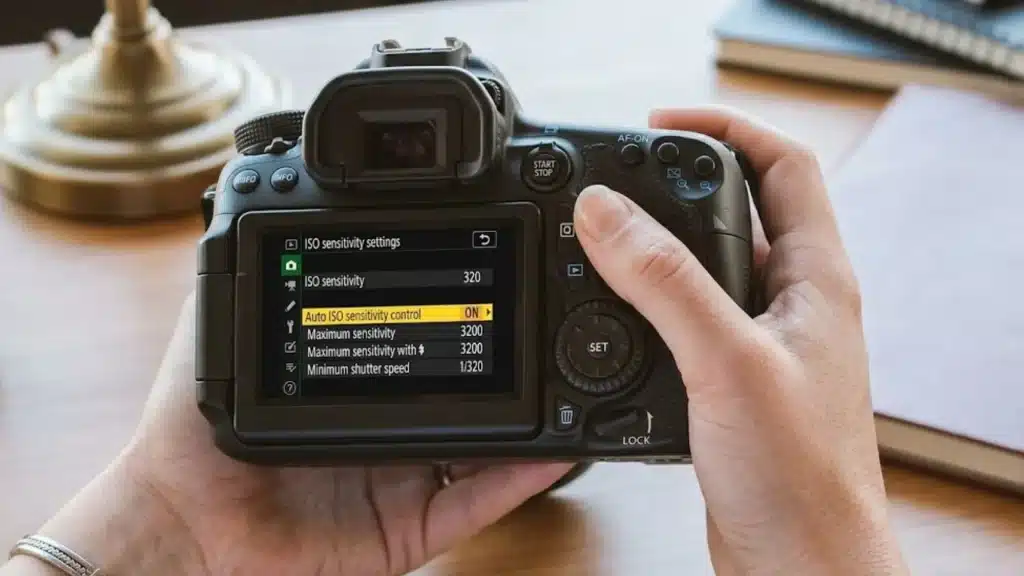
How to Change the ISO on Your Camera?
The exact steps vary by camera model, but the process is straightforward on most DSLRs and mirrorless cameras.
- Look for a dedicated ISO button on the top or back of the camera body. Press it and turn the main dial to change the value.
- On cameras without a dedicated button, go into the main menu, find the ISO setting, and adjust it there.
- Some cameras let you assign ISO to a custom button for faster access while shooting.
- In Manual (M), Aperture Priority (Av/A), Shutter Priority (Tv/S), or Program (P) modes, you have full control over ISO. In Auto mode, the camera handles it for you.
Always check which shooting mode you are in first. If ISO is not responding to your adjustments, Auto mode may be overriding it.
For the exact button location on your specific camera, check the manual or search the model name plus “how to change ISO.”
ISO Settings by Photography Scenario

Choosing the right ISO depends on the type of photography and the lighting conditions around you. There is no single ISO setting that works for every situation.
1. Portrait Photography
Portrait photography usually works best with a lower ISO because it helps keep skin tones smooth and details clean.
For outdoor portraits in daylight, ISO 100 to 400 is a great starting point. It produces sharp images with very little noise.
Indoor portraits may need ISO 800 to 1600, especially if the room is dark or natural light is limited. A slightly higher ISO can help avoid blurry photos when shooting handheld.
The goal is to keep the subject clear while maintaining natural-looking colors and soft detail in the face.
2. Landscape Photography
Landscape photography often uses ISO 100 or the camera’s base ISO to capture the highest image quality possible.
A low ISO keeps details sharp and reduces unwanted grain, which is important for scenes with mountains, forests, water, or skies.
Many landscape photographers also use a tripod, allowing them to shoot with slower shutter speeds without blur. This makes it easier to keep ISO low, even during sunrise or sunset.
Clean detail and better dynamic range are major reasons why low ISO settings are preferred for landscape photography in most lighting conditions.
3. Street Photography
Street photography often happens in changing light and fast-moving environments, so ISO settings may need quick adjustments.
During bright daytime scenes, ISO 400 usually works well and keeps image quality clean. In shaded streets, cloudy weather, or evening situations, ISO 800 to 1600 may be necessary.
A higher ISO helps maintain a fast shutter speed, which is useful for capturing people, traffic, and everyday moments without motion blur.
Street photographers often value sharp timing and real-life moments more than perfect image quality, making flexible ISO settings very important in this style of photography.
4. Sports and Wildlife Photography
Sports and wildlife photography usually require higher ISO settings because subjects move quickly and need fast shutter speeds.
ISO 800 to 3200 or higher is common, especially in indoor arenas, forests, or cloudy weather.
A higher ISO allows the camera to freeze action, whether it is a running athlete, flying bird, or moving animal. While a higher ISO can add some noise, capturing a sharp moment is often more important.
Modern cameras handle high ISO much better than older models, making it easier to photograph fast action without losing too much image detail.
5. Night Photography
Night photography depends heavily on whether the camera is handheld or placed on a tripod.
For still scenes with a tripod, such as city lights or stars, photographers usually keep ISO low to reduce noise and maintain detail.
A slower shutter speed can be used because the camera stays stable. Handheld night photography is different.
Since slow shutter speeds may cause blur, photographers often raise ISO to brighten the image while keeping the shot sharp.
Higher ISO settings are common for street scenes, events, or nighttime travel photos where using a tripod is not possible.
6. Indoor Photography Without Flash
Indoor photography without flash often needs a higher ISO because indoor lighting is usually weaker than outdoor light.
A good starting point is ISO 800, especially in homes, restaurants, or classrooms. If the photo still looks dark or the shutter speed becomes too slow, raising ISO further can help.
Many photographers use ISO 1600 or higher indoors when shooting handheld. The goal is to keep photos bright enough while avoiding motion blur from shaky hands or moving subjects.
Finding the right balance between brightness and image quality becomes easier with practice and different lighting situations.
Low ISO vs High ISO: Which is Better?
Choosing between low ISO and high ISO depends on the lighting conditions and the type of photo you want to capture. Neither option is always better than the other.
| Feature | Low ISO | High ISO |
|---|---|---|
| Common ISO Range | ISO 100 to 400 | ISO 800 and higher |
| Best For | Bright daylight, landscapes, studio shots | Low light, indoor photography, sports, night scenes |
| Image Quality | Cleaner and sharper images | More image noise or grain |
| Brightness | Needs more light | Brightens photos in dark conditions |
| Detail and Colors | Better detail and more natural colors | Slight loss of detail at very high ISO |
| Shutter Speed Support | Works with slower shutter speeds | Helps use faster shutter speeds |
| Tripod Use | Often used with tripod photography | Helpful for handheld shooting |
| Motion Blur Control | Less effective in low light | Better for freezing movement |
| Beginner Tip | Use when enough light is available | Raise only when the image becomes too dark |
When to Use Auto ISO?
Auto ISO lets the camera choose a sensitivity level based on available light while you control aperture and shutter speed.
It is useful when light changes quickly, such as when moving between indoor and outdoor environments, shooting events, or photographing fast-moving subjects.
The one thing to always do with Auto ISO is set a maximum limit in your camera’s menu. Without a ceiling, the camera will push ISO as high as the sensor allows, which can produce unusable images.
ISO 3200 is a reasonable ceiling for most APS-C cameras. Full-frame bodies from the past few years can often handle ISO 6400 before noise becomes a real problem.
Common ISO Mistakes Beginners Make
Many beginners struggle with ISO because they either leave it unchanged or raise it too much without understanding how it affects the photo.
- Keeping ISO Too Low in Dark Places: Using ISO 100 indoors or at night often makes photos too dark or blurry because the camera cannot gather enough light quickly.
- Using Very High ISO in Bright Daylight: Raising ISO too much in sunny conditions can add unnecessary grain and reduce image quality.
- Forgetting to Reset ISO After Night Photography: Many beginners leave the camera at a high ISO after shooting in low light, causing daytime photos to look noisy.
- Ignoring Motion Blur: Some photographers avoid raising ISO even when the shutter speed becomes too slow, leading to blurry moving subjects.
- Depending Only on Auto ISO: Auto ISO can help, but beginners should still understand how ISO works and check if the camera is using unnecessarily high settings.
- Thinking High ISO Always Ruins Photos: Modern cameras handle higher ISO much better than older models, so a slightly noisy photo is often acceptable if the image is sharp and properly exposed.
- Changing ISO Without Checking Other Settings: ISO works with aperture and shutter speed, so adjusting ISO alone may not always solve exposure problems.
Conclusion
Understanding what ISO is in photography and what is ISO on a camera settings makes it much easier to take better photos in different lighting conditions.
The key is learning how ISO works with shutter speed and aperture to create balanced exposure without losing too much image quality.
Beginners often improve quickly once they start adjusting ISO based on the scene instead of leaving the camera on one setting all the time.
There is no perfect ISO for every situation, and practice is the best way to understand what works for your style of photography.
Try experimenting with different ISO settings during your next photo session and compare the results.
What ISO setting do you use the most while taking photos? Share your experience, favorite camera settings, or beginner photography tips in the comments below.
Frequently Asked Questions
What is Native ISO on a Camera?
Native ISO is the camera’s standard ISO range where image quality performs best. Photos taken at native ISO usually have better detail, dynamic range, and lower noise.
Should ISO Always Be the First Setting to Change?
Not always. Many photographers first adjust shutter speed or aperture depending on the scene. ISO is usually changed when the photo is still too dark after adjusting the other settings.
How Does ISO Affect Motion Blur in Photos?
Higher ISO lets you use faster shutter speeds in low light, which helps freeze moving subjects and reduce motion blur, while low ISO may require slower shutter speeds.