When an event feels unorganized, it’s often because key tasks were rushed or skipped.
Problems like late vendors, unclear schedules, or missing materials usually trace back to planning gaps that could have been avoided.
A clear event checklist helps prevent these issues by giving you a structured timeline to follow from the initial idea to the final wrap-up.
Each stage becomes easier to manage when responsibilities, dates, and tasks are laid out in advance.
In this blog, you’ll see a clear event checklist that guides you through each planning stage, from early decisions to post-event tasks.
What is an Event Checklist?
An event checklist is a structured timeline that organizes all planning tasks by deadline.
It breaks down the process into specific phases, showing you what needs attention at 12 months out, 6 months out, and right up to event day.
It helps you remember important tasks, keeps you organized, and makes sure nothing gets forgotten.
Event Checklist: 11-Step Timeline
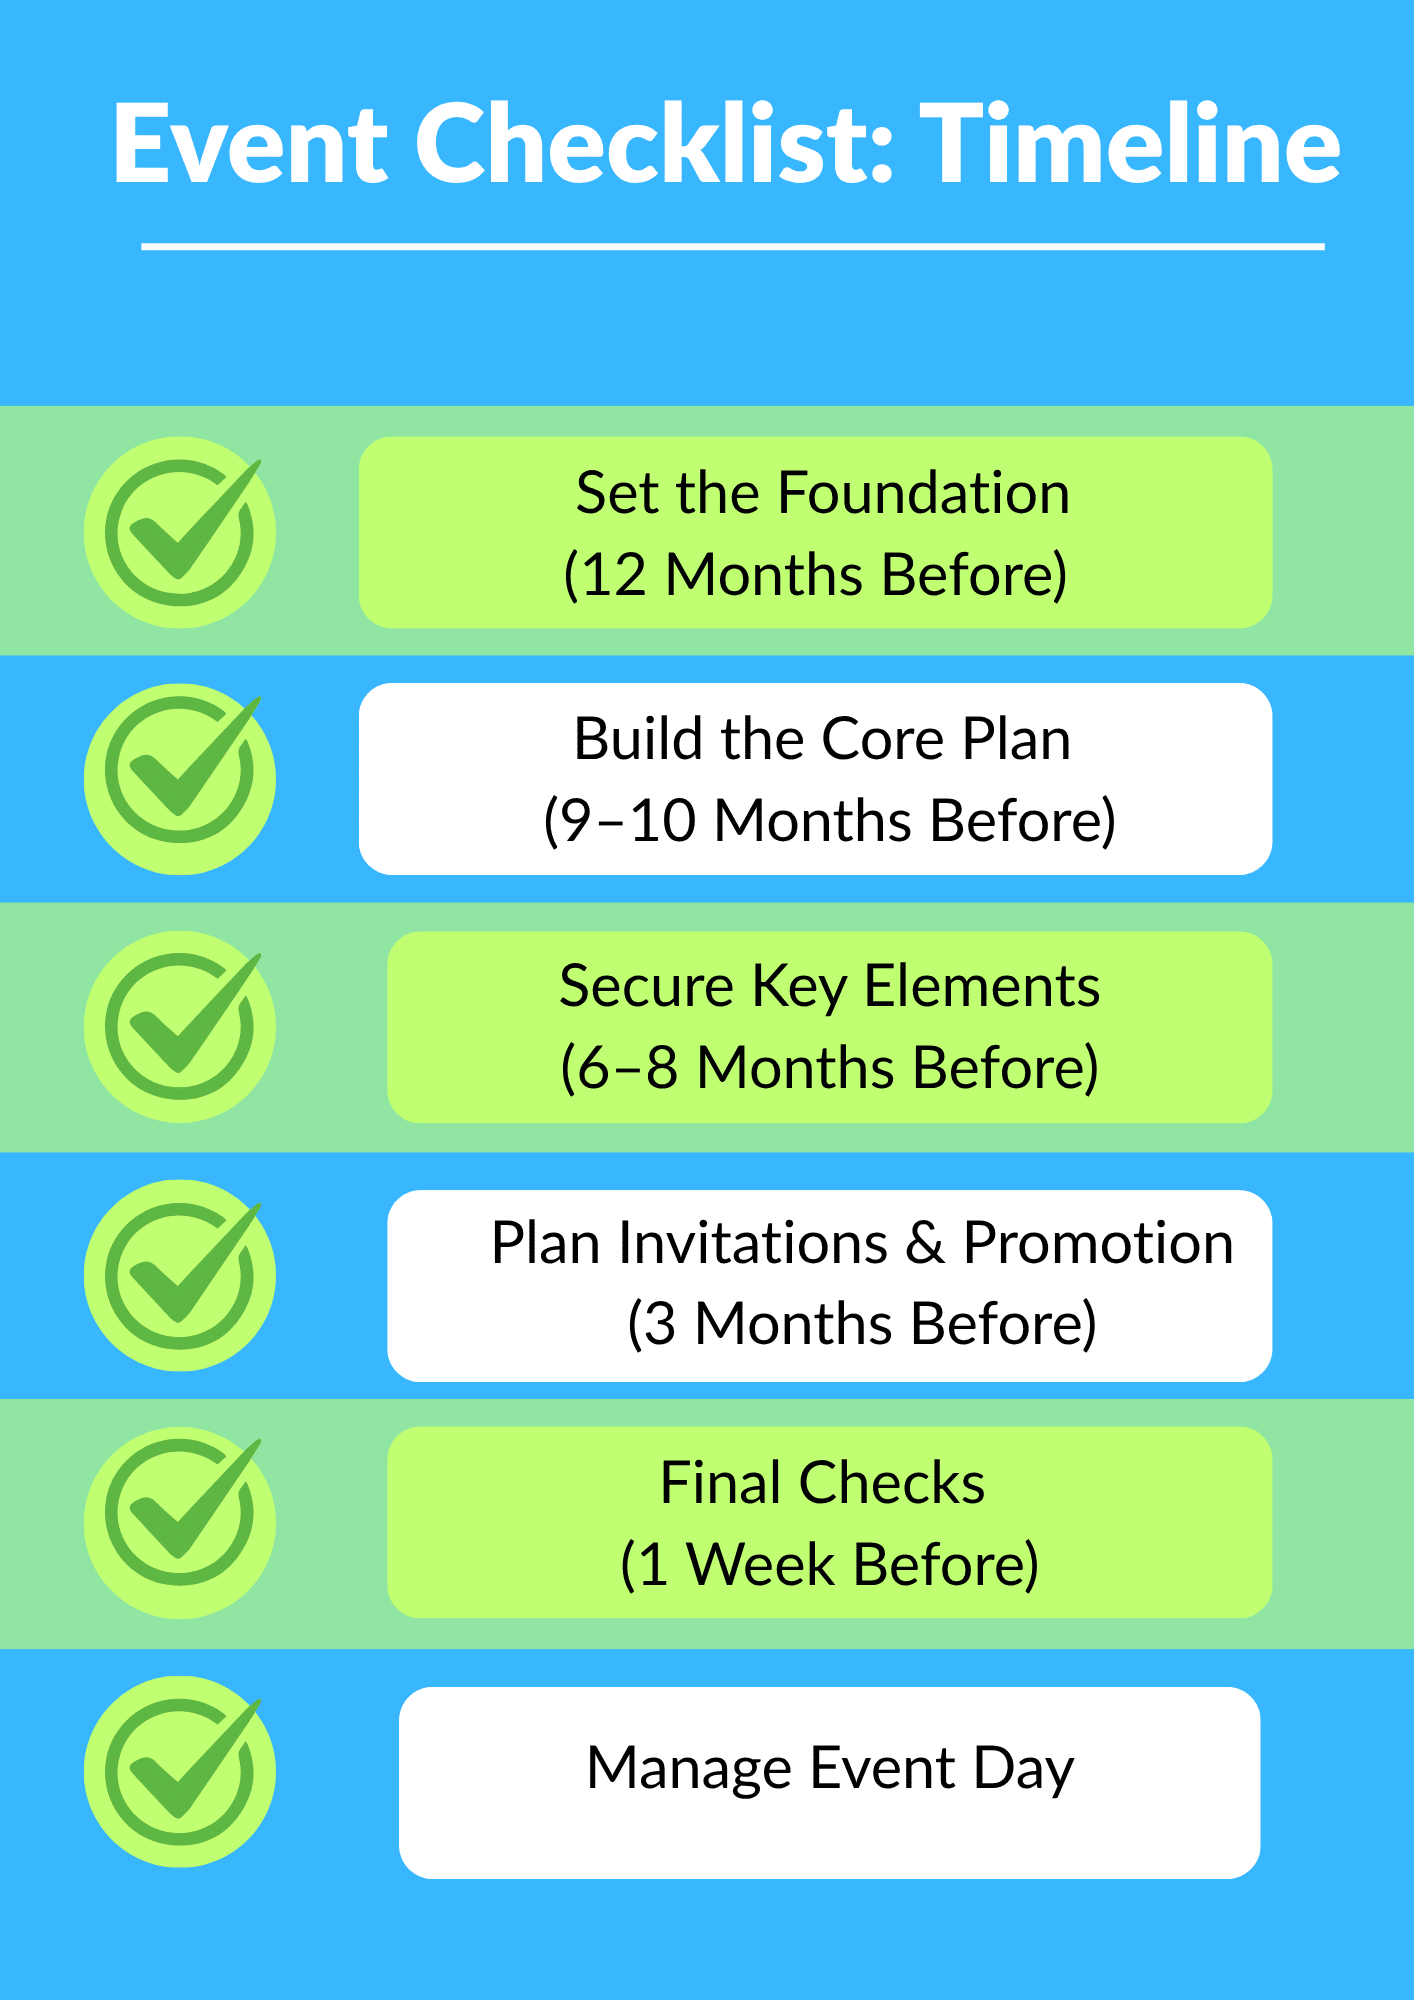
This timeline breaks down your event planning into clear stages, starting 12 months out and moving through to post-event tasks.
Each phase includes specific actions to keep you organized and on schedule.
1. Set the Foundation (12 Months Before)
Starting a year ahead gives you time to make the best choices. Right now, you’re setting up the basic plan that everything else will follow.
- Define the purpose: Decide what you want to accomplish with this event.
- Choose the theme and style: Pick a theme that fits your purpose and appeals to your guests.
- Draft a basic planning outline: Write down estimated attendance, possible dates, and key elements.
These early decisions will guide all your choices later on.
2. Build the Core Plan (9–10 Months Before)
Now you’re turning your ideas into real plans. This phase is all about setting your budget and finding the right people to work with.
- Set the budget: Decide how much you can spend and break it down by category.
- Approve spending limits: Get approval from your team or stakeholders on what you can spend.
- Identify main cost areas: Figure out where most of your money will go, like venue, food, and entertainment.
Getting your finances sorted now prevents budget problems down the road.
3. Secure Key Elements (6–8 Months Before)
This is when your event becomes real. You’re making commitments and booking the essential services that everything else will depend on for success.
- Select the venue: Choose a location that fits your needs, guest count, and theme.
- Confirm the date: Lock in your date and send save-the-date notices if needed.
- Book essential vendors: Secure your caterer, speakers, photographer, and entertainment before they book up.
Locking down these essentials early gives you better options and often better prices.
4. Finalize Vendors and Services (4–5 Months Before)
With the big pieces in place, you’re now filling in the details and making sure everyone knows what to expect. This phase connects all the moving parts and ensures clear communication,
- Confirm décor needs: Decide what decorations you need based on your theme.
- Arrange rentals: Book any extra equipment or furniture the venue doesn’t provide.
- Share requirements with each vendor: Give everyone detailed information about timing, setup, and special requests.
Clear communication with vendors now saves you from confusion later.
5. Plan Invitations and Promotion (3 Months Before)
You’ve handled the setup, so now focus on getting people to attend. Spread the word, manage your guest list, and build excitement for your event.
- Create guest list: Make a complete list of everyone you want to invite with their contact details.
- Prepare invitations: Design invitations with all the important details like date, time, location, and RSVP info.
- Map out communication updates: Decide when you’ll send reminders and updates to keep people engaged.
Regular communication helps people remember to respond and prepare for your event.
6. Strengthen the Event Team (2 Months Before)
Good events need good teams. This phase makes sure everyone knows what they’re doing and how to work together.
- Assign team roles: Give each person clear responsibilities for different parts of the event.
- Share responsibilities: Write down exactly what each team member will handle before, during, and after.
- Review upcoming deadlines: Go through what needs to happen next and make sure everyone is on track.
A well-organized team makes event day run much smoothly.
7. Build the Final Structure (1 Month Before)
You’re almost there, so confirm every detail and create your event day plan. Lock down logistics and make sure everyone knows exactly what happens and when.
- Review the full event schedule: Create a detailed timeline showing when everything happens on the day.
- Confirm vendor arrival times: Check with each vendor about when they’ll arrive and how long setup takes.
- Check all tech needs: Test microphones, projectors, and any other equipment you’ll use.
Double-checking everything now prevents surprises on event day.
8. Confirm All Details (2 Weeks Before)
Time for final confirmations to make sure nothing has changed. Reach out to everyone involved and handle any last-minute additions.
- Reconfirm guest count: Follow up with people who haven’t responded to get your final headcount.
- Review venue setup: Contact the venue to confirm your plans and timing.
- Prepare materials and signage: Create signs, name tags, programs, and printed materials.
Having everything ready two weeks out lets you focus on bigger priorities in your final week.
9. Conduct Final Checks (1 Week Before)
Use this final week to catch any problems before guests arrive. Go through everything carefully and make sure you’re completely ready.
- Walk through the venue: Visit the space one more time and check how everything will work.
- Confirm equipment delivery: Touch base with anyone delivering rentals or equipment.
- Prepare check-in lists: Print registration lists, name tags, and materials for welcoming guests.
A thorough final check helps you spot and fix issues before guests arrive.
10. Manage the Flow (Event Day)
Today is the day all your planning pays off. Stay focused, stay flexible, and handle whatever comes your way with confidence.
- Team briefing: Gather your team before guests arrive for a quick schedule review.
- Oversee setup: Watch as vendors arrive and make sure everything is positioned correctly.
- Handle guest arrivals: Greet people warmly and manage registration smoothly.
- Adjust to last-minute needs: Stay calm and solve problems quickly when they arise.
Your ability to stay organized and flexible makes the difference between a good event and a great one.
11. Complete the Wrap-Up (After the Event)
The event isn’t over when guests leave. Proper follow-up leaves a lasting impression and helps you improve next time.
- Clean up the venue: Oversee breakdown and make sure the space is left in good condition.
- Return rentals: Coordinate pickup or return of all rented equipment.
- Collect feedback: Send a quick survey asking what worked well and what could improve.
Taking time to wrap up properly helps you build on your success for future events.
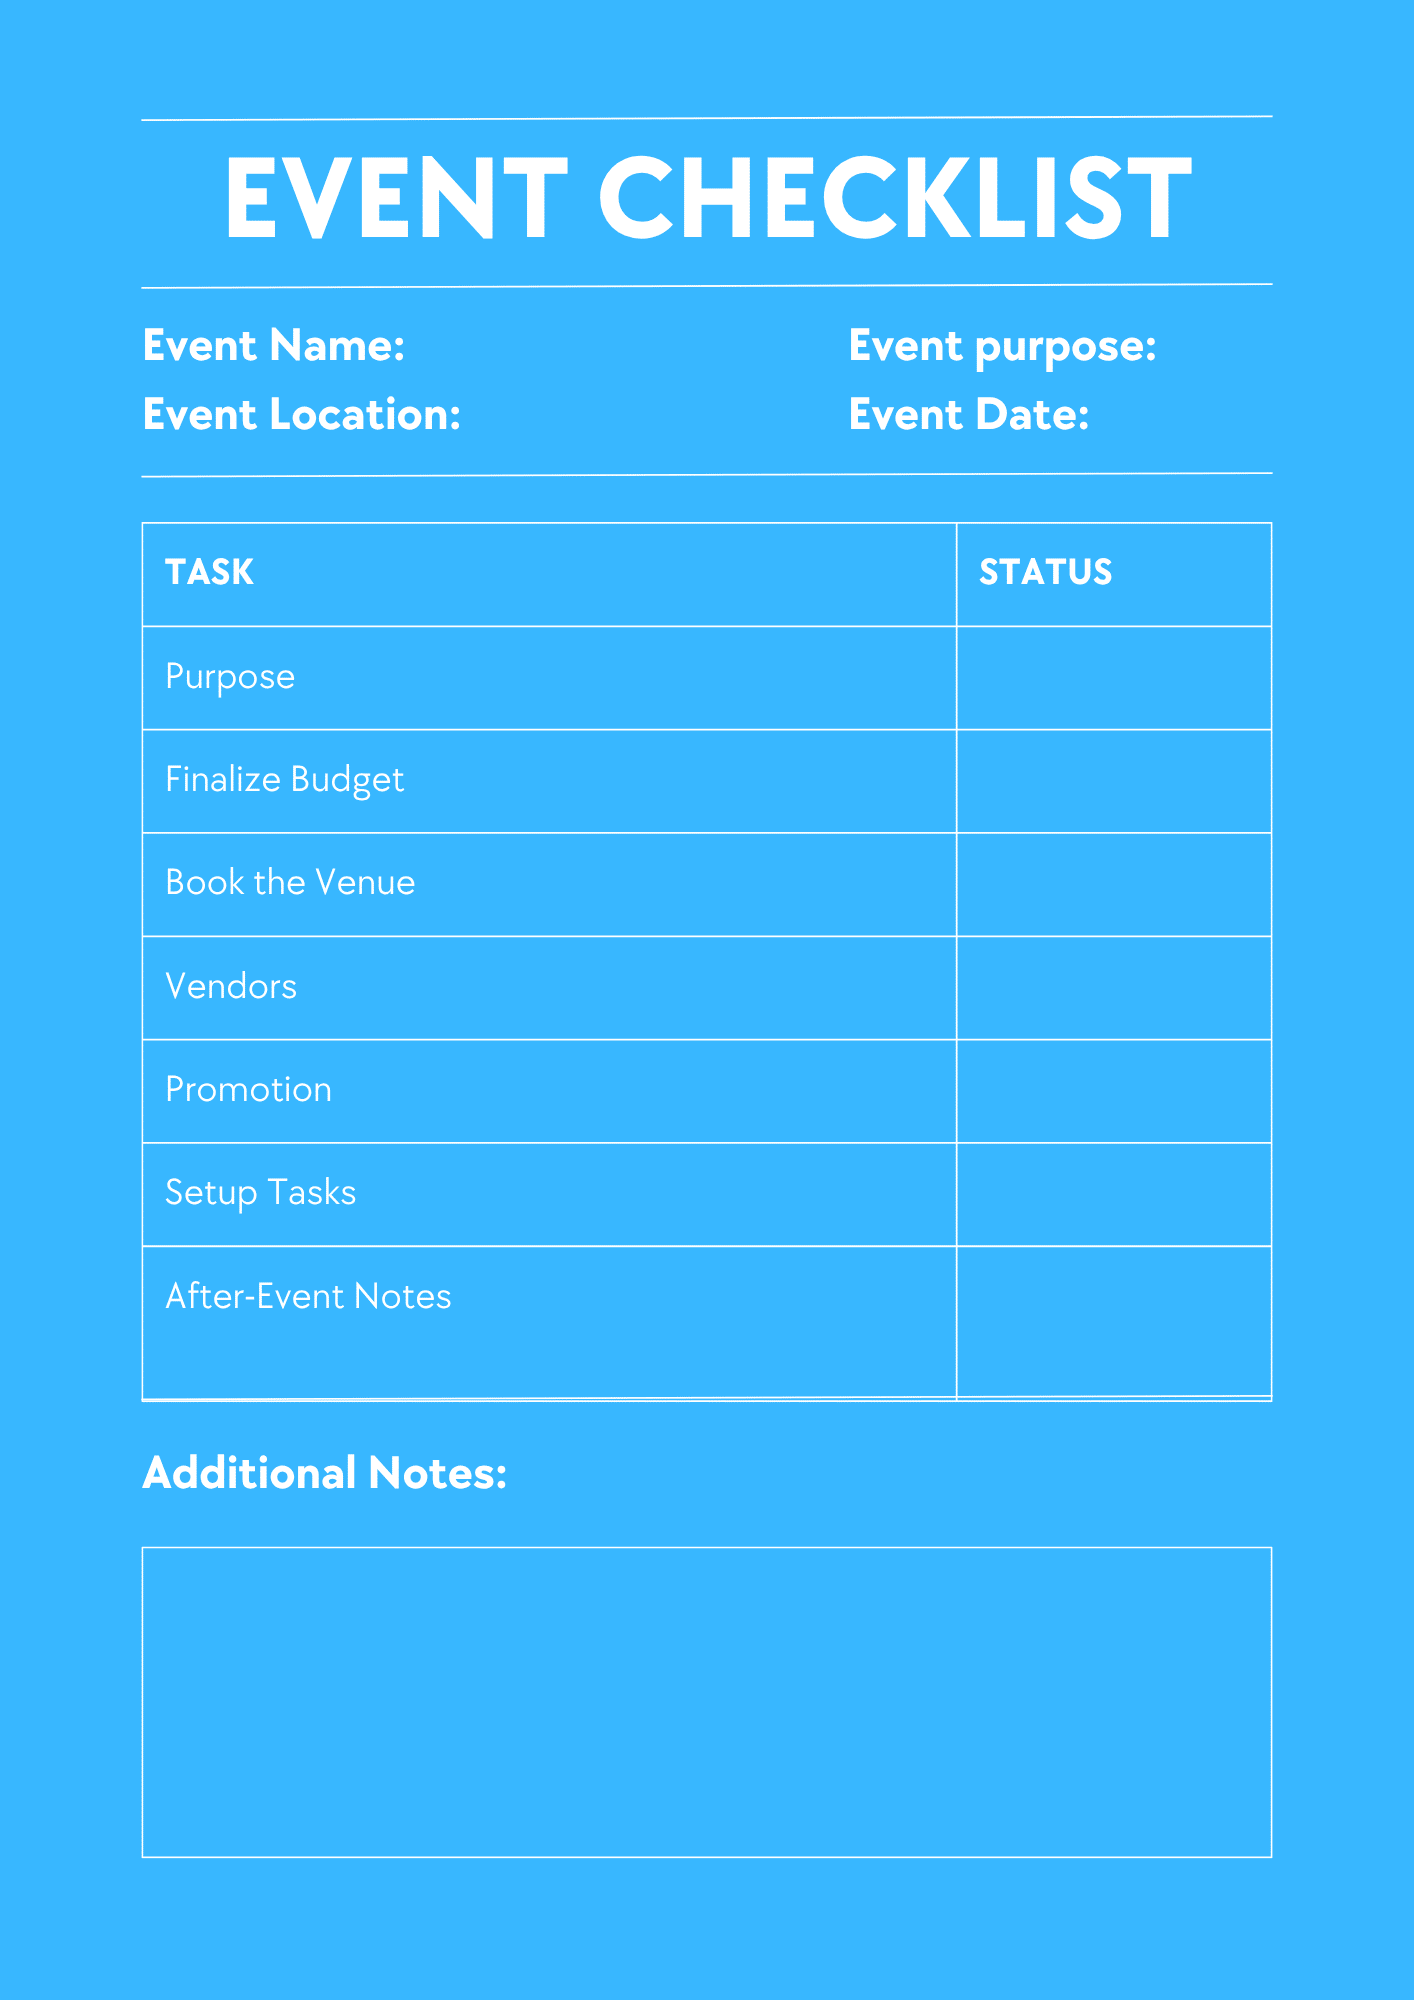
Event Checklist Format
A well-structured checklist keeps you organized throughout the planning process.
Below is a fillable format that captures every detail from initial planning to post-event review.
Copy this structure, fill in your specific information, and adapt it to match your event requirements.
|
Event Name: _______________________________ Event Date: _____________ | Time: _____________ Purpose
Budget
Venue
Vendors
Promotion
Setup Tasks
After-Event Notes
|
How Does This Checklist Change by Event Type?
Different events require a slightly different approach.
While the core timeline remains similar across all events, certain types need special attention in specific areas.
Adjust your checklist to match your event’s unique requirements.
1. Corporate Events
Corporate gatherings have professional standards and organizational protocols that must be followed.
Keep the company identity visible on all materials, signage, and presentations, and brief presenters on timing and technical setup, testing everything beforehand.
2. Social Events
Social gatherings prioritize guest experience and creating memorable moments.
Create an immersive atmosphere with creative decorations and photo opportunities.
Collect dietary restrictions early and plan food service that matches your event style, and pay attention to temperature, music volume, seating, and other comfort details.
3. Fundraisers or Community Events
These events balance mission-driven goals with practical logistics.
Recruit volunteers early, provide clear instructions, and show appreciation for their time.
Offer multiple payment methods, display progress toward fundraising goals, communicate your purpose clearly, and share stories that show impact.
Event Checklist Template
A simple copy-friendly template for quick planning. Take a quick look at this streamlined template; you can adapt it for any event.
Common Mistakes to Avoid
These issues can affect planning and guest experience. Being aware of common pitfalls helps you avoid them.
- Late bookings: Start early or lose your top vendor and venue choices.
- Missing a backup plan: Always prepare for weather changes and vendor cancellations.
- Poor communication: Clear expectations prevent confusion with your team and vendors.
- Skipping tech checks: Test all equipment at the venue before event day.
- Forgetting guest experience: Focus on comfort, flow, and accessibility for all attendees.
Conclusion
Planning an event becomes easier when you follow a clear event checklist that guides you through each stage from start to finish.
Start early, stay organized, and communicate clearly to avoid last-minute issues.
Know that every phase matters, from setting your foundation a year ahead to wrapping up after guests leave.
And the best part is that each event you plan teaches you something new.
What’s your biggest event planning challenge?
Share your thoughts in the comments below and help fellow planners learn from your experience.