When I first switched to shooting in RAW format, I felt unsure if it was worth the extra effort. Like you, I wanted sharper photos and more freedom to edit without ruining quality.
That’s exactly where RAW makes a difference. Instead of compressing files like JPEG, RAW keeps every detail from your camera’s sensor.
In this blog, I’ll walk you through what RAW really is, how it compares to JPEG, and the trade-offs you should know. I’ll also share easy steps to get started, plus tips on storage and editing.
By the time you’re done, you’ll know whether RAW fits your photography style.
What is the RAW Format?
RAW is a file type your camera uses to capture every bit of information from its sensor. Unlike JPEG, which compresses and processes the photo in-camera, RAW keeps all the original details untouched.
Many photographers compare it to a digital negative, much like film photography before development. This means you have full control later when adjusting brightness, color, or sharpness without damaging the image quality.
RAW is often described as “lossless” because nothing important is thrown away during capture.
Every highlight, shadow, and tone is preserved. While this makes the files much larger than JPEGs, it also gives you a more flexible starting point for editing and creating the best possible version of your photo.
RAW vs. JPEG: Key Differences
RAW and JPEG handle photos differently, with trade-offs in quality, size, editing control, and ease of sharing.
1. Image Quality
RAW files preserve every detail captured by the camera sensor. Highlights, shadows, and colors remain intact, giving you room to adjust later.
JPEGs, however, compress the photo by discarding data. This smaller file looks fine for casual use, but limits flexibility if you need to brighten dark areas or fix color. For critical work, RAW delivers noticeably higher image quality.
2. File Size and Storage Needs
RAW files are large because they keep all the information from your camera sensor. Depending on the camera, they may be two to ten times bigger than JPEGs. This quickly fills up memory cards and computer storage.
JPEGs are much smaller, making them easier to handle for everyday shooting or long trips. If storage space matters more than ultimate quality, JPEG is more practical.
3. Editing Flexibility
RAW gives you unmatched freedom when editing. You can recover lost details in shadows, adjust exposure, and fine-tune colors without harming the original photo.
JPEGs are already processed in-camera, so editing changes permanently degrade image quality. Small tweaks work fine, but heavy adjustments can ruin the photo. If you want full creative control and a safety net for mistakes, RAW is the better option.
4. Sharing and Compatibility
JPEGs are universally recognized by phones, browsers, and social platforms. You can share them instantly without extra steps.
RAW files, on the other hand, require special software to open and process before sharing. They aren’t meant for direct use straight out of the camera. If you want fast, ready-to-go photos, JPEG is more convenient. RAW is best when you plan to edit before sharing.
Summary: RAW vs JPEG
| Feature | RAW | JPEG |
|---|---|---|
| Image Quality | Maximum detail, lossless data | Compressed, some detail lost |
| File Size | Large, needs more storage | Small, storage-friendly |
| Editing | Flexible, non-destructive | Limited, quality loss |
| Sharing | Needs processing first | Instantly shareable |
When RAW makes sense: professional work, tricky lighting, creative editing.
When JPEG is enough: casual photos, social sharing, limited storage.
Pros and Cons of Shooting in RAW
Shooting in RAW offers excellent quality and flexibility but comes with storage challenges and extra editing steps.
Benefits (Quality, Recovery, Control)
RAW files give you more room to adjust photos without losing important details, making them ideal for serious editing.
- Maximum image quality with full sensor data preserved
- Ability to recover highlights and shadows easily
- Non-destructive editing protects the original file
- Greater control over color correction and exposure
- Produces professional-level results suitable for printing
Drawbacks (Storage, Workflow, Software Required)
RAW files are large and require software, making them less convenient for quick sharing or casual use compared to JPEGs.
- Much larger file sizes consume storage quickly
- Slower workflow due to required processing
- Needs editing software like Lightroom or Photoshop
- Not instantly shareable on most devices
- Can overwhelm beginners with extra steps
How to Shoot in RAW (Step by Step)
Switching to RAW is simple once you learn the process. Follow these steps to start capturing higher-quality images:
- Step 1: RAW mode lets your camera capture every detail from the sensor without losing important data.
- Step 2: The camera works the same, but RAW files save extra information useful for editing later.
- Step 3: RAW files are larger, so transferring them to your computer may take longer than JPEGs.
- Step 4: This step unlocks RAW’s potential, letting you control exposure, color, and fine details while editing.
Editing RAW Files
Editing RAW files is where the real advantages of this format shine. Unlike JPEGs, RAW photos must be processed before sharing, since they contain untouched sensor data. This gives you full freedom to adjust exposure, white balance, color, and sharpness without losing detail.
Popular tools like Adobe Lightroom and Photoshop dominate the market, but free programs such as Darktable, RawTherapee, or GIMP also work well.
The goal of editing RAW isn’t to “fix” bad photos, but to bring out the hidden potential already captured by your camera. With practice, this step becomes second nature.
Storage and Workflow Tips
Handling RAW files efficiently requires smart storage solutions and good organization to keep your editing process smooth and stress-free:
- Managing large file sizes: RAW files are much bigger than JPEGs, so invest in larger memory cards, external drives, or cloud storage. Regularly back up your photos to avoid running out of space.
- File naming and organization: Create a consistent system for naming and storing your RAW files. Use folders by date, project, or subject to quickly find and manage your work.
When Should You Shoot RAW?
Shooting in RAW makes the most sense when you need flexibility, detail, and control over your photos.
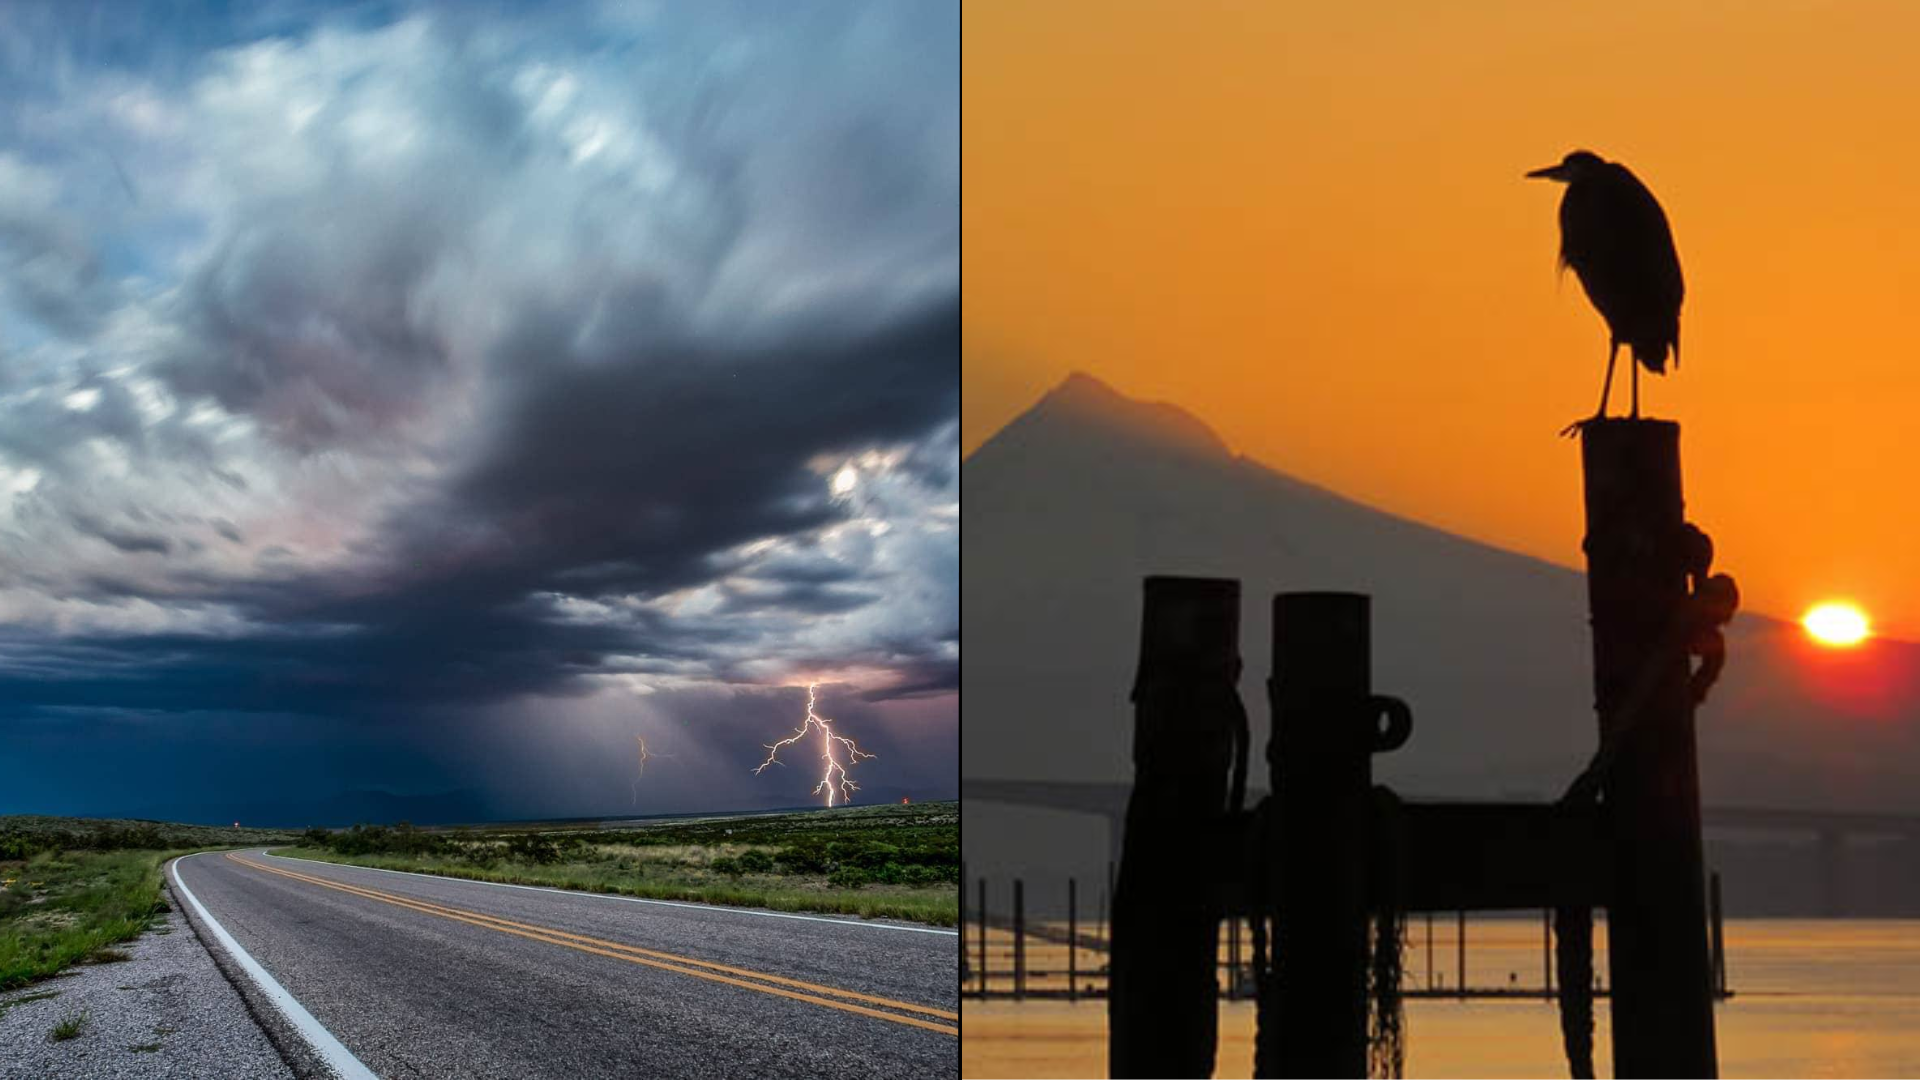
It’s especially helpful in tricky lighting conditions, such as sunsets, night photography, or indoor scenes, where recovering highlights and shadows matters most.
RAW is also the best choice for professional work, printing, or when you plan to edit extensively. On the other hand, JPEG is enough for quick snapshots, social media uploads, or when storage space is limited.
Think about your goals before each shoot. RAW is perfect for serious projects, while JPEG works fine for casual use.
Conclusion
I’ve learned that shooting in RAW format gives me more control and flexibility than JPEG ever could. Now you know how it works, what makes it different, and why it matters when editing or printing photos.
You’ve also seen the pros and cons, along with simple steps to get started. My advice? Try RAW on your next shoot and compare the results with JPEG. You might be surprised by the difference in detail and color.
If you’re ready to keep improving your photography, check out more of my blogs for editing tips, workflow advice, and practical guides that help you get the best out of your camera.