Setting up a CCTV camera on your own can feel a bit stressful, but I’ve learned that the process is much easier when you understand each step clearly.
In this guide, I’ll walk you through everything you need to know so you feel ready before you even pick up a tool.
You’ll see how to choose the right camera, where to place it, how to wire it, and how to get the system working the right way.
I want you to feel confident as you follow along, even if this is your first time doing a project like this.
The steps are simple, the tools are basic, and the setup can fit almost any home. By the end, you’ll know exactly what to do and what to avoid.
My guide is here to help you install your CCTV camera the smart, safe, and clear way.
What You Need to Get Started?
When I set up my first CCTV system, I realized that having the right tools ready made everything much easier. So before you begin, it helps to get familiar with your system and gather what you need.
- CCTV camera (wired or wireless)
- DVR or NVR unit
- Power adapter or power supply
- Coaxial or Ethernet cables
- Drill with the right drill bits
- Screws and wall anchors
- Ladder for high placements
- Monitor or TV for viewing setup
- Ethernet router (for networked systems)
- Smartphone or computer for app setup
- Cable clips or zip ties for clean wiring
Step-By-Step CCTV Camera Installation
These steps will guide you from unboxing your CCTV kit to getting the system working the right way, making the whole setup simple and clear.
Step 1: Unbox the Kit and Check All Parts

Begin by unboxing your CCTV kit and placing all the parts on a flat surface.
You should find the cameras, the NVR, long Ethernet cables, screws, and mounting templates.
Checking everything early helps you avoid delays once installation starts. It also gives you a better understanding of what connects where before you begin drilling or mounting.
This simple preparation step makes the whole setup smoother and ensures you’re ready for the next stages.
Step 2: Test the Cameras and NVR Indoors

Before mounting anything, connect each camera to the NVR and power the system on.
You should see every feed load on the monitor, which confirms that the cameras, cables, and ports are working properly.
Testing indoors prevents the frustration of mounting a camera only to discover that something isn’t functioning.
Once you confirm all cameras display correctly, you can move forward with confidence and start the installation process outside.
Step 3: Mark the Camera Position on the Soffit

Use the mounting template to mark the exact spot where the camera will sit on the soffit.
Start by marking the center hole for the Ethernet cable, then mark the three screw holes that will hold the bracket in place.
Clear markings help you avoid small errors and keep the setup aligned. This quick step also makes drilling smoother and prevents messy edges.
With careful prep, the camera fits neatly, stays steady, and gives your installation a clean, professional look once everything is finished.
Step 4: Drill the Cable and Screw Holes

Drill the large center hole for the Ethernet cable using an auger bit or spade bit, depending on what you have.
Then drill the three smaller holes for the screws marked earlier. Drilling carefully helps the bracket sit flat and secure when you mount the camera.
This step should be done slowly and accurately, ensuring all holes match the template.
Once completed, you’re ready to feed the cable and mount the camera confidently.
Step 5: Feed the Ethernet Cable Into the Soffit

Unravel the Ethernet cable and push a small loop through the center hole that leads into the soffit.
In the loft, tie a larger loop at the other end so the cable doesn’t slip back through while you work. Use a cable rod, hook, or pulling tool to guide the cable into the loft without forcing it.
This step gives you a clean path for the wiring and makes the later connections much easier.
Proper cable placement keeps everything organized and prevents clutter during installation.
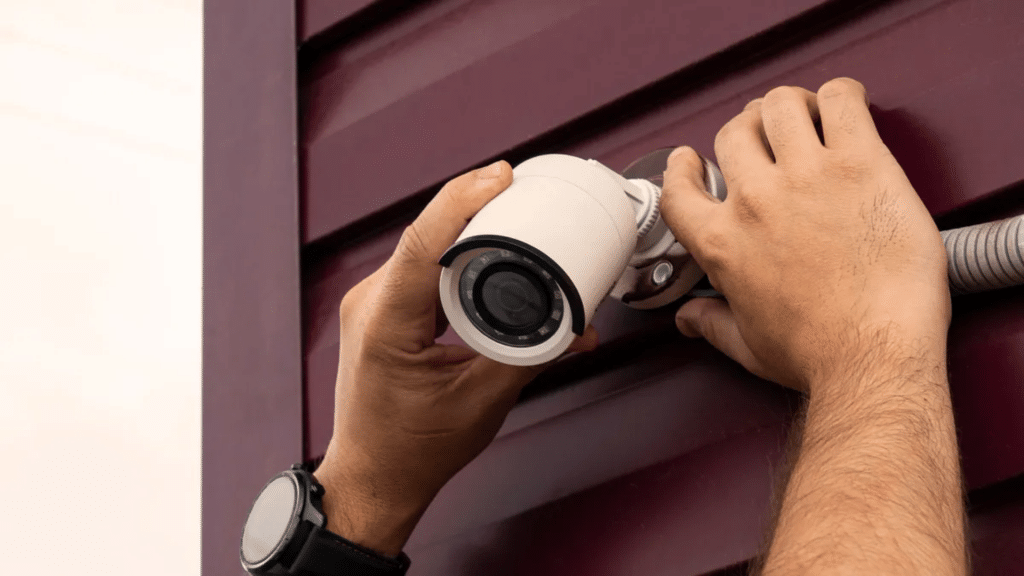
Step 6: Mount the Camera and Connect the PoE Cable

Connect the Ethernet cable to the camera’s PoE connector, then tuck any extra cable into the soffit to keep the area neat and free of clutter.
Secure the camera bracket with the provided screws, making sure it sits firmly and doesn’t shift.
Once the bracket is tight, use the Allen key to adjust the camera angle so it faces the right direction. You can make small changes later after checking the live feed.
This step finishes the physical setup and gets your camera ready for testing.
Step 7: Repeat the Installation for All Cameras

Follow the same process for every remaining camera by marking the spots, drilling the holes, feeding the cable, mounting the bracket, and adjusting the angle.
As you finish each one, the Ethernet cables will gather inside the loft, which makes them easier to sort and guide later.
Repeating the steps also helps you work faster because the routine becomes more familiar.
Once all the cameras are in place and secured, you can start routing the cables toward the NVR and move on to completing the full system setup.
Step 8: Choose Your Cable Route to the NVR

Decide how you want to bring the Ethernet cables from the loft to the NVR.
You can hide them behind a downpipe, run them through a false downpipe, or route them indoors using trunking. The best choice depends on your home layout and how clean you want the setup to look.
Pick the option that gives easy access, protects the cables, and keeps everything tidy.
Once you know the route, you can start preparing the path and guiding the cables toward the NVR.
Step 9: Pull the Cables Down the Wall Using Trunking

Drill a hole near the top of the wall where the cables will enter the room. Use a cable rod to reach into the loft, attach each Ethernet cable, and pull them down one by one.
Place the cables neatly inside the trunking and snap the cover back on to keep the area tidy.
This approach gives you a clean, organized path that leads straight to the NVR without leaving loose or visible cables hanging.
It also makes the setup easier to maintain later.
Step 10: Connect All Cables to the NVR

Plug each camera’s Ethernet cable into the matching port on the NVR.
Connect the router’s Ethernet cable, the HDMI cable for your monitor, and the USB mouse.
Power on the NVR, and all camera feeds should appear on the screen. This confirms that the installation is successful and that the system is communicating correctly.
Completing this step sets up the entire network, allowing you to begin adjusting angles and settings afterward.
Step 11: Fine-Tune Camera Angles and Settings

Once the live feed loads, adjust each camera angle to capture the right areas.
Use the system’s menu to fine-tune features like spotlight control, image settings, motion sensitivity, and detection zones.
Making these adjustments helps you reduce false alerts and improve the overall video quality.
Take your time to check each camera feed and ensure it covers the intended area clearly and effectively for the best performance.
This tutorial is based on a helpful video by The DIY Guy. You can check out the original video on their YouTube channel here or watch it below.
Set up Your CCTV System After Installation
After placing and connecting all your cameras, the next step is getting the system ready for daily use. These simple setup tasks help your CCTV system run smoothly and give you reliable monitoring.
1. Connect and Verify the System
After powering on your NVR, check that every camera feed appears clearly on your screen.
Use the system menu to confirm that each camera is connected to the correct port and responding properly.
If one doesn’t show up, recheck the Ethernet cable or try another port. Naming each camera by location, such as front door or driveway, makes navigation easier later.
This quick verification ensures your full system is working before adjusting any settings.
2. Adjust Detection and Recording Settings
Your CCTV system becomes more effective once you fine-tune its motion and recording options.
Open the settings and adjust the motion sensitivity so the system reacts to movement without sending unnecessary alerts.
You can also create detection zones to avoid busy areas that trigger constant notifications.
Check whether you want continuous or motion-based recording. These adjustments help you capture useful footage, minimize false alerts, and keep your storage organized for long-term use.
3. Set Up the Mobile App for Easy Monitoring
Download the recommended mobile app and link it to your system using your login details.
Once connected, you can view live footage, review recordings, and adjust settings right from your phone. The app makes it easier to monitor your home without relying on the NVR screen.
You can customize notifications, switch between camera views, and manage features remotely.
Setting up the app gives you convenient access and completes your overall CCTV system setup.
Helpful Tips for a Smooth CCTV Setup
These easy tips help you keep your CCTV system working well after installation. Use them to avoid small issues and get better performance from your cameras.
- Place outdoor cameras under a soffit or roof edge to protect them from rain, sun, and moisture.
- Keep all cables secure using clips, trunking, or ties to prevent damage or tangling.
- Seal cable entry points properly so water or insects can’t enter your soffit or loft.
- Adjust motion sensitivity if you receive too many alerts from cars, pets, or shadows.
- Clean the camera lenses occasionally to maintain clear video, especially outdoors.
- Review your storage settings to ensure you always have enough space for recordings.
- Update your app or NVR firmware when prompted to keep features and security up to date.
Conclusion
Setting up your own CCTV system becomes much easier when you follow each step with a clear plan.
After installing the cameras, connecting the cables, and completing the setup through the NVR and app, you end up with a system that works smoothly for daily monitoring.
Simple tasks like checking camera angles, adjusting detection settings, and keeping cables secure help your setup stay reliable over time.
With the right tools and guidance, you can handle the full installation confidently and avoid the need for professional help.
Your system is now ready to record, alert, and protect the areas you care about most.
This process may look complex at first, but once you break it down, you’ll see how manageable it is from start to finish.