Private messages are not meant for random eyes. A quick look at your screen can reveal bank alerts, OTPs, personal chats, or photos you would rather keep to yourself.
Even if your iPhone has Face ID enabled, there are moments when someone grabs it before auto lock kicks in. That is when extra protection starts to matter.
This blog breaks down what is actually possible on iPhone and what is not, regarding iMessage and other third-party apps, but there are smart ways to lock it using system features.
Both official options and simple workarounds will be covered. Common issues, limits, and what people are saying in forums will also be explained.
By the end, it will be clear which method fits best and what to expect after setting it up.
Understanding Face ID and Message Security
Face ID is Apple’s facial recognition system. It scans the face and unlocks the device within seconds.
It also works with Apple Pay, password autofill, and some apps that support biometric security. The system uses the front camera and depth sensors to confirm identity before granting access.
Securing the entire phone with Face ID means everything inside the device is protected when it is locked. Once unlocked, all apps can be opened freely unless extra restrictions are set.
This is where message security becomes different. Locking the phone is not the same as locking a single app like Messages.
App-level protection requires additional settings. That is why many users look for ways to control access to iMessage separately instead of relying only on the main device lock.
Can You Lock iMessage with Face ID?
The short answer is no, because there is no built-in setting in the Messages app that lets you lock it separately with Face ID.
Apple does not provide a simple toggle labeled “lock iMessage only”. By default, Apple handles privacy at the device level.
However, on iPhones running iOS 18 or later, users can lock individual apps, including Messages, by enabling “Require Face ID” in the app’s menu.
When Face ID is enabled, the entire phone stays protected until it is unlocked. Notifications can also be set to hide previews on the lock screen.
This adds another layer of privacy without locking a specific app. Locking the phone and locking an app are two different things.
Once the phone is unlocked, apps open freely unless extra restrictions are added. That is why users often look for additional methods to control access to Messages separately.
How to Put Face ID on Messages Using App Lock
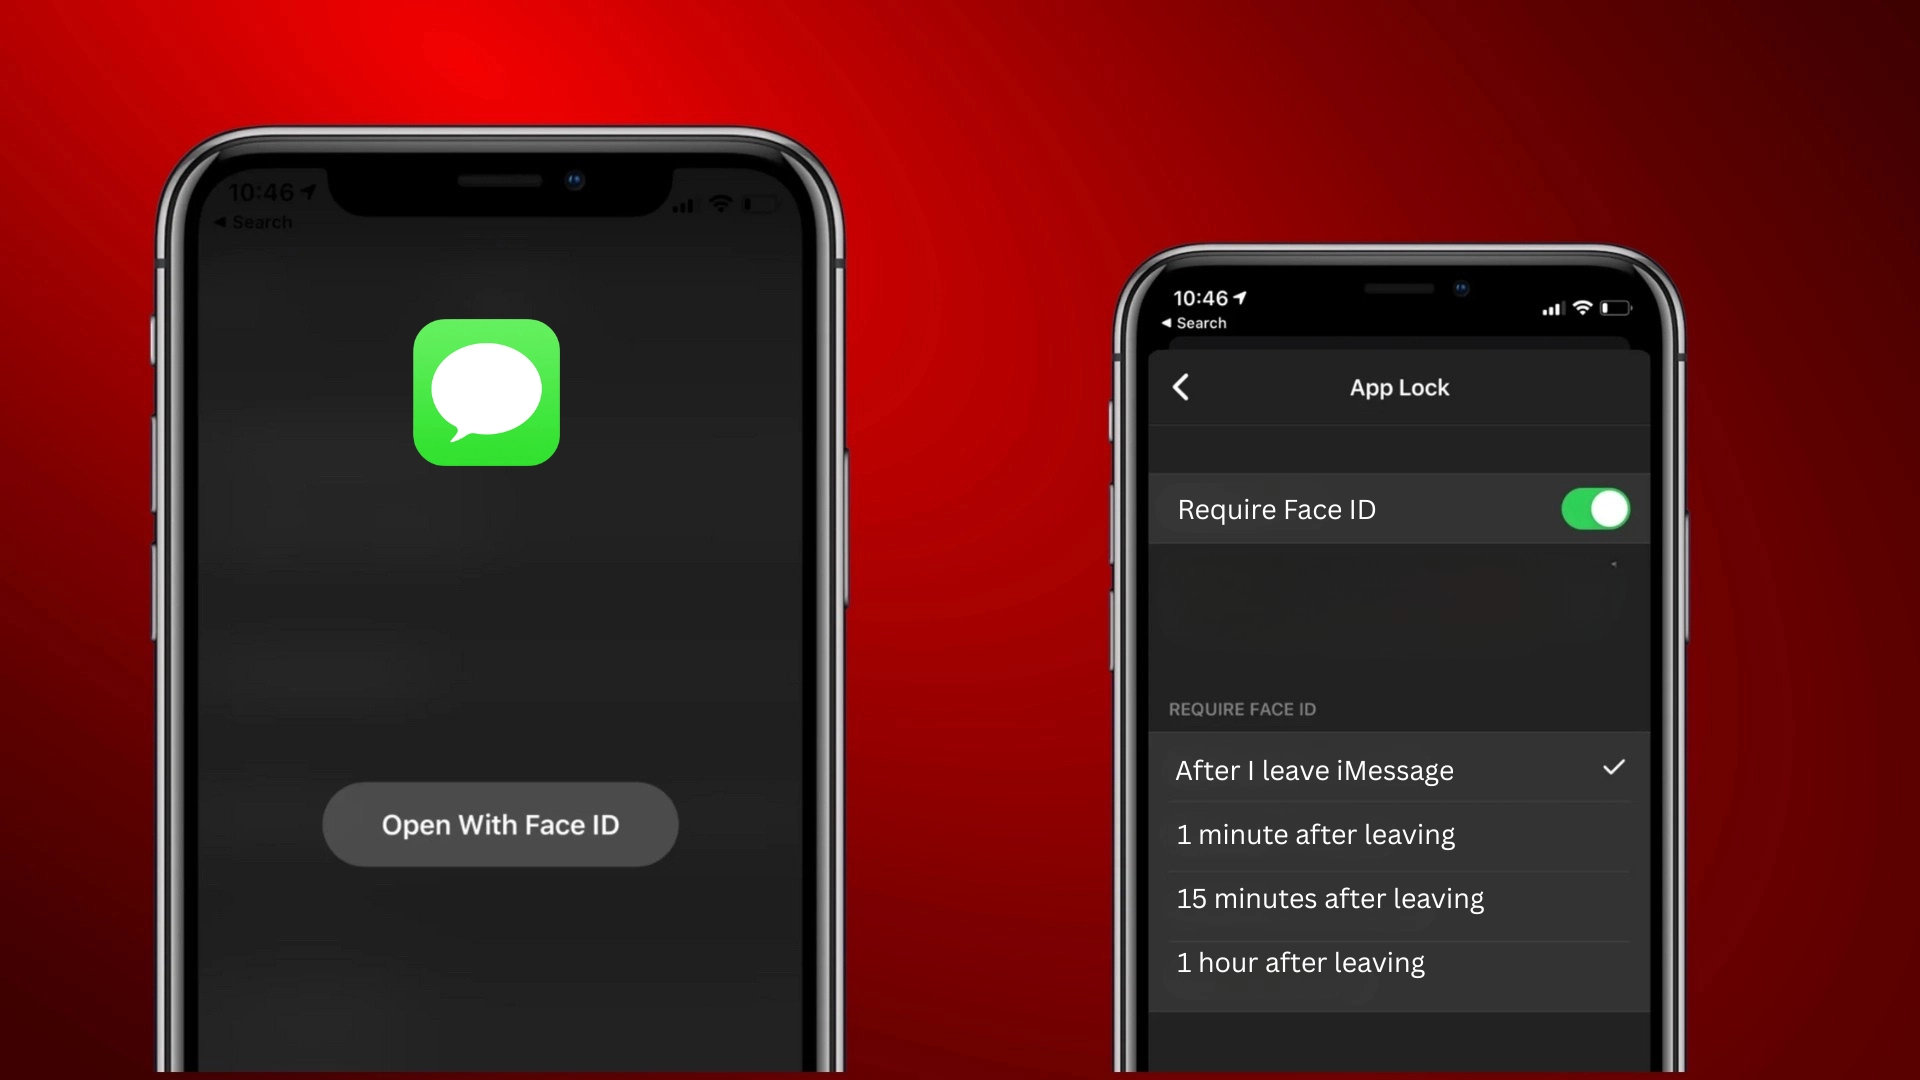
If the device supports iOS 18 or later, Messages can be locked directly using the new App Lock feature. The setup takes less than a minute.
Step 1: Find the Messages app on the Home Screen or App Library.
Start by locating the Messages app. It may be on the main Home Screen, inside a folder, or in the App Library if apps are organized automatically.
Swipe left through the Home Screens to access the App Library if needed. Make sure the correct app is selected, since the feature works per app.
Once found, do not open it. The lock setting is accessed by interacting with the app icon itself, not from inside the Messages settings.
Step 2: Press and hold the Messages app icon.
Touch and hold the Messages app icon until a quick action menu appears. This menu usually shows options related to the app.
Keep holding for a second until the menu expands fully. Do not drag the icon. The goal is to trigger the context menu that gives access to additional controls.
This is where the App Lock option becomes visible on supported devices running the correct iOS version.
Step 3: Tap “Require Face ID.”
In the quick action menu, look for the option labeled Require Face ID. Tap on it once.
The system may show a confirmation message explaining that the app will require Face ID or the device passcode to open.
Read the prompt carefully so the feature is clearly understood. This step activates the security layer for Messages and links it directly with Face ID authentication.
Step 4: Confirm with Face ID to finish.
After selecting the option, the phone will ask for Face ID verification. Look at the screen so the system can scan and confirm identity.
If Face ID does not work at that moment, the device passcode can be entered instead. Once verified, the setting is applied instantly.
From that point forward, every attempt to open Messages will require Face ID or the passcode before chats become visible.
Using Screen Time to Lock Messages on Older iPhones
On older iOS versions, it is possible to restrict access to Messages using Screen Time, but it does not work as a true Face ID lock.
Screen Time allows you to set a time limit for specific apps, including Messages. Once the limit is reached, the app becomes unavailable unless the Screen Time passcode is entered.
This creates an extra step before someone can open the app. However, this method depends on a separate passcode, not Face ID.
It also requires setting a very short daily limit so the restriction triggers quickly. While it adds a layer of control, it is more of a workaround than a built-in biometric lock.
Users looking for full Face ID protection need iOS 18 or later for proper app-level security.
Alternative Ways to Secure Your Messages
If locking the app is not enough, a few extra settings can improve message privacy and reduce unwanted access or exposure.
- Hide Lock Screen Previews: Open Settings, tap Notifications, select Messages, choose Show Previews, and set it to When Unlocked or Never to stop content from appearing on the lock screen.
- Disable Notification Banners: Go to Settings, tap Notifications, choose Messages, and turn off banners or alerts so incoming texts do not briefly display while someone is using the phone.
- Filter Unknown Senders: In Settings under Messages, enable Filter Unknown Senders to separate unknown numbers into a different list and reduce clutter in the main conversation view.
- Enable Two Factor Authentication: Open Settings, tap your Apple ID, select Sign In and Security, and turn on Two Factor Authentication to protect iCloud synced messages from unauthorized access.
How to Put Face ID on Messages: What Users Are Saying
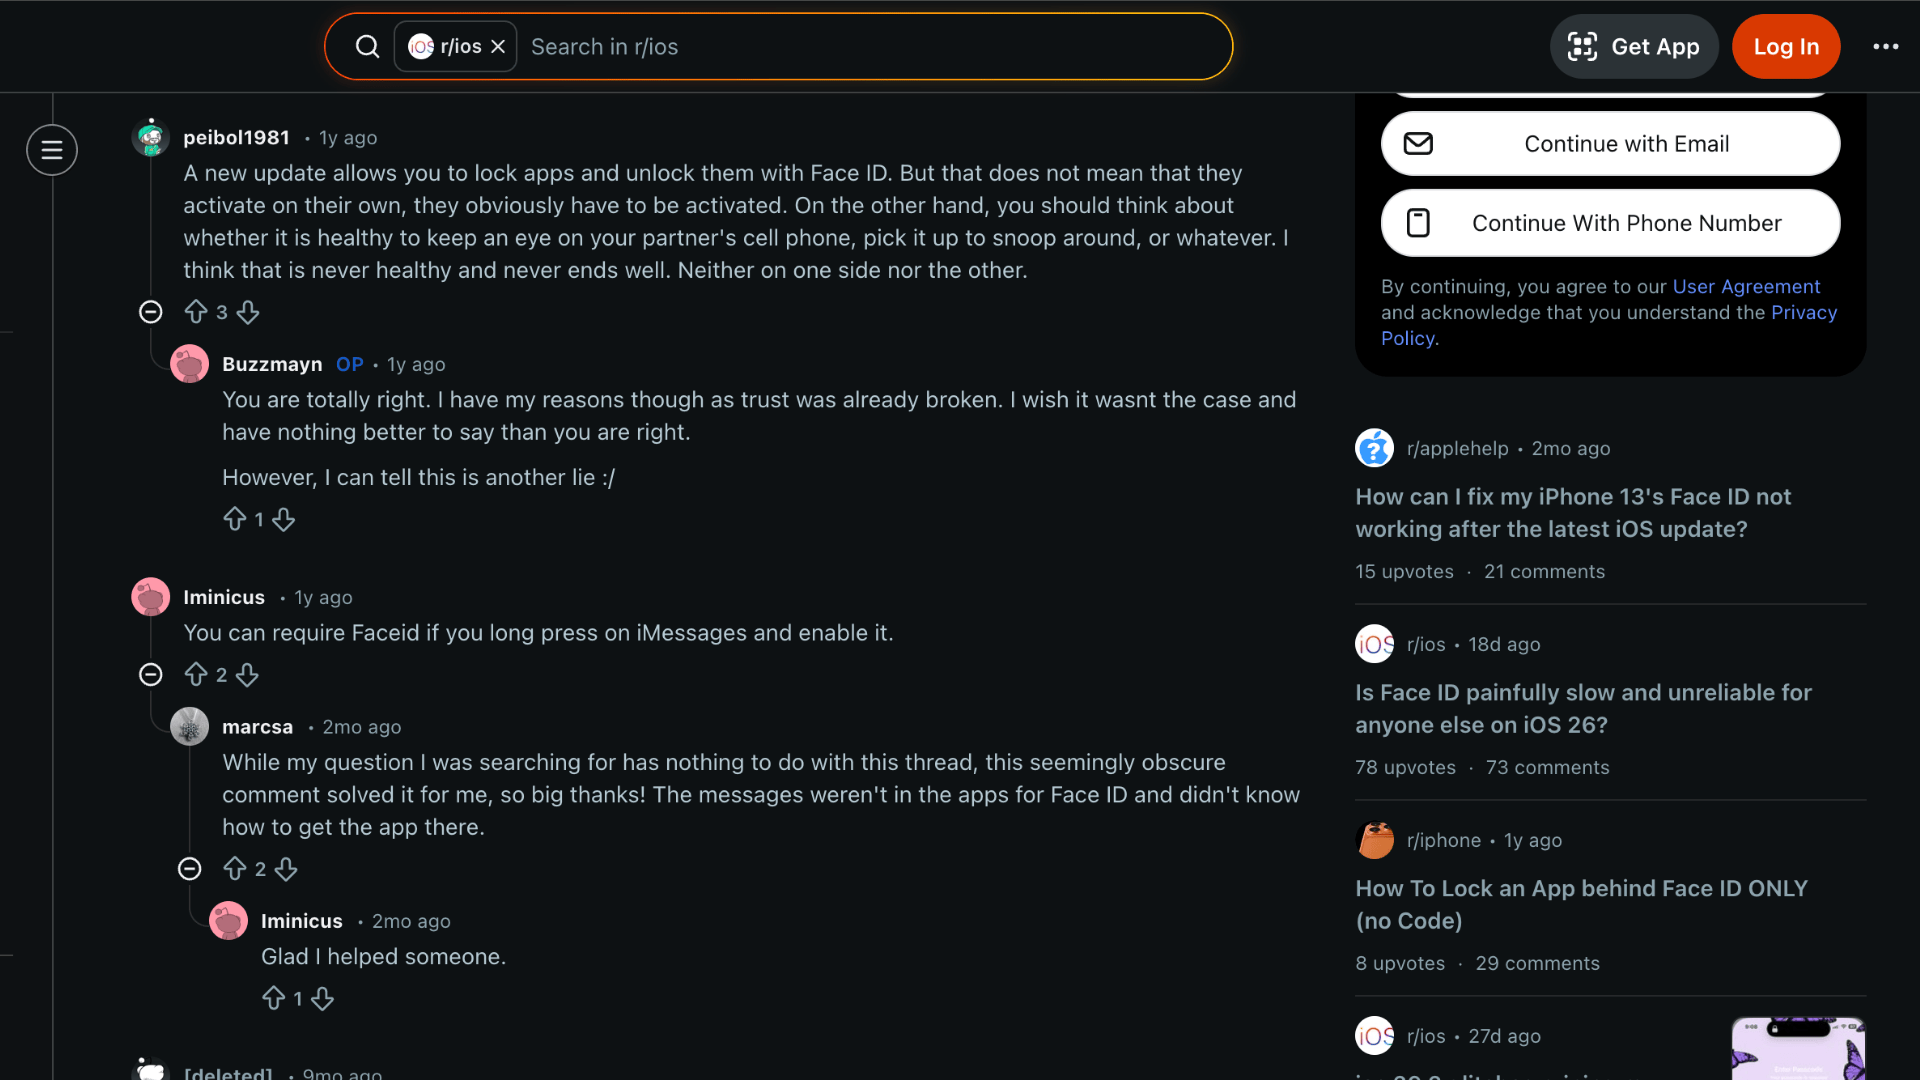
Many users on community platforms such as Reddit and Apple Community point out that the latest iOS update lets apps be locked and unlocked with Face ID, but the feature does not turn on automatically.
It has to be enabled manually for each app. Some mention that learning how to put Face ID on messages is simple once the option is found by long pressing the iMessages icon and turning on Require Face ID.
Others agree that individual apps can be secured with face recognition and believe Apple should expand this control further.
A common concern is someone picking up an unlocked phone before the auto lock kicks in. In those moments, an added layer on communication apps feels necessary.
For anyone searching for how to put Face ID on messages, these discussions show why the feature matters.
Common Issues with Face ID on Messages
Even after setting everything correctly, some users face small glitches or confusion while trying to secure Messages with Face ID or other privacy settings.
- Face ID Not Prompting: Make sure App Lock is enabled for Messages, and the device runs iOS 18 or later. Face ID will not trigger separately.
- App Lock Option Missing: If Require Face ID does not appear, check the iOS version and confirm the feature is available in your region and device model.
- Screen Time Passcode Forgotten: When using Screen Time as a workaround, forgetting the passcode can block access and require Apple ID recovery steps.
- Face ID Not Recognizing: Poor lighting, face changes, or blocked sensors can stop Face ID from working properly, requiring a reset in Face ID settings.
- Message Previews Still Visible: Even with app locking enabled, lock screen previews may still show unless notification preview settings are adjusted manually.
Conclusion
How to put Face ID on messages comes down to choosing the method that fits the device and privacy needs.
iOS 18 users can rely on the built-in App Lock feature for direct protection. Those on older versions can use Screen Time as a workaround, even though it has limits.
Extra steps like hiding previews, filtering unknown senders, and enabling two-factor authentication add another layer of safety.
Each option works differently, so the right choice depends on how strict the privacy setup needs to be. Some may only want to stop casual access, while others prefer tighter control over synced data and notifications.
Which method worked best for your setup? Drop your experience or questions in the comments below.