Neon signs have outgrown their role as wall art. By early 2026, photographers, podcasters, streamers, and designers will be treating it as a working studio tool that adds depth, mood, and brand recognition to their creative spaces.
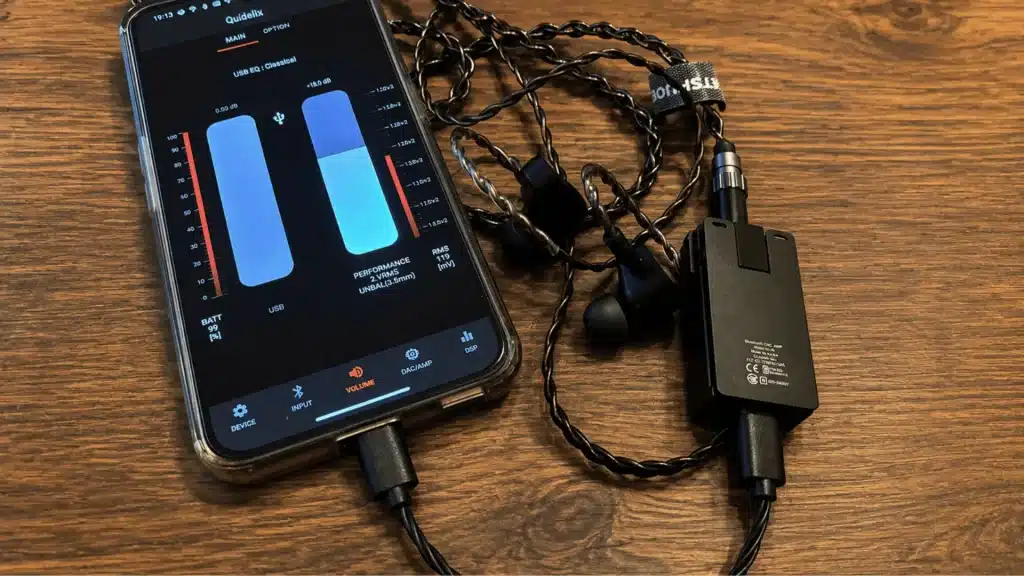
The turning point? LED neon flex got good enough. It delivers that familiar glow without the heat, the buzzing transformer noise, or the risk of shattering a glass tube mid-session. Today’s studio-grade neon signs run on low-voltage power (12V or 24V DC), stay cool enough to touch, and can sync with music or respond to voice commands through Alexa and Google Assistant.
This guide covers seven practical methods for layering neon light signs inside a studio. You’ll learn how color temperature shifts the feel of a room on camera, why your three-point lighting setup actually benefits from a neon accent, and which smart features are worth paying for as a content creator.
Whether you’re building out a podcast set or rethinking a photography studio, these techniques will help you use neon with purpose.
Why Does Layered Lighting Change Everything in a Studio?
Most studios lean on a single light source. That’s a missed opportunity. Layered lighting means combining multiple sources at different intensities and positions to create a dimension that flat, even lighting can’t replicate.
The concept builds on three-point lighting, a standard framework in photography and videography: a key light as your primary source, a fill light to reduce harsh shadows, and a backlight to separate your subject from the background.
The neon sign introduces a fourth layer. Think of it as an atmosphere light. It’s a controlled wash of color that sets the mood behind or around your subject without competing with your key light.
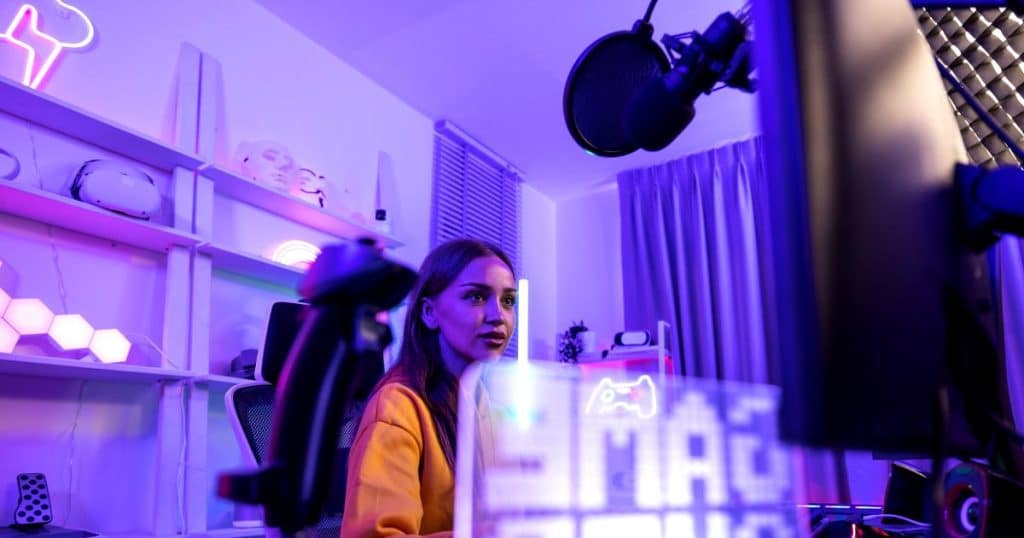
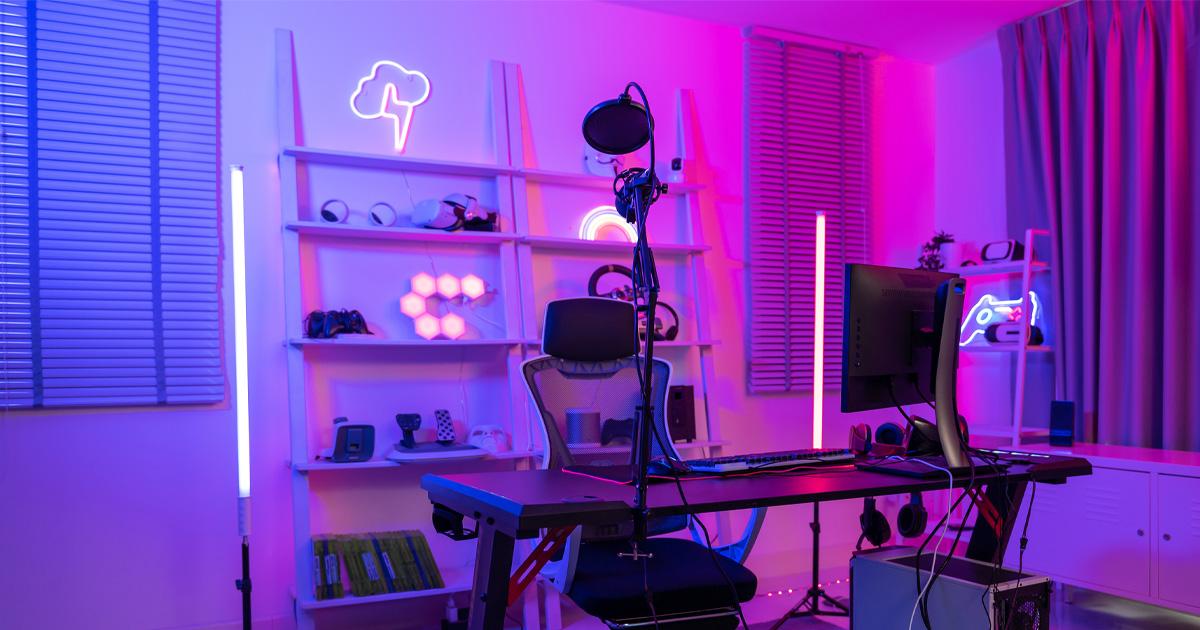
Here’s the practical difference: a studio lit with just overhead panels looks functional. Forgettable, even. Mount a warm neon strip behind a shelf or hang a custom logo neon sign on the back wall, and suddenly the space has character. It feels intentional.
Phillip “Zain” Dias Jr., a creative professional and photographer based in New Jersey, has described how the neon lights in his studio serve as a source of motivation while complementing the room’s darker tones, creating what he calls “an inspiring and intentional atmosphere”. That kind of environmental detail is exactly what layered lighting achieves.
How Does LED Neon Flex Compare to Traditional Glass Neon for Studios?
This comparison matters far more than appearance if you’re running a studio.
Traditional glass neon requires high voltage to ionize the gas inside its tubes. The typical operating range is 3,000 to 15,000 volts, depending on tube length and gas type. Surface temperatures reach 60–80°C. And there’s an audible transformer buzz that will absolutely ruin your audio recordings.
For any space where a microphone is live, glass neon is a dealbreaker.
LED neon flex operates at just 12V or 24V DC. It stays cool; surface temperatures max out around 40°C. It runs silently. And it’s shatterproof because it’s made from flexible silicone or PVC rather than fragile glass tubing.
Glass neon still has one genuine advantage: that 360-degree glow and the handcrafted imperfections that give it an authentic vintage look. Some designers genuinely prefer it for that reason. But for daily studio use where cameras and microphones are active, LED neon flex is the practical standard.
What Role Does Color Temperature Play in Studio Neon?
Color temperature, measured in Kelvin (K), controls whether a light source reads warm (yellowish) or cool (bluish) to both your eyes and your camera sensor. Get this wrong in a studio, and everything looks off on screen. The entire mood shifts in ways viewers feel but can’t articulate.
Warm light sits in the 2,700K to 3,000K range. That amber, candle-like glow works well for studios focused on relaxation content, beauty videos, or hospitality shoots.
A 2022 experimental study found that warm light at 3,000K combined with higher illuminance (590 lux) made subjects feel most comfortable. If you’re trying to create an inviting on-camera environment, that’s a useful data point.
Cool light runs between 5,000K and 6,500K, closer to midday sunlight. Studios that need precision favor cooler temps. Product photography, tech reviews, anything where accurate color reproduction and visual clarity matter more than atmosphere.
Most LED neon signs for studios fall in the warm-to-neutral range by default. But you’re not stuck there. RGB and tunable-white LED neon options let you adjust color temperature on demand, so one sign can shift between a warm 2,700K for interview segments and a neutral 4,000K for product shoots.
How Can Content Creators Use Neon for On-Camera Branding?
Neon signs have become a fixture in creator studios because they solve two problems at once: lighting and branding. A custom sign displaying your channel name, logo, or catchphrase reinforces your visual identity in every single frame. Viewers start associating that glow with your content before you say a word.
This trend picked up real speed through 2025 and into 2026. Creators on Twitch, YouTube, and TikTok are investing in custom LED neon because it photographs well on webcams and instantly makes even a bedroom studio look polished.
Some creators have requested inverted sign designs so the text reads correctly through a mirrored webcam feed. That’s how central neon has become to stream setups.
Instagram analytics tools show a 28% increase in engagement for posts featuring custom neon signage in the background. The sign becomes content itself.
Neon Designs, one of the booming custom neon sign companies, has worked with podcasters and YouTube creators to produce branded backdrop signs. Their cases show that posts and videos featuring neon signs generate noticeably higher engagement. The sign itself becomes part of the content.
When ordering neon for a studio, think about size relative to your camera frame. Too small and it vanishes behind you. Too large and it overpowers the shot. For text-based custom neon, a sign under 2 feet typically runs $140–$350. Mid-range pieces between 2 and 3.5 feet cost $350–$600.
Larger signs over 3 feet can cost $600–$1,500 or more, and logo-based or intricate designs can push prices even higher.
What Are the 7 Practical Ways to Layer Neon Light in Your Studio?
Theory stops here. Each method below treats neon as one component in a larger lighting composition. Not the main source. A purposeful layer.
1. Background Accent Wall
Mount a neon sign directly behind your subject position. This serves as the “atmosphere layer” in a three-point setup, adding color depth to what would otherwise be a flat backdrop. Keep brightness dimmed to around 30–50% so it doesn’t blow out on camera.
If your key light is set to 5,600K, a warm neon accent at 3,000K creates a pleasing contrast without color-clashing.
Setup step: Use a wall-mount bracket positioned 6–12 inches above head height. Plug into a dimmer-compatible power supply to adjust intensity between takes.
2. Shelf Edge Glow
Run LED neon flex strips along the edges of shelving or bookcases behind your desk. This creates graduated light; bright near the strip, fading into shadow further away. The result is visual depth without adding another fixture to your rig.
Setup step: Measure each shelf edge first. Cut neon flex at the marked cutting intervals (typically every 50mm for most strips). Secure with adhesive clips every 15–20cm to avoid sagging. Use a 24V strip if your total run length exceeds 3.6 meters from one power end.
3. Color Zone Separation
Place two different neon colors on opposite sides of your studio. Warm pink on the left, cool blue on the right, for example. This creates a cinematic split-tone look that cameras respond to extremely well. RGB neon makes this adjustable on the fly.
Setup step: Position each color source at roughly the same height, but angle them slightly inward (about 20–30 degrees) toward your subject. This way, both colors subtly wash across your face rather than only lighting the walls behind you.
4. Frame-Within-a-Frame
Shape LED neon flex into a geometric outline behind your shooting position. A rectangle, arch, or circle. This creates a visual “frame” that pulls the viewer’s eye toward you, functioning like a rim light but with creative flair.
Setup step: Sketch your shape on the wall with painter’s tape first. Then bend the neon flex along the guide. Silicone-jacketed neon flex typically allows a minimum bend radius of 50mm, so plan gentle curves rather than sharp corners.
5. Under-Desk or Low-Mount Glow
Place neon flex beneath your desk or along the floor line. This uplighting technique creates dramatic wall shadows and adds a moody atmosphere for nighttime streams or low-key content. Subtle on its own; very effective on camera.
Setup step: Attach strips to the underside of the desk using adhesive mounting clips. Face the LEDs downward toward the floor, not outward toward the camera. This prevents glare on your lens and keeps the glow indirect.
6. Key Light Companion
Don’t replace your key light with a neon sign. Complement it. Position a small neon sign off to one side as a colored fill that adds warmth or coolness to the shadows cast by your primary light. This adapts the fill light concept from three-point setups, but replaces a neutral fill with neon’s color character.
Setup step: Place the neon sign at a 45-degree angle from your subject, opposite your key light. Set it to approximately 20–30% brightness. You want it to color the shadows, not compete with the key test by looking at the shadow side of your face on the camera monitor.
7. Smart-Controlled Scene Switching
Use app-controlled or voice-activated RGB neon signs to change your entire studio mood between segments. Today’s smart neon signs work with Alexa and Google Assistant, support music sync, and offer 16 million or more color options. Record an interview segment in warm white. Switch to vibrant blue for a gaming segment; there’s no need to touch a single fixture.
Setup step: Connect your smart neon to your home Wi-Fi network (2.4 GHz; most smart neons don’t support 5 GHz). Create preset scenes in the manufacturer’s app. Name them clearly: “Interview Warm,” “Gaming Blue,” “Podcast Neutral.” During recording, trigger scene changes by voice command or a quick app tap between segments.
How Do Smart Features Make Studio Neon More Practical?
For studio use, the ability to control brightness, color, and effects without standing up mid-take is genuinely useful during production.
Modern RGB LED neon signs ship with remote controls and smartphone app connectivity. Most remotes cover the basics: on/off, brightness, color selection, speed controls for dynamic modes, and preset scene buttons.
App integration goes further. Bluetooth and Wi-Fi connectivity let you tweak settings from your phone while you’re still seated and mic’d up.
Voice control through Alexa or Google Assistant adds real convenience. Say “Alexa, set studio neon to warm white” before a podcast recording.
Switch to “Alexa, set studio neon to blue pulse” before a gaming session. That kind of flexibility used to require separate fixtures and manual dimmers. Now it’s a voice command.
Music sync mode matters for specific creators. DJs, music producers, and streamers who want reactive visuals behind them will find value here. The neon shifts color in response to audio input, creating a backdrop that moves with the beat.
One practical consideration before buying: not all smart neon signs support the same ecosystem. Some use Bluetooth only, which limits range. Others connect over Wi-Fi for better integration with a smart home hub. A few support both. If your studio already runs smart lighting through a central hub, Wi-Fi-enabled neon will integrate smoothly.
What Should You Budget for a Studio Neon Setup?
Cost depends on the scope. Are you adding a single branded sign or building out a full layered lighting system?
For a single custom neon text sign under 2 feet, expect $140–$350. Mid-range signs between 2 and 3.5 feet cost $350–$600. Larger pieces over 3 feet can hit $600–$1,500 or more. Logo-based or complex designs push prices higher because of additional design labor and material costs. Traditional glass neon, by comparison, runs $1,000 to $8,000 or more for custom business signage in 2026.
LED neon flex strip, useful for shelf edges, under-desk glow, and geometric shapes, is sold by the meter and costs significantly less per unit than custom signage. Power consumption ranges from 4 to 15 watts per meter, so running costs stay low even if you run the lights 8+ hours daily.
With a lifespan of 50,000 to 100,000 hours, you’re looking at 10 to 17 years of use at 8 hours per day before replacement becomes a concern.
Personalized and custom neon sign designs continue to dominate the market heading into 2026. Expect more options built specifically for studio creators: inverted webcam-friendly designs, modular shapes that reconfigure between shoots, and app-controlled RGB signs with scene presets out of the box.
The technology has shifted neon from decoration to functional studio infrastructure. Budget accordingly. It’s not a splurge if it shows up in every frame of every project you produce.