Setting up your home with connected technology has become more accessible than ever.
Smart home system installation is a process many homeowners confidently handle themselves, saving money while gaining control over their living space.
Most installations require only basic technical skills and attention to detail, though proper preparation and patience remain essential for success.
The process becomes manageable when broken into smaller steps, each addressing specific tasks and common obstacles.
This blog explains planning, setup, automation, and security steps to help complete the installation without any professional help.
Following these methods helps ensure your system operates reliably from the start.
What is a Smart Home System?
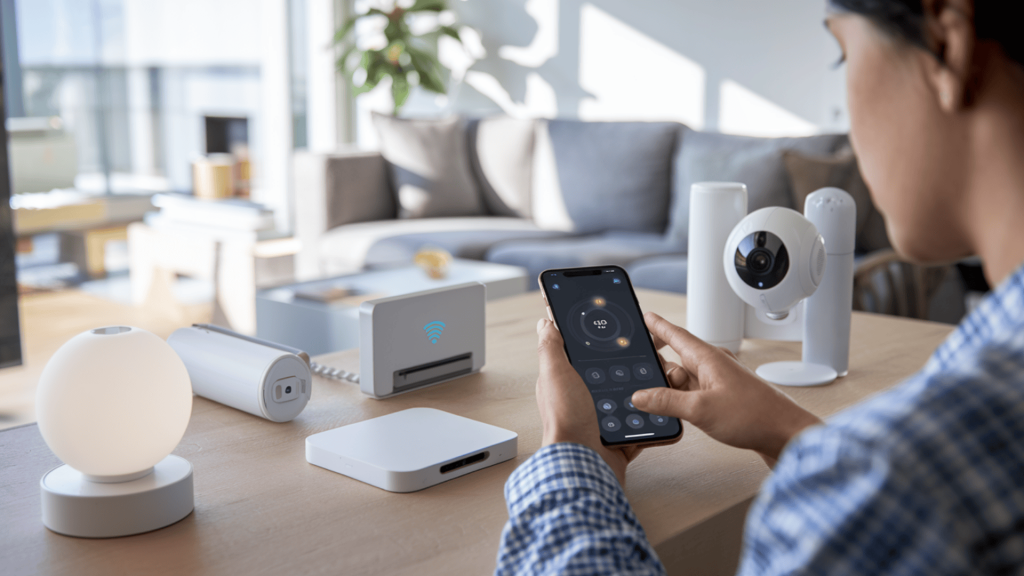
A smart home system is a network of connected devices that communicate and operate together through centralized control.
These devices link through wireless networks using a central hub, smartphone app, or cloud service that stores your settings and preferences.
The system allows you to control lights, thermostats, locks, cameras, and appliances from a single interface, simplifying daily operations.
Automation features enable devices to respond to schedules, sensors, or manual commands without constant input from you.
Remote access means you can monitor and adjust settings from anywhere with internet connectivity, providing convenience and peace of mind while away from home.
Easy Steps to Set Up a Smart Home System

Following a structured approach prevents confusion and reduces troubleshooting time during setup.
Step 1: Setting Up the Smart Hub or Control App
This step establishes the foundation that all other devices will connect to throughout your home.
Begin by downloading the manufacturer’s control application on your smartphone or tablet, then create a secure account using a strong password.
Connect your hub or primary controller to your wireless router using the provided cable or wireless pairing process.
Follow the on-screen prompts to name your home, set your time zone, and configure basic preferences.
Check for firmware updates immediately after initial setup, as manufacturers frequently release improvements that enhance performance and security.
Step 2: Connecting and Organizing Smart Devices
This phase involves adding each device to your system and creating a logical structure for easy control.
Place the first device into pairing mode following its specific instructions, which typically involves holding a button or power cycling the unit.
Wait for the app to detect and confirm the connection before moving to the next device.
Assign clear, descriptive names like “Living Room Lamp” or “Front Door Lock” instead of generic labels.
Group devices by room or function within the app to simplify navigation and control, making daily use more intuitive for everyone in your household.
Step 3: Configuring Automations and Schedules
This step adds intelligence to your system by allowing devices to operate without manual commands each time.
Create simple time-based rules first, such as lights turning on at sunset or thermostats adjusting before you wake.
Define triggers that activate multiple devices together, like an “Away” mode that locks doors, adjusts temperature, and activates security cameras simultaneously.
Test each automation several times at different times of day to confirm reliable operation.
Start with a few essential rules and add complexity gradually as you become comfortable with the system’s capabilities.
Step 4: Integrating Voice and Remote Controls
This step extends control options beyond the smartphone app for greater flexibility in daily use.
Link your smart home system to compatible voice assistants by enabling the manufacturer’s skill or action within the assistant’s app.
Grant the voice platform the necessary permissions to access your devices, then test basic commands such as “Turn off the bedroom lights” to verify proper communication.
Enable remote access features within your control app, which may require creating a cloud account or adjusting router settings.
Confirm you can control devices from outside your home network using cellular data before considering this step complete.
When Should You Hire a Smart Home Installer?
Some situations exceed typical DIY capabilities and benefit from experienced technicians who handle complex requirements safely.
Homeowners should consider professional help when smart home system installation involves electrical work, extensive networks, or specialized integration beyond basic setup.
- Extensive hardwiring needs
- Complex security integrations
- Large properties with coverage issues
- Whole-home system coordination
Smart home installers also provide warranties on their work and can troubleshoot complex issues that might be difficult to resolve independently.
How Much Does a Smart Home Installation Cost?
Smart home system installation costs vary significantly based on system complexity and the number of devices included.
Basic DIY setups with a hub and several devices typically range from $200 to $800, covering essential items like smart lights, plugs, and a thermostat.
Mid-range systems incorporating security cameras, door locks, and voice assistants may cost between $1,000 and $3,000.
Hiring a smart home installer adds extra expenses depending on labor requirements and customization needs.
Whole-home automation with integrated lighting, climate control, security, and entertainment systems can exceed to thousands.
This includes both equipment and professional configuration services.
Note: Prices may vary based on location, brand preferences, and current market conditions.
Common Installation Issues and Fixes
Many setup problems have straightforward solutions that don’t require starting over from the beginning.
- Connection failures: Move devices closer to the hub temporarily, restart both units, or verify matching wireless frequency bands.
- App delays: Close and reopen the app completely, enable background refresh in phone settings, or check internet stability.
- Unresponsive devices: Unplug devices for 30 seconds, install available firmware updates, or confirm unchanged router settings.
- Automation failures: Verify correct time zone settings, test each condition separately, or check device connectivity status.
- Network interference: Switch devices to less congested wireless channels, reduce distance from metal objects, or relocate the hub away from other electronics.
- Voice control issues: Re-link voice assistant accounts, confirm proper device naming conventions, or check microphone permissions in assistant settings
Conclusion
Completing a smart home system installation yourself provides both cost savings and valuable knowledge about how your connected devices function together.
With careful planning, patience, and basic technical skills, most homeowners can achieve excellent results.
Following structured setup, pairing, automation, and security steps creates a reliable system that improves daily convenience and home management.
Regular maintenance and gradual expansion allow you to refine your setup over time without overwhelming complexity.
Remember that even experienced users started with simple configurations before advancing to more advanced automations.
What questions do you have about the setup process?
Share your experiences, questions, or tips in the comments section below.