Too many car owners ignore small rust bubbles, only to face major bodywork expenses later.
That tiny orange spot noticed last month is already spreading underneath the paint, eating away at the metal structure.
The good news is that learning how to fix rust spots in a car doesn’t require professional skills or expensive equipment.
Basic tools and some patience are all that’s needed for quality results.
Most people assume rust damage means an expensive trip to the body shop, but with the right approach and patience, repairs can be handled at home for a fraction of the cost.
This blog covers identifying rust damage, proper surface preparation, complete repair techniques, and proven prevention methods to stop corrosion from returning.
What Causes Rust on a Car?
Rust forms when bare metal comes into contact with moisture and oxygen. Road salt accelerates this process significantly, especially in winter climates.
Paint chips from rock impacts are the most common entry point for corrosion.
Once the protective paint layer breaks, water seeps underneath, spreading rust beyond what’s visible on the surface.
Poor drainage around wheel wells, door bottoms, and rocker panels creates standing water that promotes rapid rust formation.
Even small scratches or bubbling paint indicate underlying corrosion that needs immediate attention before it spreads.
How to Fix Rust on a Car?
Rust repair follows a systematic approach that anyone can master with the right preparation. Each step builds on the previous one to create a lasting, professional-looking finish.
Step 1: Clean and Dry the Area
Start by spraying the rusted section with rubbing alcohol or adhesive remover to eliminate any wax, dirt, or oils.
This prevents contamination during sanding and ensures proper adhesion for body filler later.
Remove any plastic trim pieces near the rust to avoid accidental damage, and once cleaned, let the area dry completely before proceeding.
Check the rust depth after cleaning; surface rust requires less work than holes eaten through the metal.
Proper preparation at this stage determines the quality of your final repair, so take time to clean thoroughly and inspect carefully.
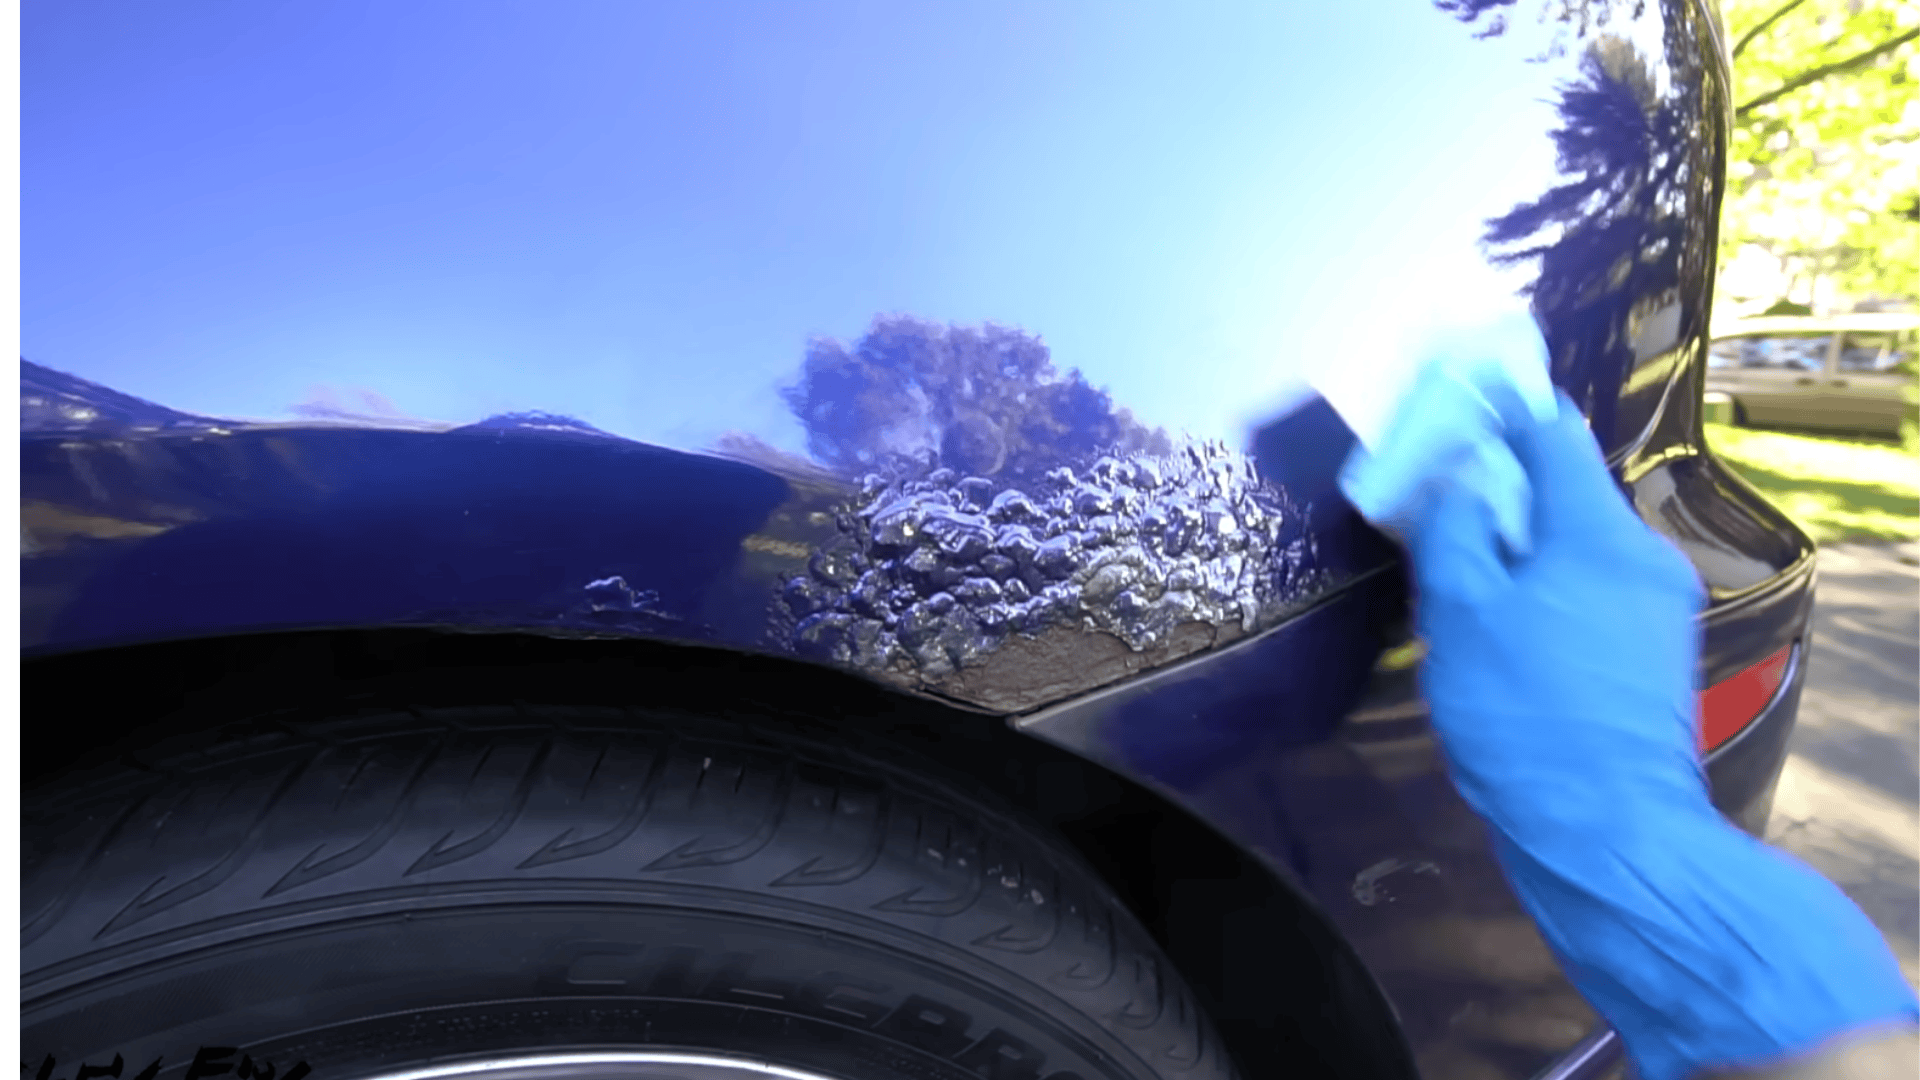
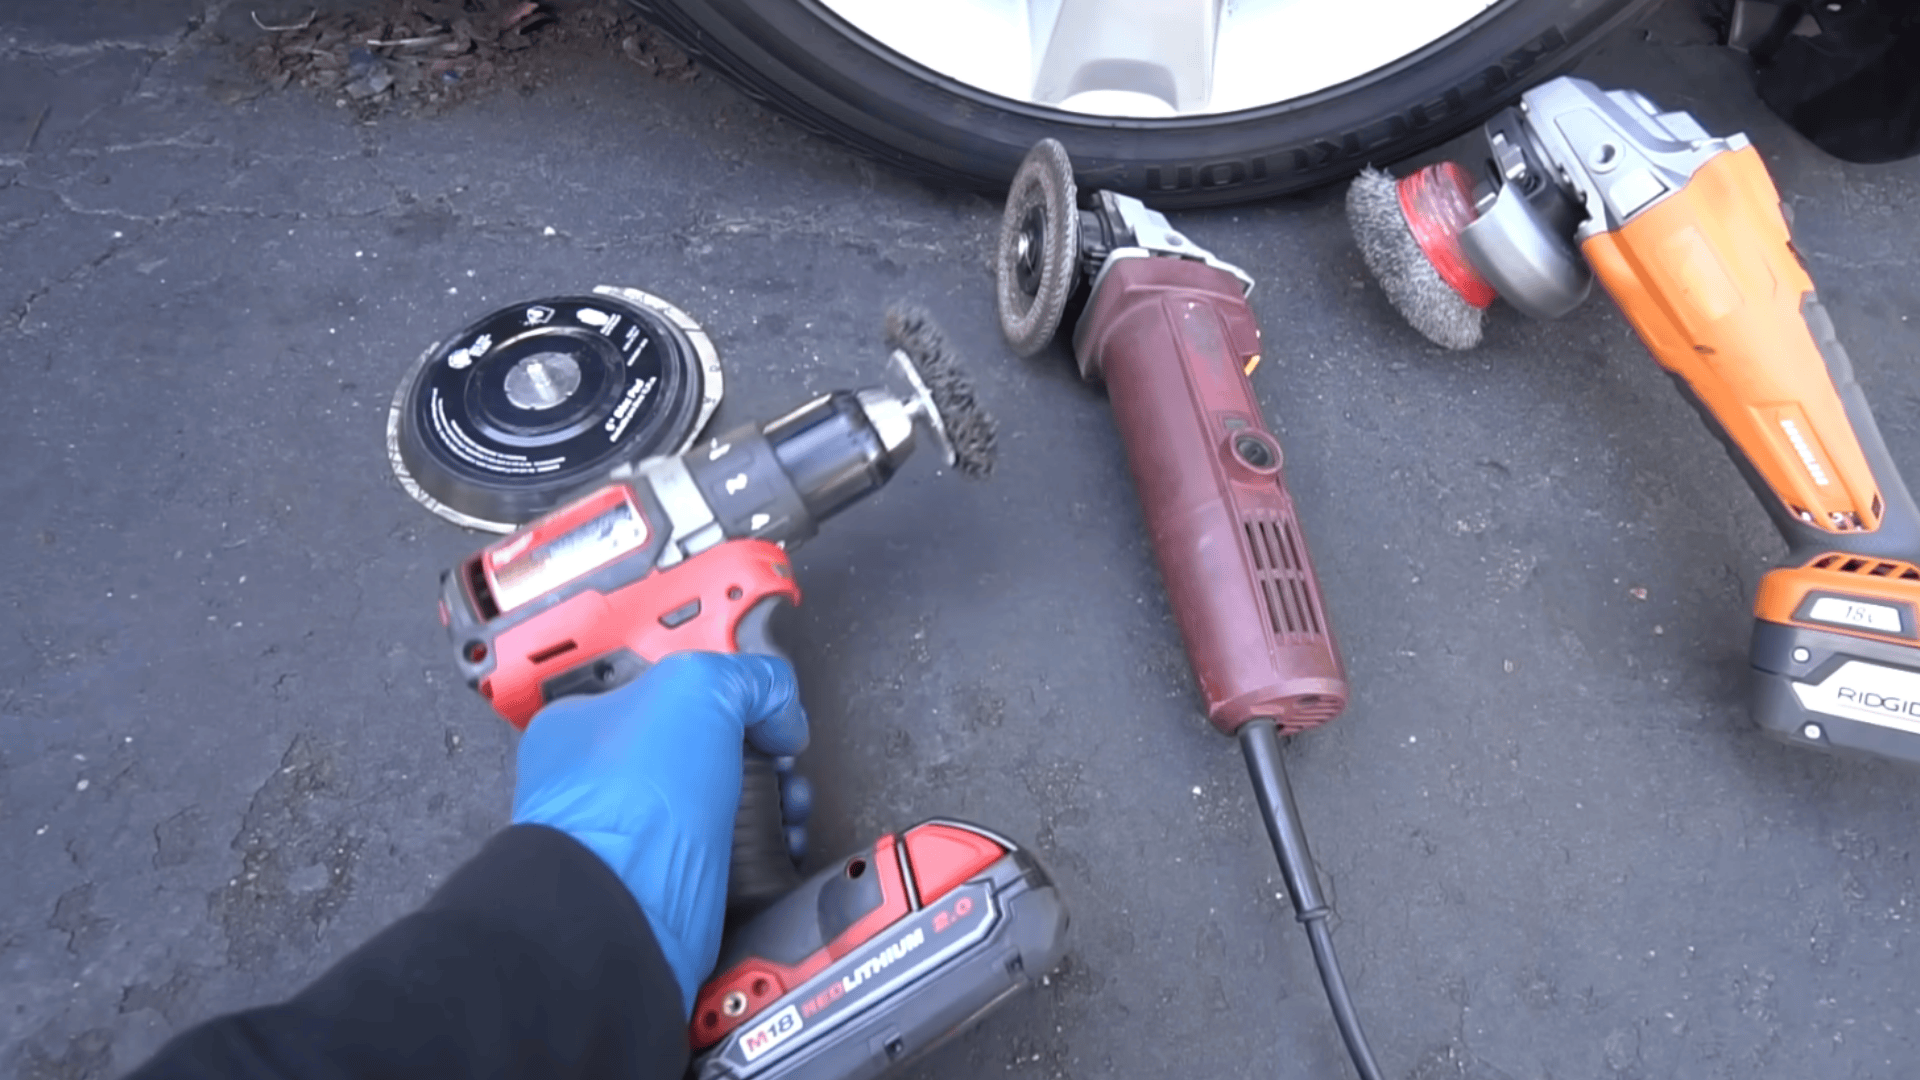
Step 2: Sand Down the Rust
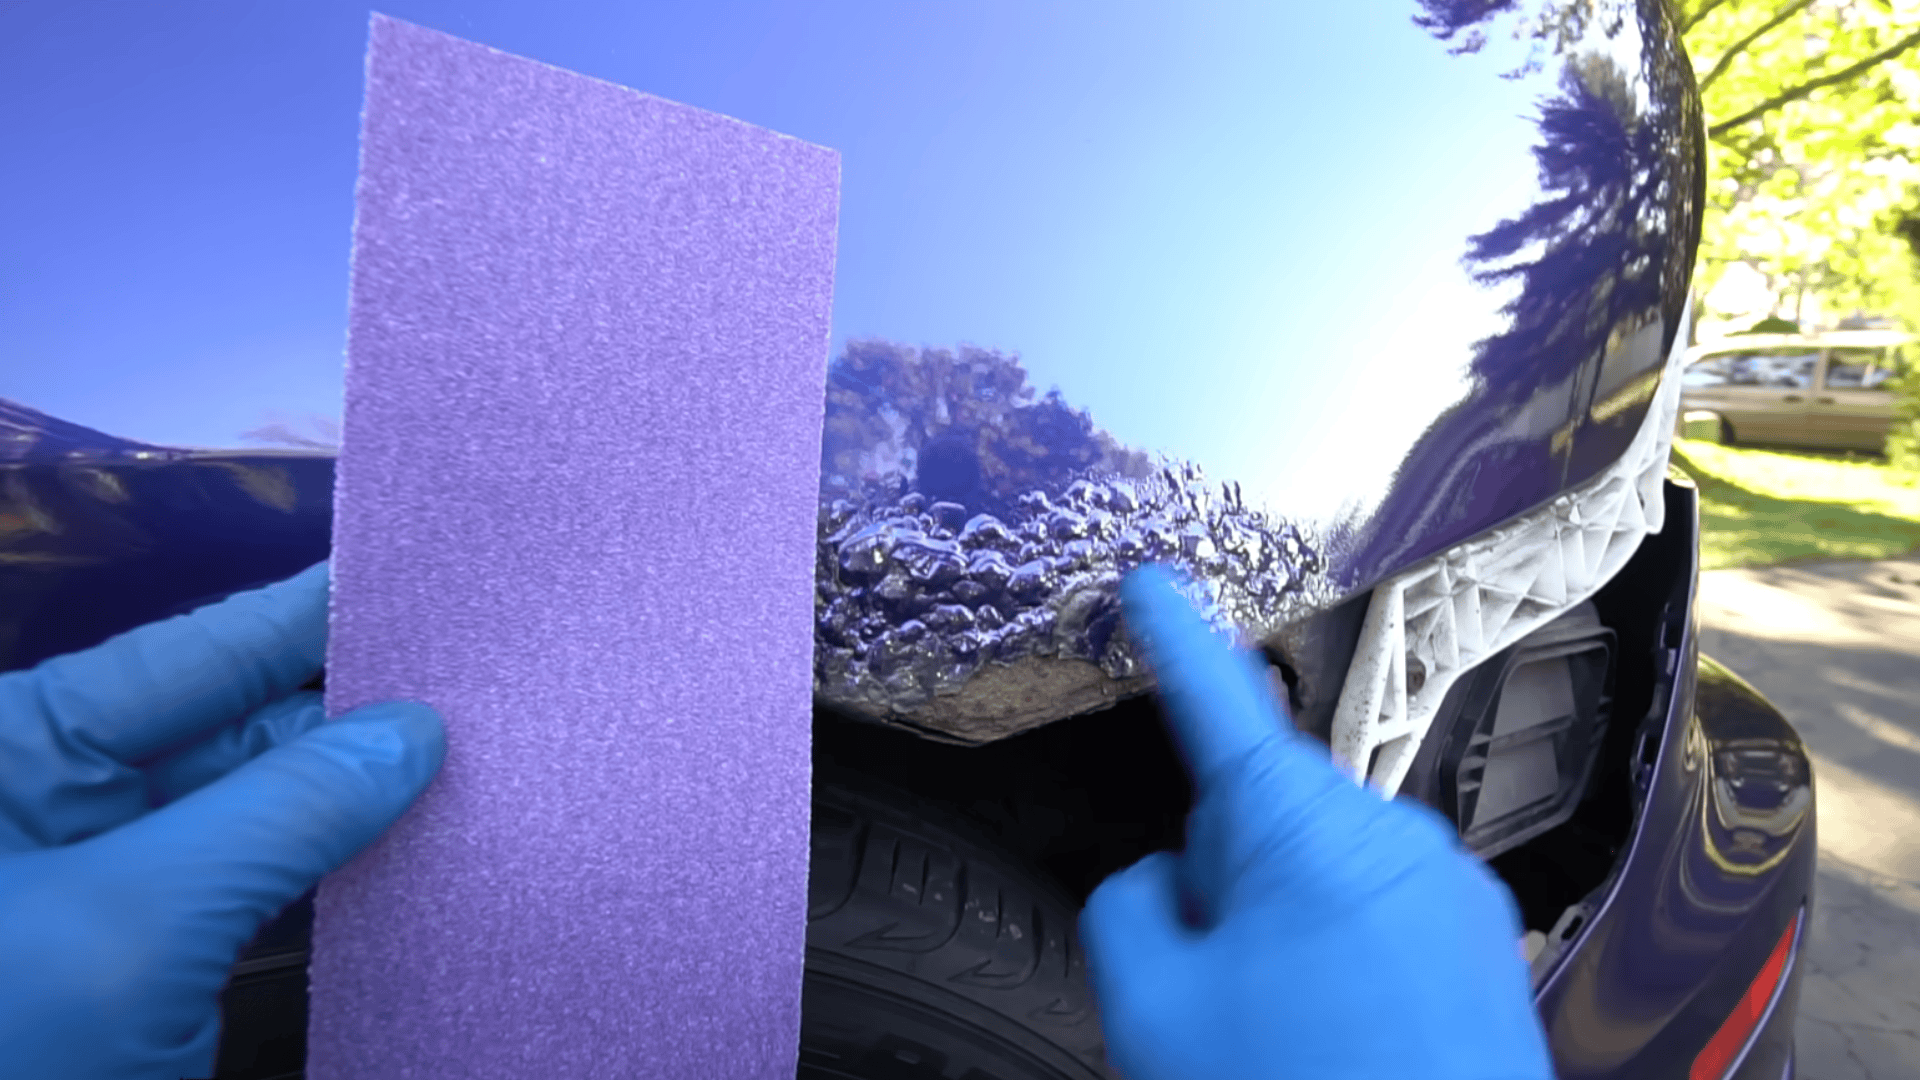
Use 80-grit sandpaper on a sanding block to remove all visible rust down to bare metal.
Sand approximately one inch beyond the rust into clean metal to ensure complete removal.
Even tiny rust remnants will spread after repair, wasting your effort; therefore, apply steady pressure with the sanding block to maintain an even surface.
For thick rust layers, switch to a wire brush or drill attachment with a sanding disc, remember the main goal is exposing shiny bare metal throughout the entire damaged area.
Step 3: Apply Rust Converter (for Moderate Rust)
Rust converter chemically bonds to any remaining rust particles, transforming them into a stable, paintable surface.
Use this product when you’ve sanded most rust away but suspect microscopic amounts remain in pitted metal, as even tiny rust particles left behind will continue spreading under your repair.
Apply thin, even layers using a brush, following the manufacturer’s drying time between coats.
This step is particularly important for rear wheel wells and hard-to-reach areas where complete sanding proves difficult.
Step 4: Fill Damaged Areas (for Deeper Rust)
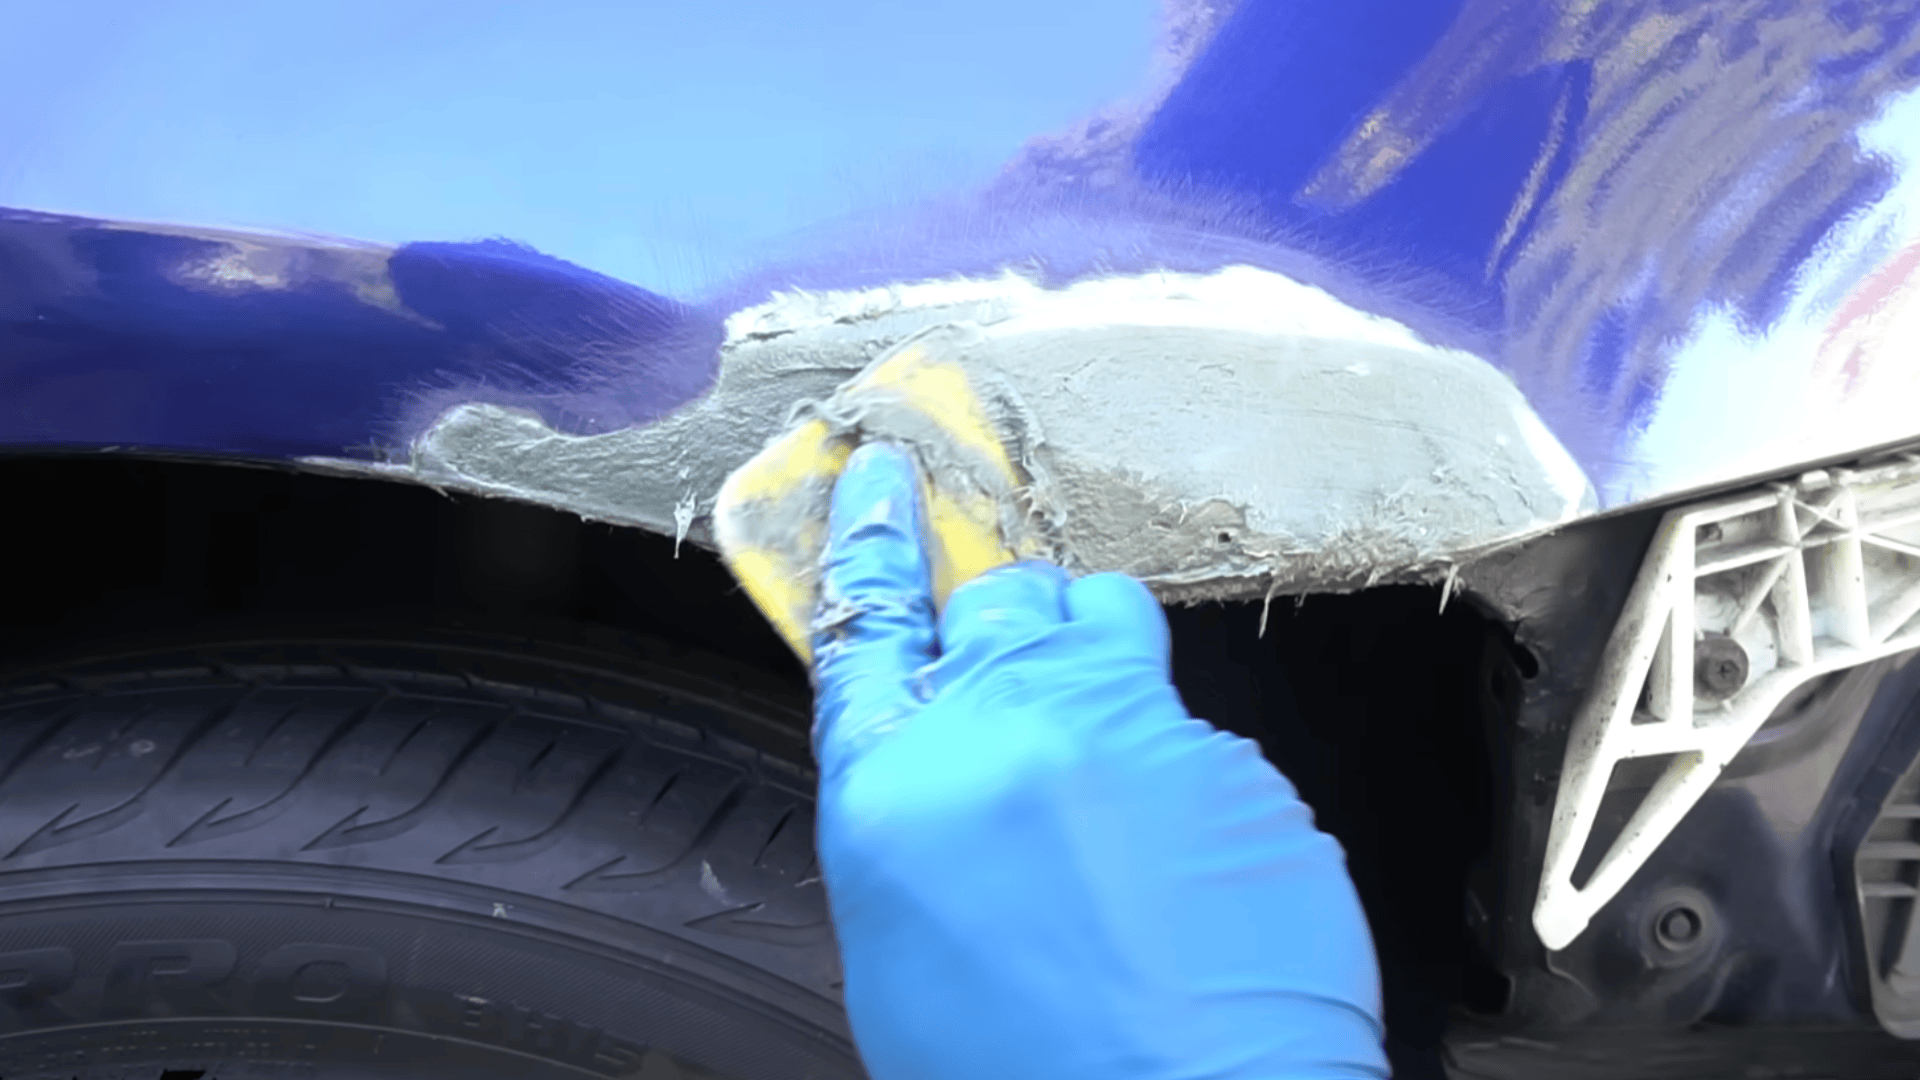
Mix fiberglass body filler according to package directions, typically a half-inch circle of filler with hardener running across its diameter.
Press the filler firmly into rust holes using a spreader, forcing out air bubbles.
For holes larger than a dime, install an adhesive body patch behind the opening first for structural support.
Hammer the damaged area inward slightly so filler sits flush with the surrounding metal rather than creating a hump. Build up layers gradually, letting each dry before adding more.
Step 5: Prime the RepairedSurface

Select a high-build filler primer designed for automotive use.
This fills minor surface imperfections invisible to the naked eye and applies three light coats, allowing each to dry to a matte finish before adding the next.
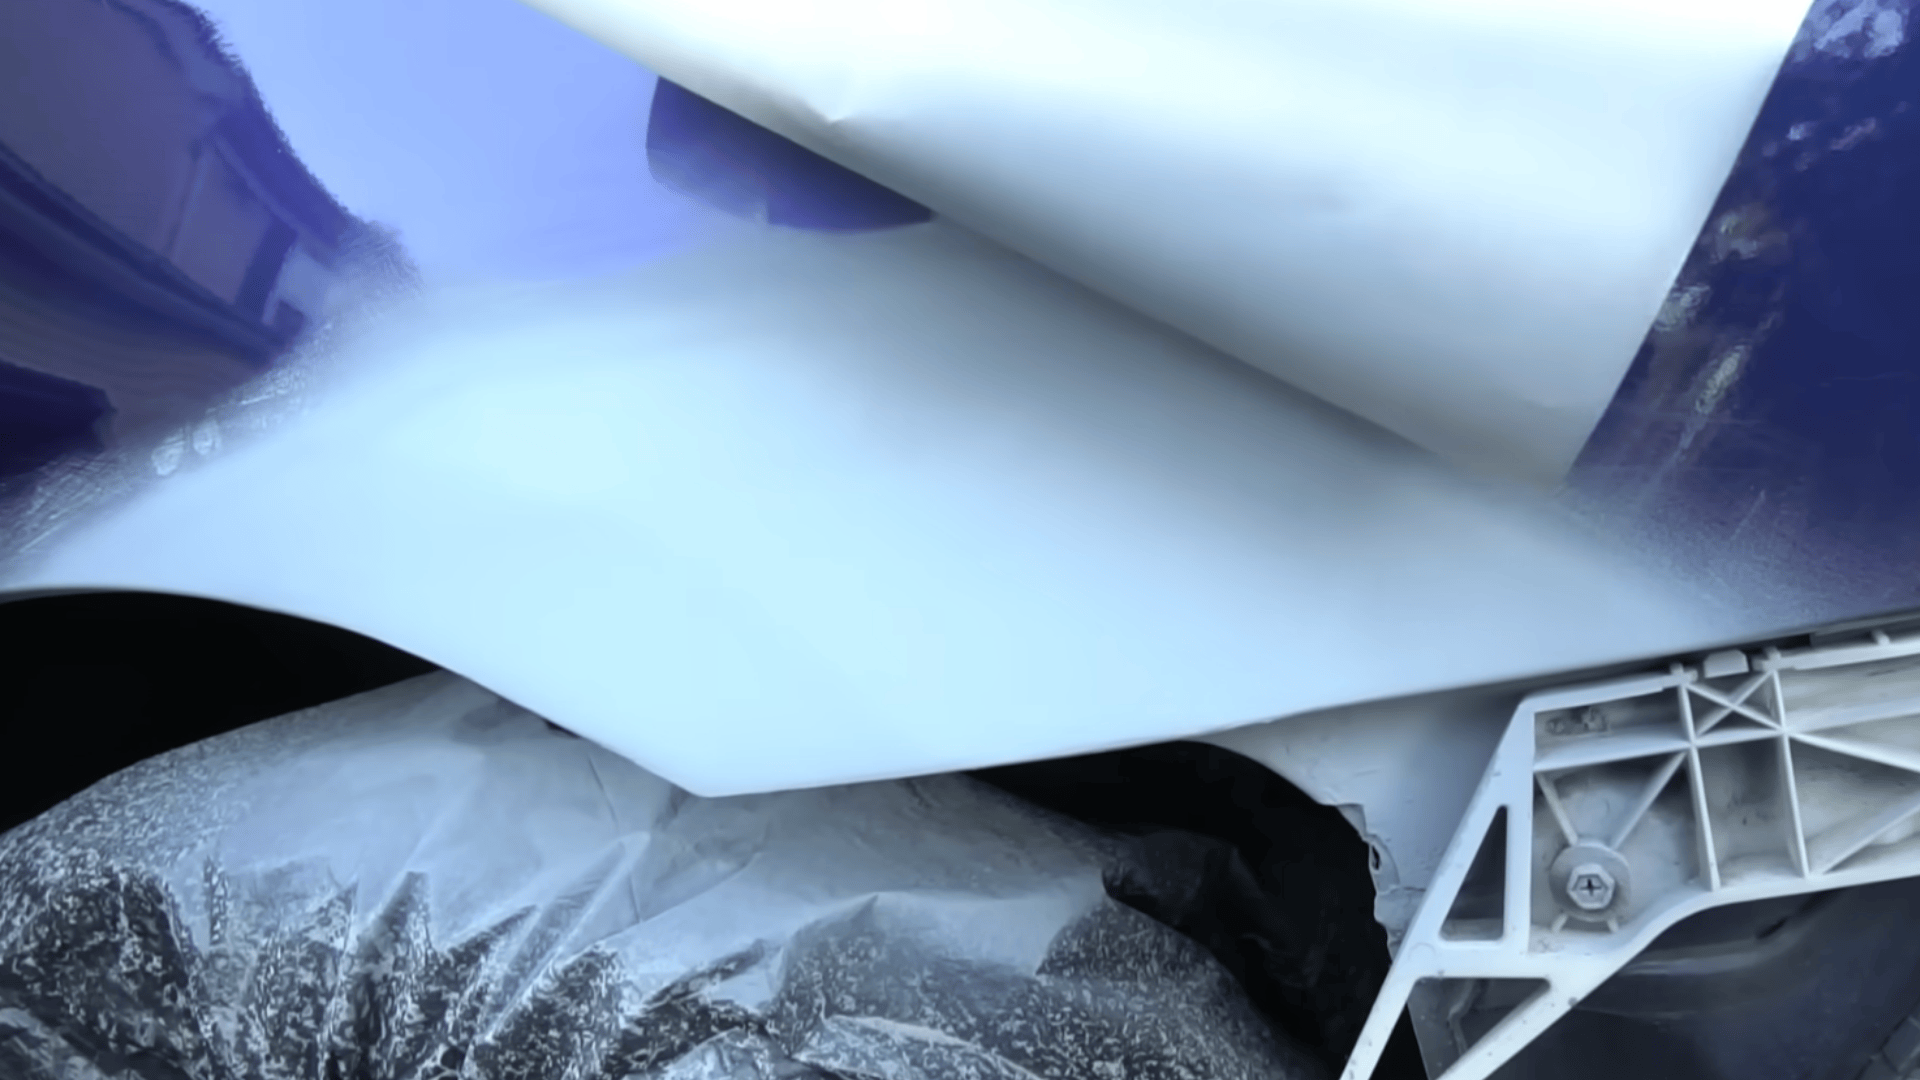
Use curved masking paper above the repair area to create soft paint edges instead of harsh lines.
Sand the dried primer with 320-grit then 600-grit sandpaper for a glass-smooth surface.
Proper priming creates the foundation for a professional-looking paint finish.
Step 6: Paint and Clear Coat the Area
Match your car’s paint code exactly, which can be found on a sticker in the door jamb or glove box.
Apply base coat in three light layers, letting each dry completely between applications, and avoid thick coats that cause runs or sags.
After the base coat cures, apply three coats of automotive clear coat for protection and shine.
The final clear coat layer should be slightly thicker to reduce orange peel texture, and finally wet sand with progressively finer grits (1500, 2000, 3000, 5000) after full cure, then buff with polish.
Watch this video by ChrisFix for a complete rust repair visual reference.
How to Prevent Rust From Coming Back?
Completing a rust repair is only half the battle when long-term protection requires ongoing maintenance. These simple habits keep corrosion at bay and extend the life of your repair work.
- Regular washing: Remove salt and road chemicals weekly, especially during winter months
- Applying wax: Create a protective barrier every three months to seal paint against moisture
- Sealing chips quickly: Touch up paint damage within days of occurrence using factory-matched paint pens
- Checking wheel wells and underbody: Inspect these high-risk areas monthly for early rust formation
- Undercoating application: Apply rubberized undercoating to bare metal surfaces for long-term protection
When to Seek Professional Help?
While many rust repairs can be handled at home, certain situations require professional expertise and equipment.
Knowing when to call in the experts saves time, money, and ensures safety-critical repairs are done correctly.
- Rust holes exceeding three inches require welding
- Frame rails or suspension mount corrosion needs expert assessment
- Metallic or custom paint colors demand professional mixing
Professional body shops have the tools, experience, and facilities to handle these challenging repairs safely and effectively.
They can access hard-to-reach areas behind body panels that require partial disassembly. Their climate-controlled spray booths ensure proper paint adhesion and finish quality.
Conclusion
Learning how to fix rust spots in a car is an achievable DIY project that protects your investment and prevents expensive future damage.
Following the proper techniques creates lasting repairs that restore both appearance and structural integrity.
Remember that catching rust early makes repairs dramatically easier and more effective than waiting until holes form.
Regular inspections of your vehicle’s vulnerable areas, particularly wheel wells and lower body panels, help spot problems before they escalate.
Routine washing, waxing, and immediate attention to paint chips form the best defense against new rust formation.
Have questions about rust repair?
Don’t forget to share your thoughts in the comments below.