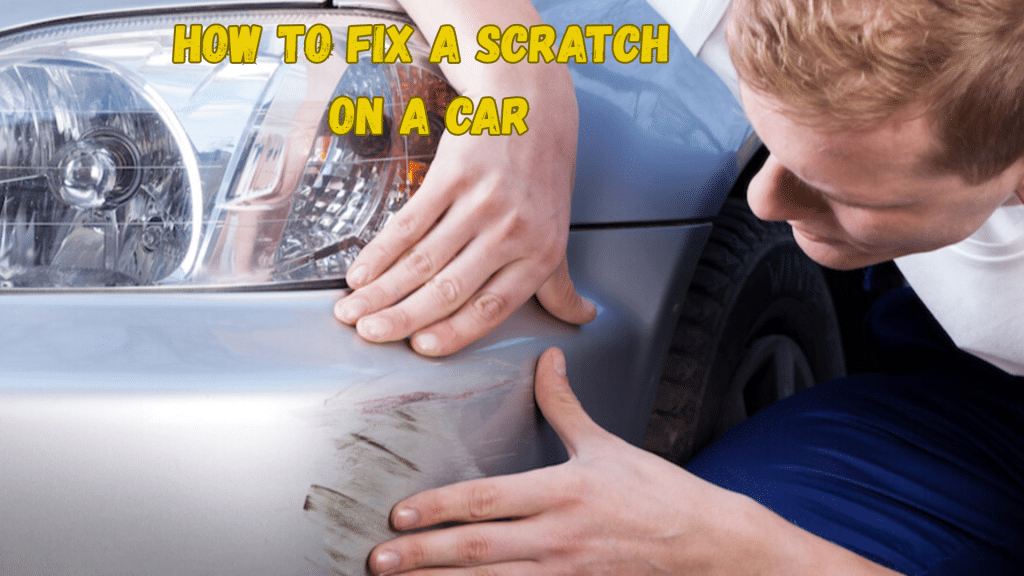
I know how it feels to walk up to your car and notice a scratch you didn’t expect. It’s frustrating, and it can make you think a costly repair is the only option.
The good news is that many scratches can be fixed at home. You need the proper steps. In this guide, I’ll show you how to check the depth, choose simple tools, and follow easy DIY methods that work.
I’ll share the same approach I use to repair light marks, scuffs, and deeper lines without confusion. My goal is to give you clear instructions you can follow with confidence.
By the time you’re done reading, you’ll know exactly what to do and how to make your car look better again.
Understand the Type of Scratch
Knowing the depth of a scratch is the first step to choosing the right repair. A quick check helps you decide which DIY method will actually work.
1. Clear Coat Scratches
Evident coat scratches sit on the top surface, and they’re the easiest to fix at home. I like to start by running my fingernail lightly across the scratch.
If it doesn’t catch, it’s usually just in the clear coat. These marks often come from minor bumps, brushes against bushes, or everyday wear.
Most of the time, a scratch-removal compound and a microfiber cloth are enough to make them fade or disappear.
2. Paint Scratches
Paint scratches cut past the clear coat and reach the actual color layer. I usually notice these when my fingernail catches slightly, but not profoundly.
These scratches often appear from sharp objects or accidental scrapes. They need a bit more care than surface marks, and sanding lightly before applying rubbing compound works well.
With steady pressure and the right product, you can smooth the spot and bring back the color without going to a repair shop.
3. Deep Primer Scratches
Deep scratches reach the primer or even expose metal, and I always treat these differently. When I can clearly see a lighter or darker layer under the paint, I know the repair will require touch-up paint.
These marks often come from substantial impact or sharp contact. DIY repair is still possible, but it takes more time and patience.
Filling the scratch with touch-up paint, letting it dry thoroughly, then sanding and polishing, helps blend the repair back into the panel.
Step-by-Step Scratch Repair
Follow these steps to fix a scratch using the same method demonstrated in the footage. Each step is clear, simple, and based on what you can do at home.
Step 1: Check the Scratch
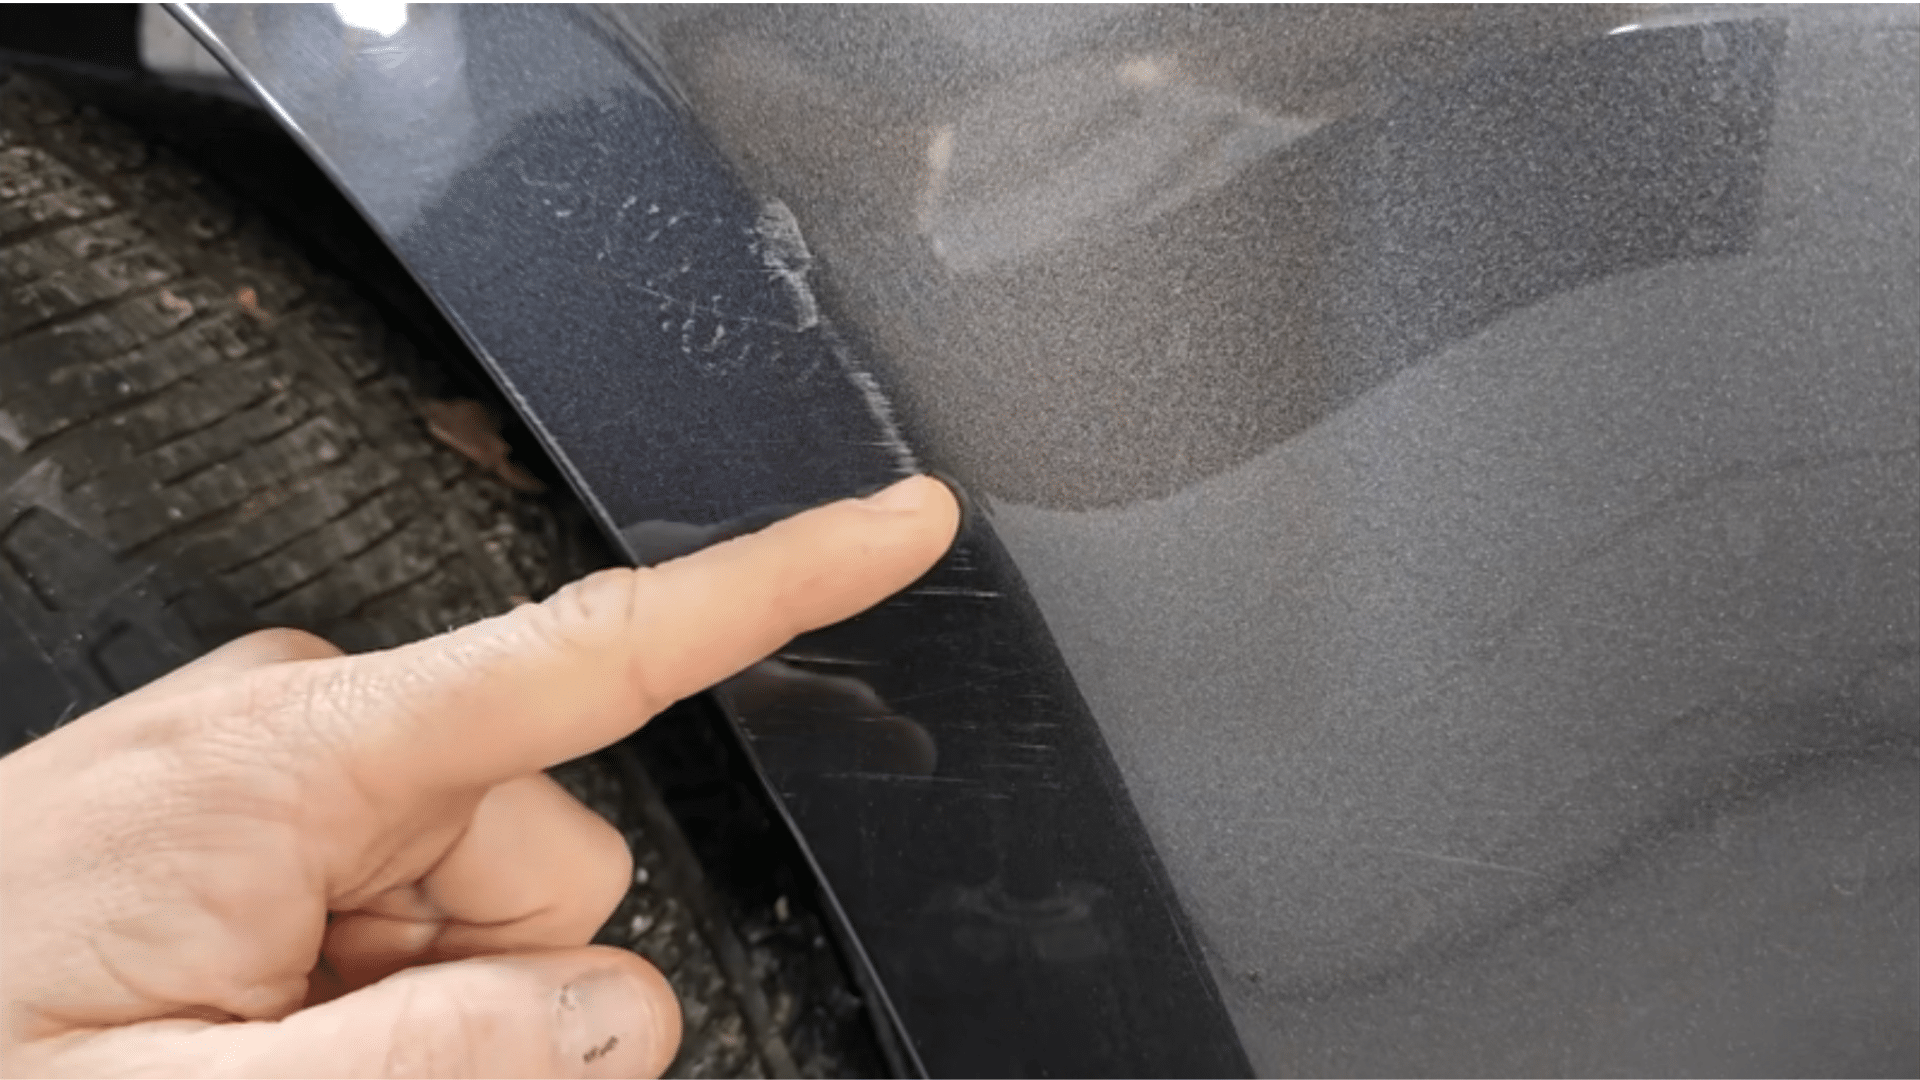
Start by examining the scratch closely to understand how deep it is. Look for scuff marks, broken clear coat, or areas where the base coat shows through.
If the scratch has cut into the paint, simple polishing won’t remove it, which is why this method works well. Check the edges and panel lines too, since scratches in those areas can be harder to repair.
This quick inspection helps you decide the approach you’ll take next.
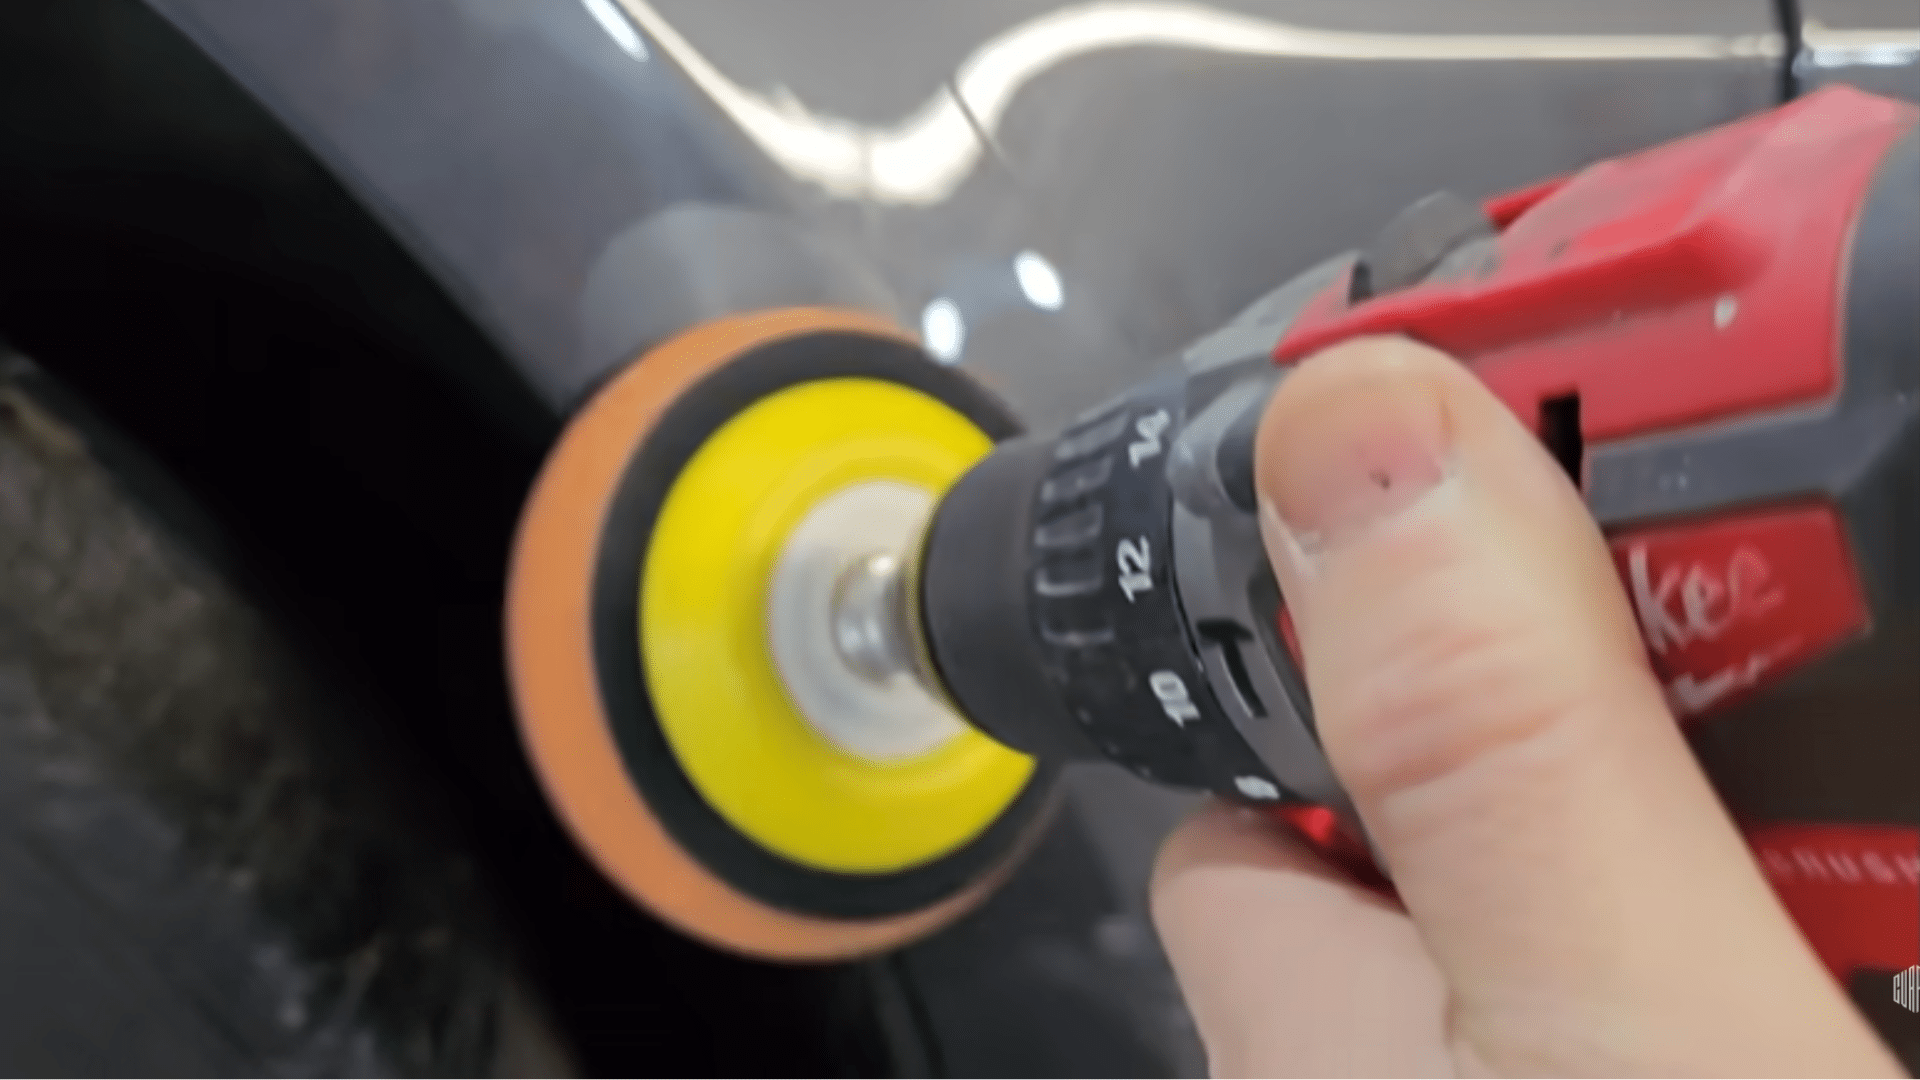
Step 2: Gather Your Tools
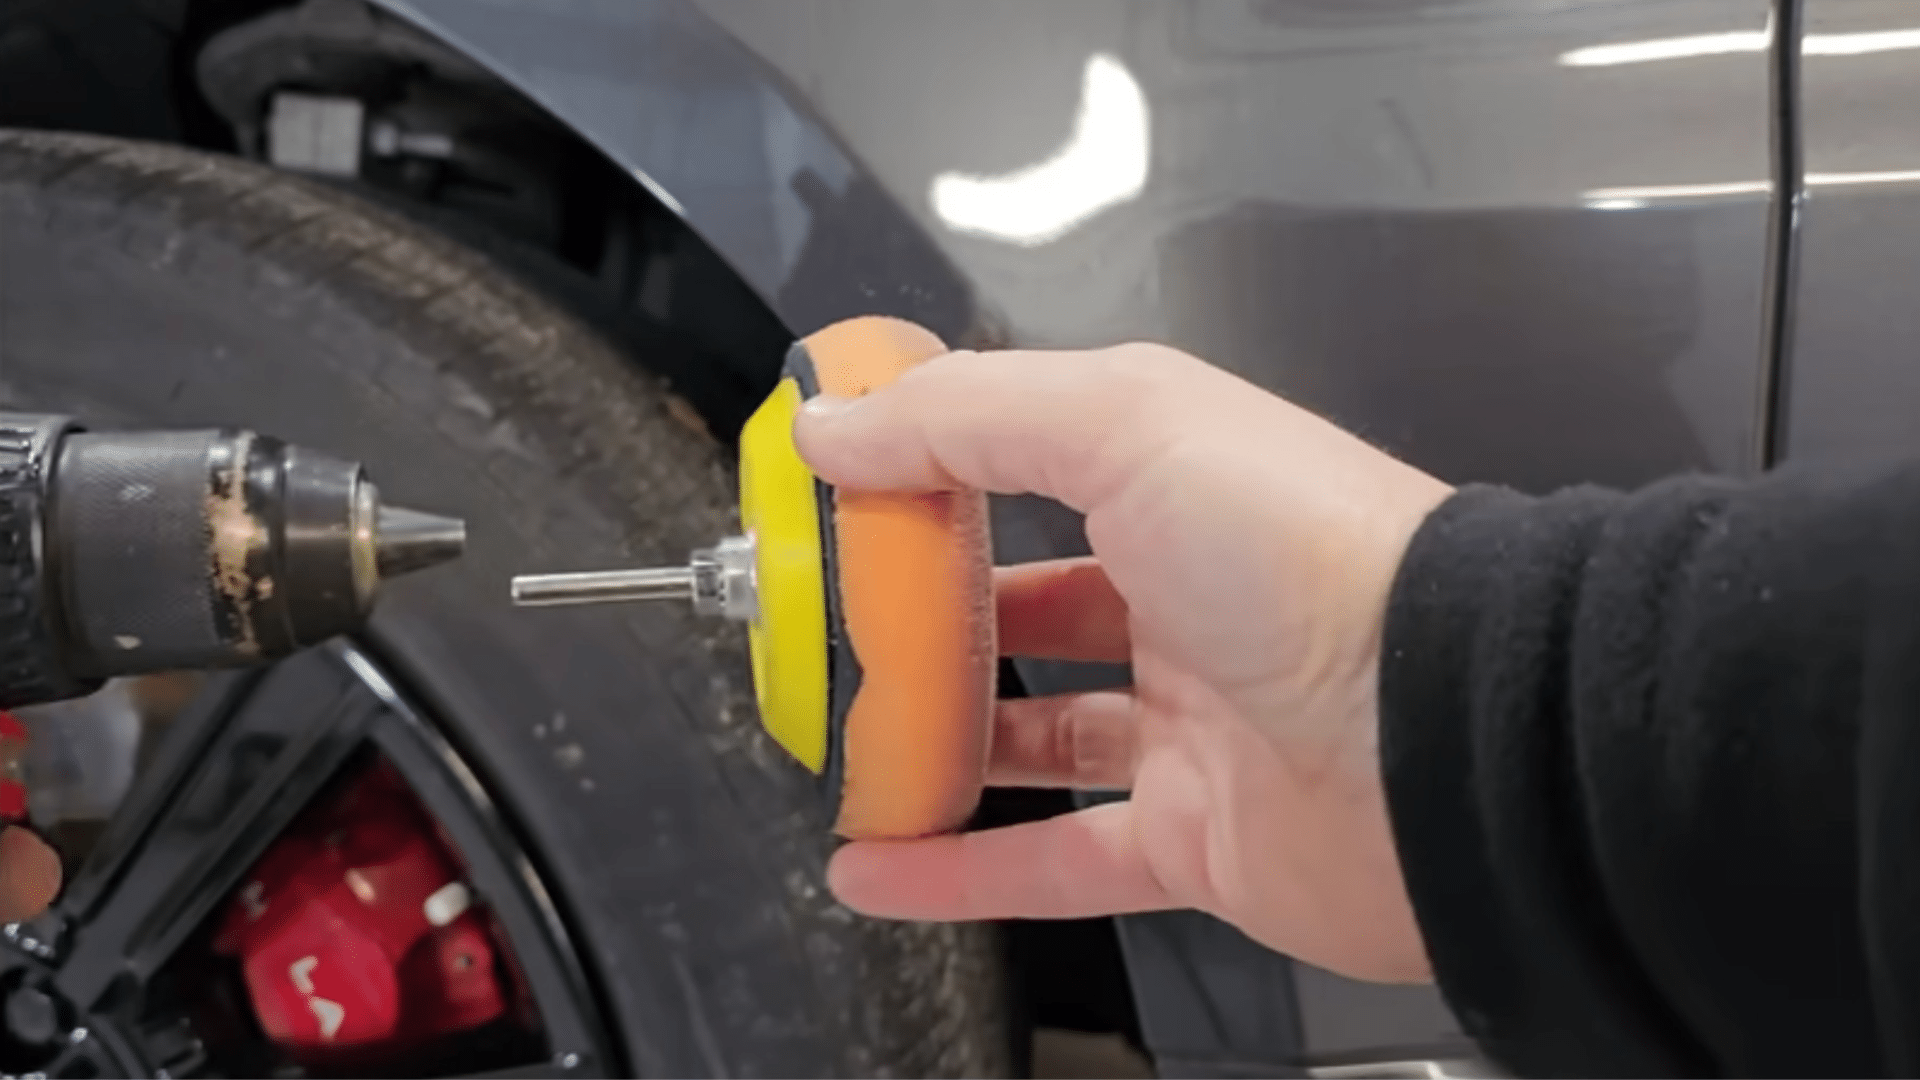
You only need a few basic tools to complete this repair. Grab a drill, a backing pad, and a buffing or cutting pad. The pad attaches to the drill and will help remove excess paint later.
These simple tools keep the process affordable and easy for beginners. Most people already have a drill at home, and the remaining items are inexpensive and easy to get.
This setup is enough to achieve a smooth and effective repair.
Step 3: Choose the Right Paint
Use solvent-based automotive paint for this method, because water-based paint won’t work correctly. A matched color is ideal, especially for metallic finishes, but close shades can still blend well on darker cars.
The goal is to fill the damaged area with new paint before polishing. You don’t need a complete spray system; just a small amount of the correct paint will do.
Choosing the right type ensures the repaired area blends better with the surrounding surface.
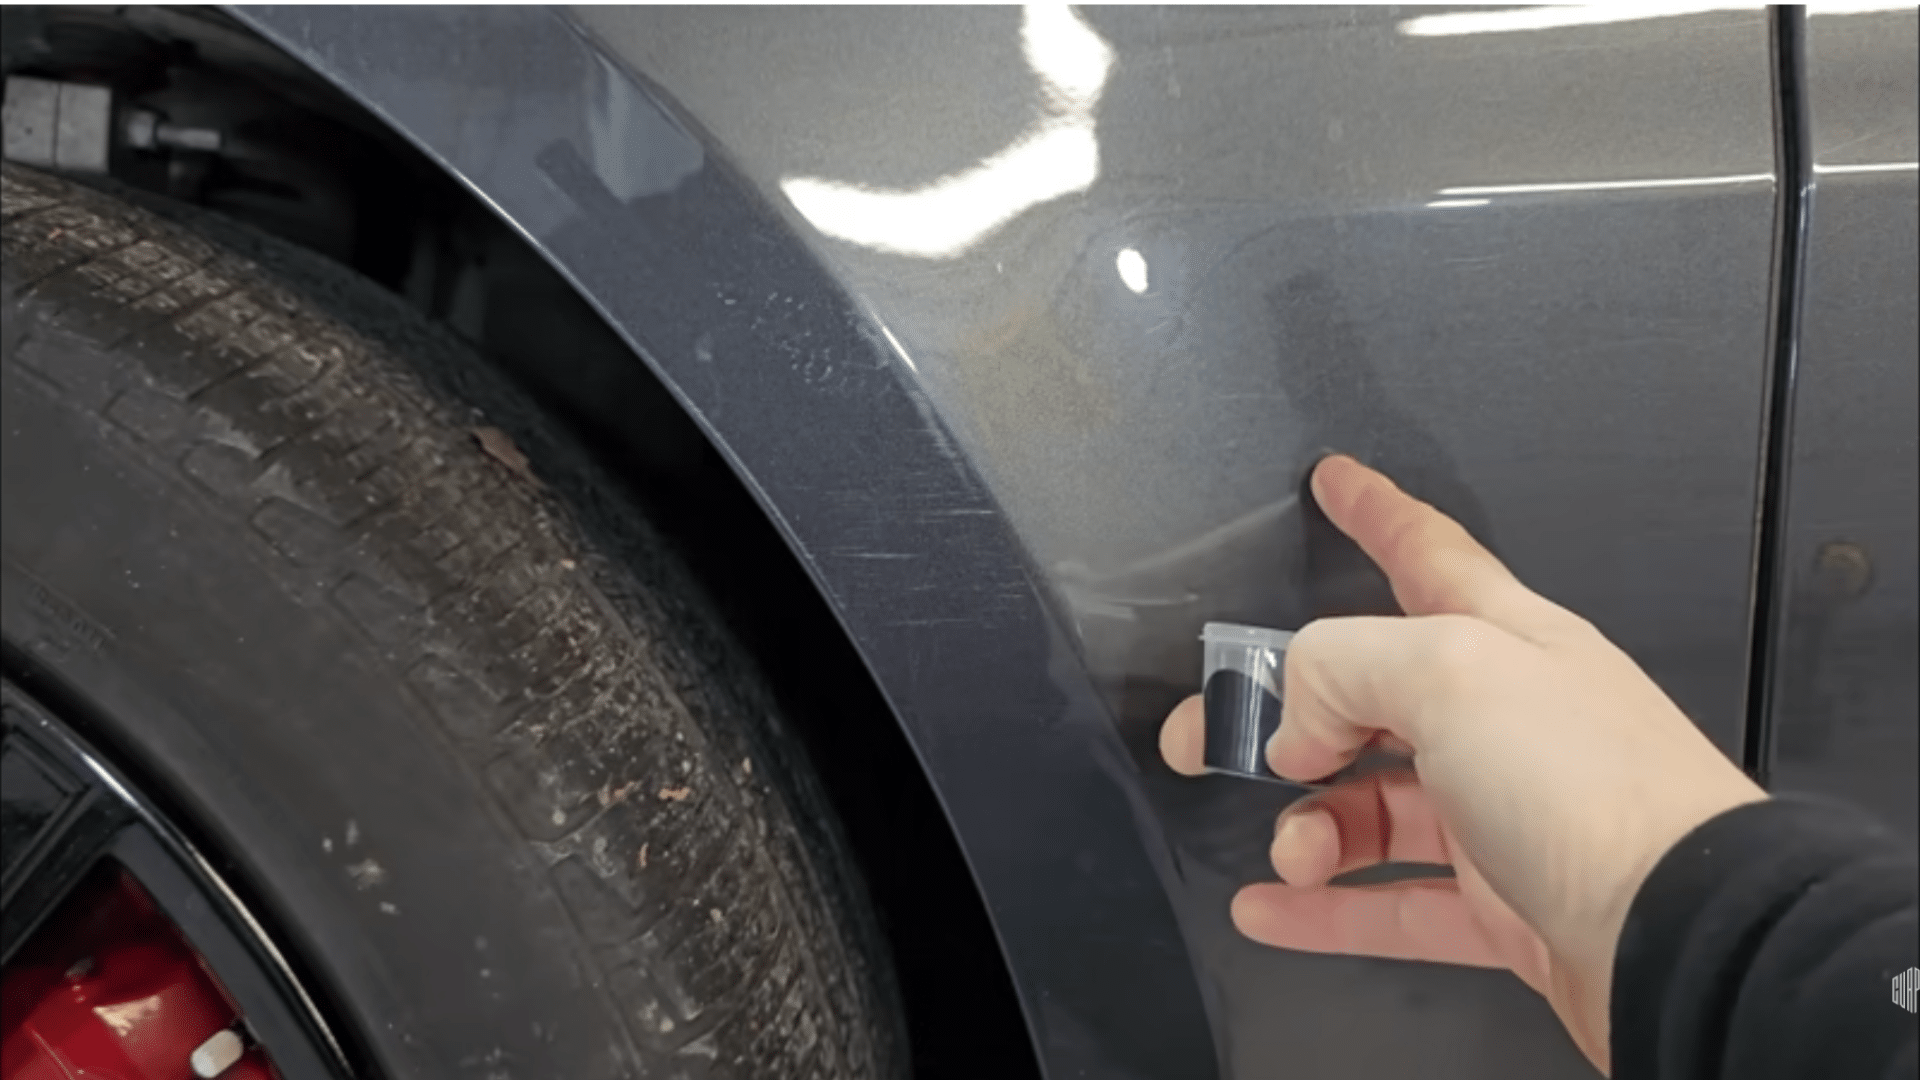
Step 4: Apply Paint to the Scratch
Dip your finger into the paint and spread it directly over the damaged section. Use enough paint to cover the scratched area fully, allowing it to fill any missing clear coat or exposed base coat.
A bare finger gives you better control, but a glove can also be used. Make sure the paint reaches into all the thin lines of the scratch.
This step loads the damaged area with fresh paint so it can be blended smoothly later.
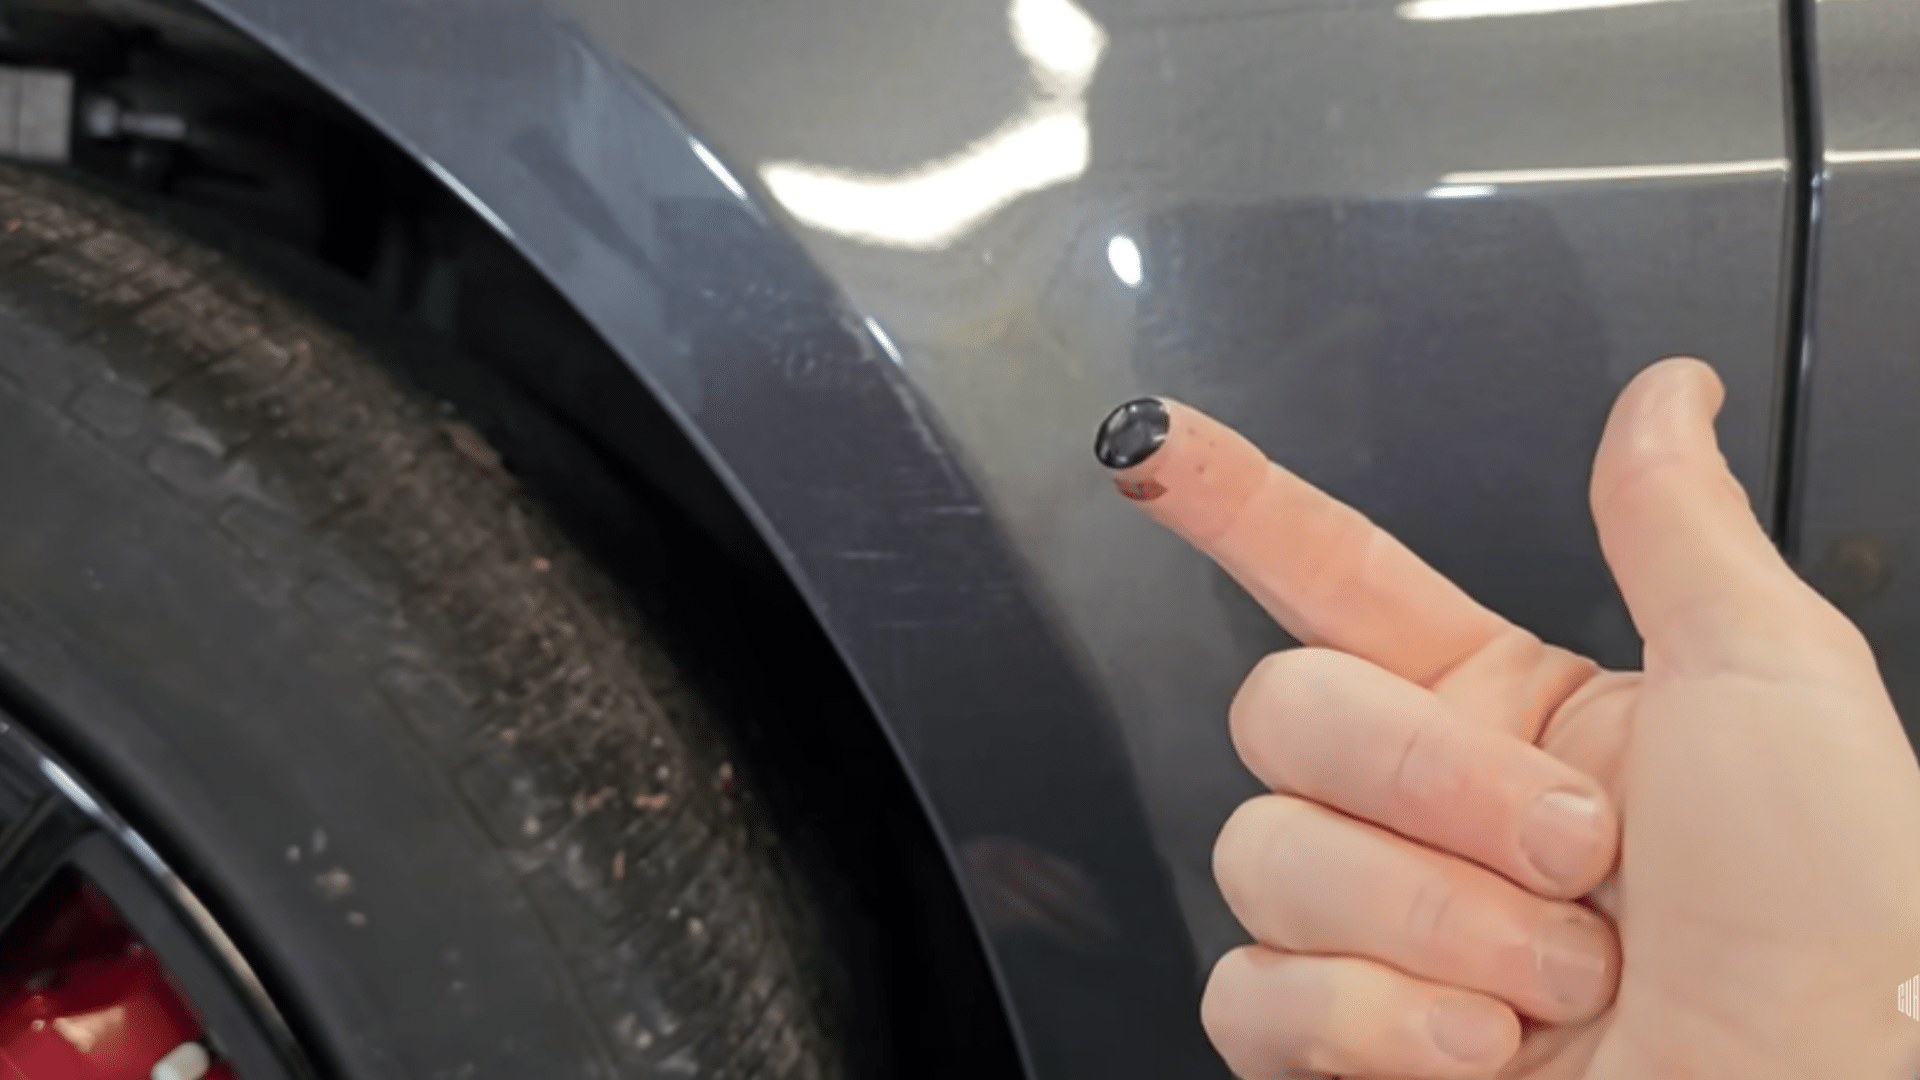
Step 5: Let the Paint Dry
Allow the paint to dry completely before moving on. Drying time is important because the paint must settle into the scratch before polishing.
You don’t need to rush this step; give the paint a moment to firm up so it bonds well to the surface.
Once the paint is dry, you’ll be ready to remove the excess sitting on top while keeping the paint that has filled the damaged areas.
Step 6: Add Cutting Compound
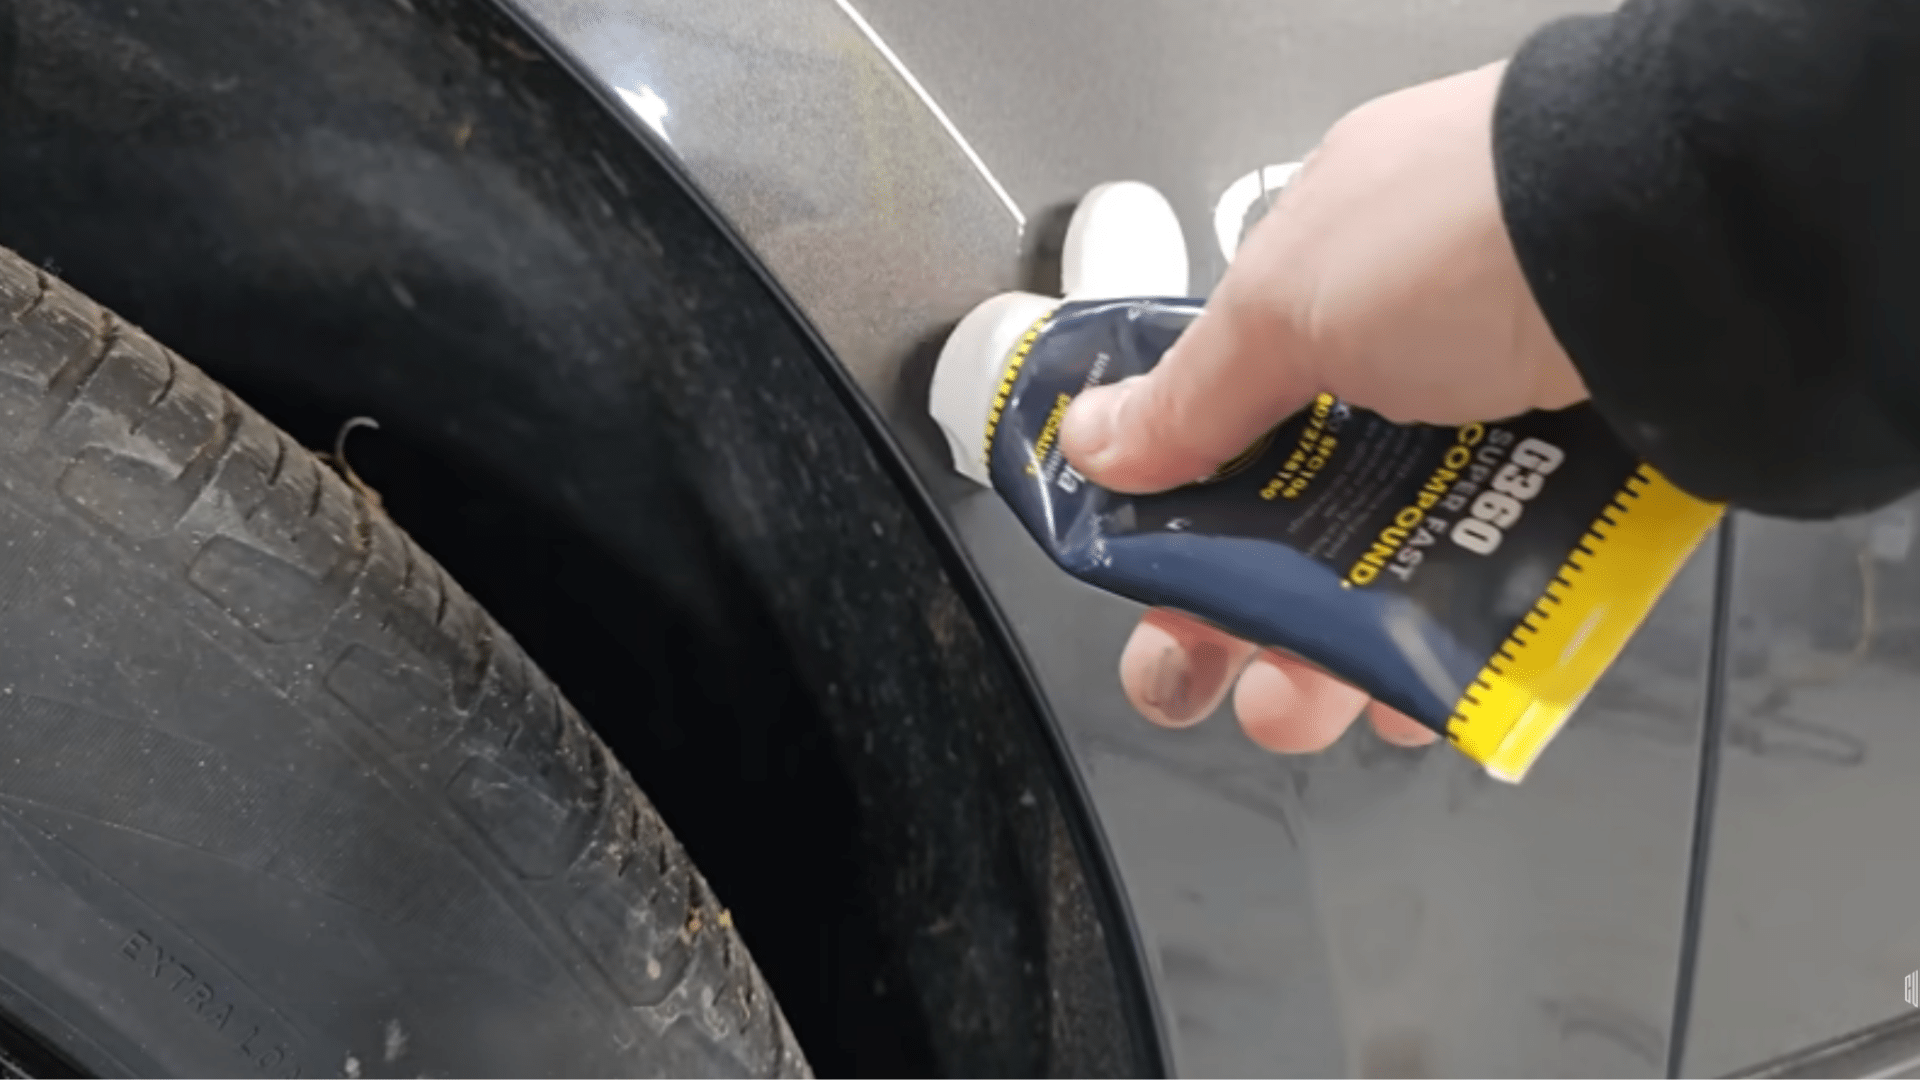
Apply a generous amount of cutting compound to your buffing pad. You’ll need more compound than you might expect, because it acts as the primary tool for lifting off the dried excess paint.
A heavier layer helps the pad cut effectively without damaging the repair. Spread it evenly on the pad so the drill can work smoothly.
This compound will make it easier to blend the paint and restore the finish during the next step.
Step 7: Polish the Area
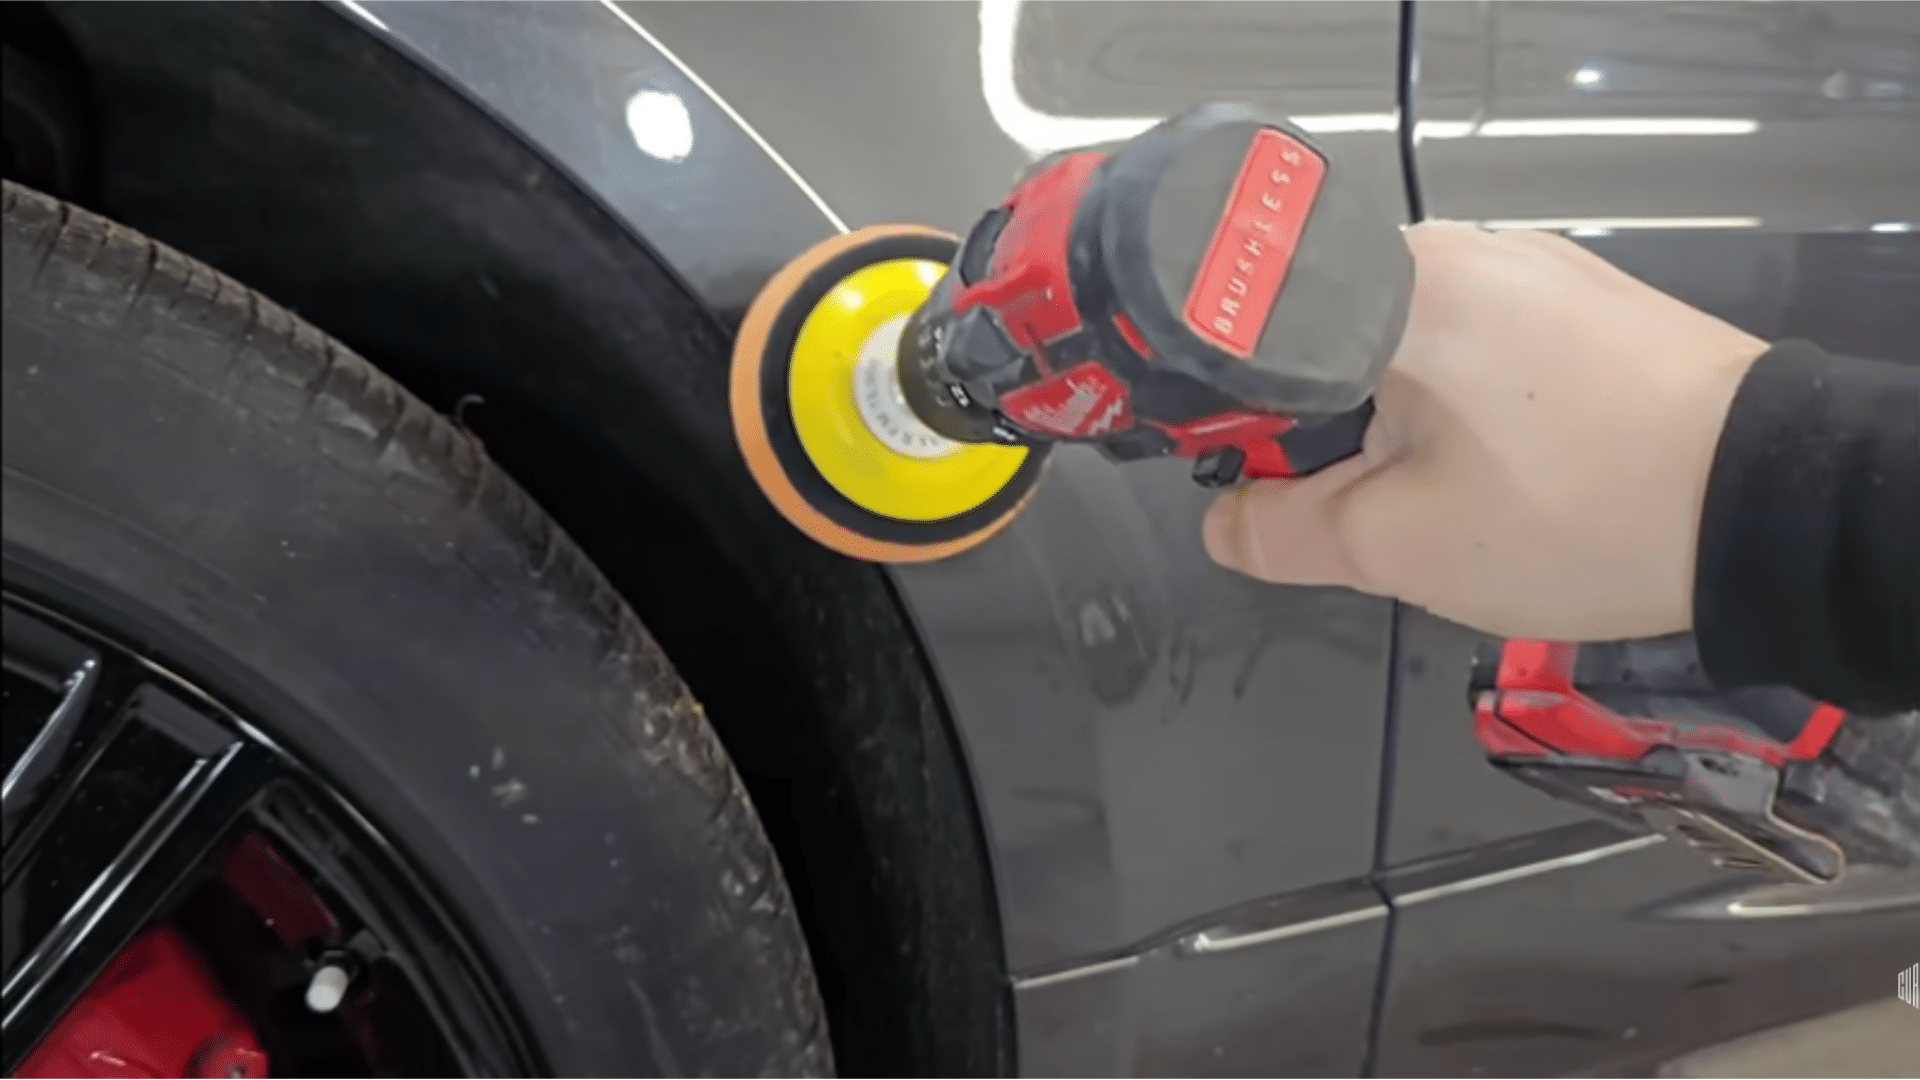
Use the drill with the buffing pad to polish the damaged spot. Keep the drill moving at all times to avoid heat buildup. As the compound breaks down, add more to maintain the cutting strength.
The goal is to remove the extra paint sitting on the surface while leaving the paint that filled the scratch. This step quickly smooths the area and blends the repair into the original finish.
No sanding is required, making the process simple and safe.
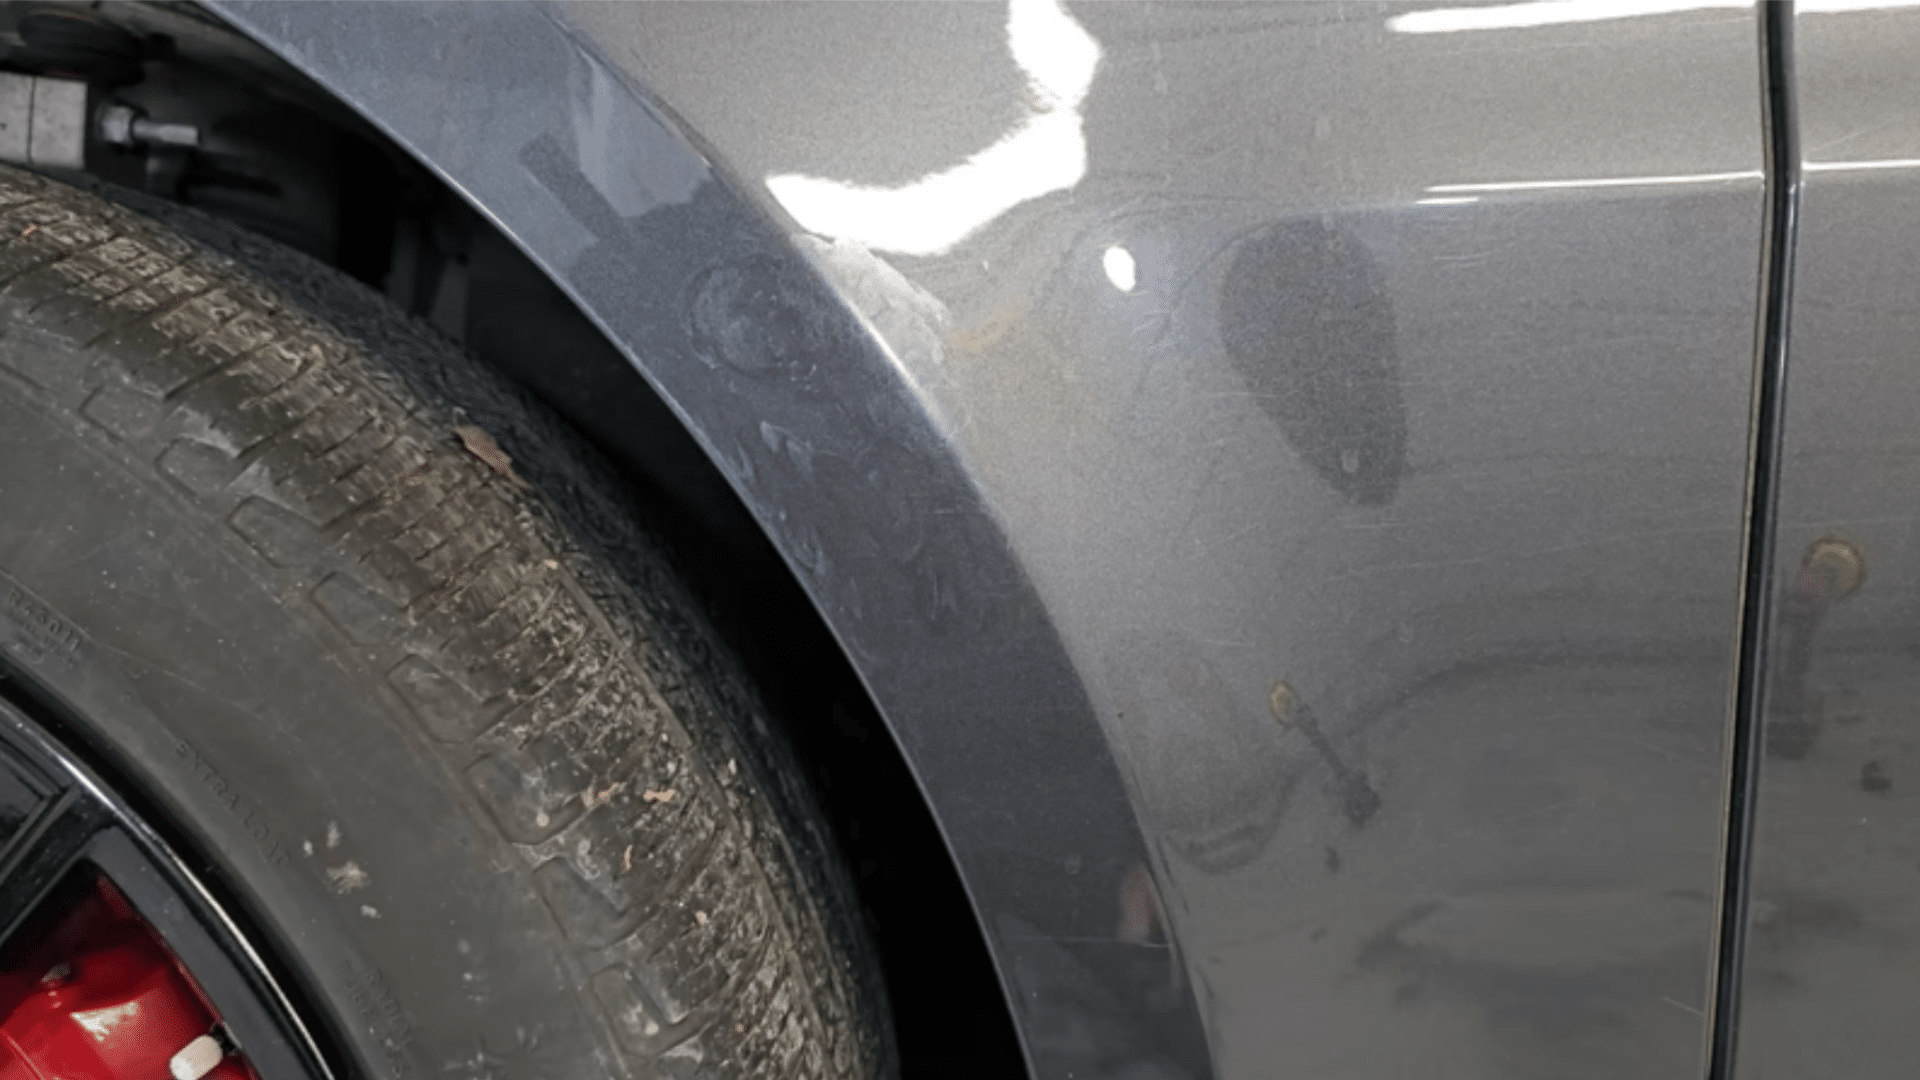
Step 8: Check and Repeat If Needed
After polishing, look closely at the repaired area to see if any marks remain. If you still see slight scuffs or small patches of excess paint, repeat the polishing step once more.
Do not exceed two rounds of polishing, as too much cutting can thin the surrounding paint.
A second light pass is usually enough to remove the last imperfections and create a smooth, well-blended finish.
Step 9: Review the Final Result
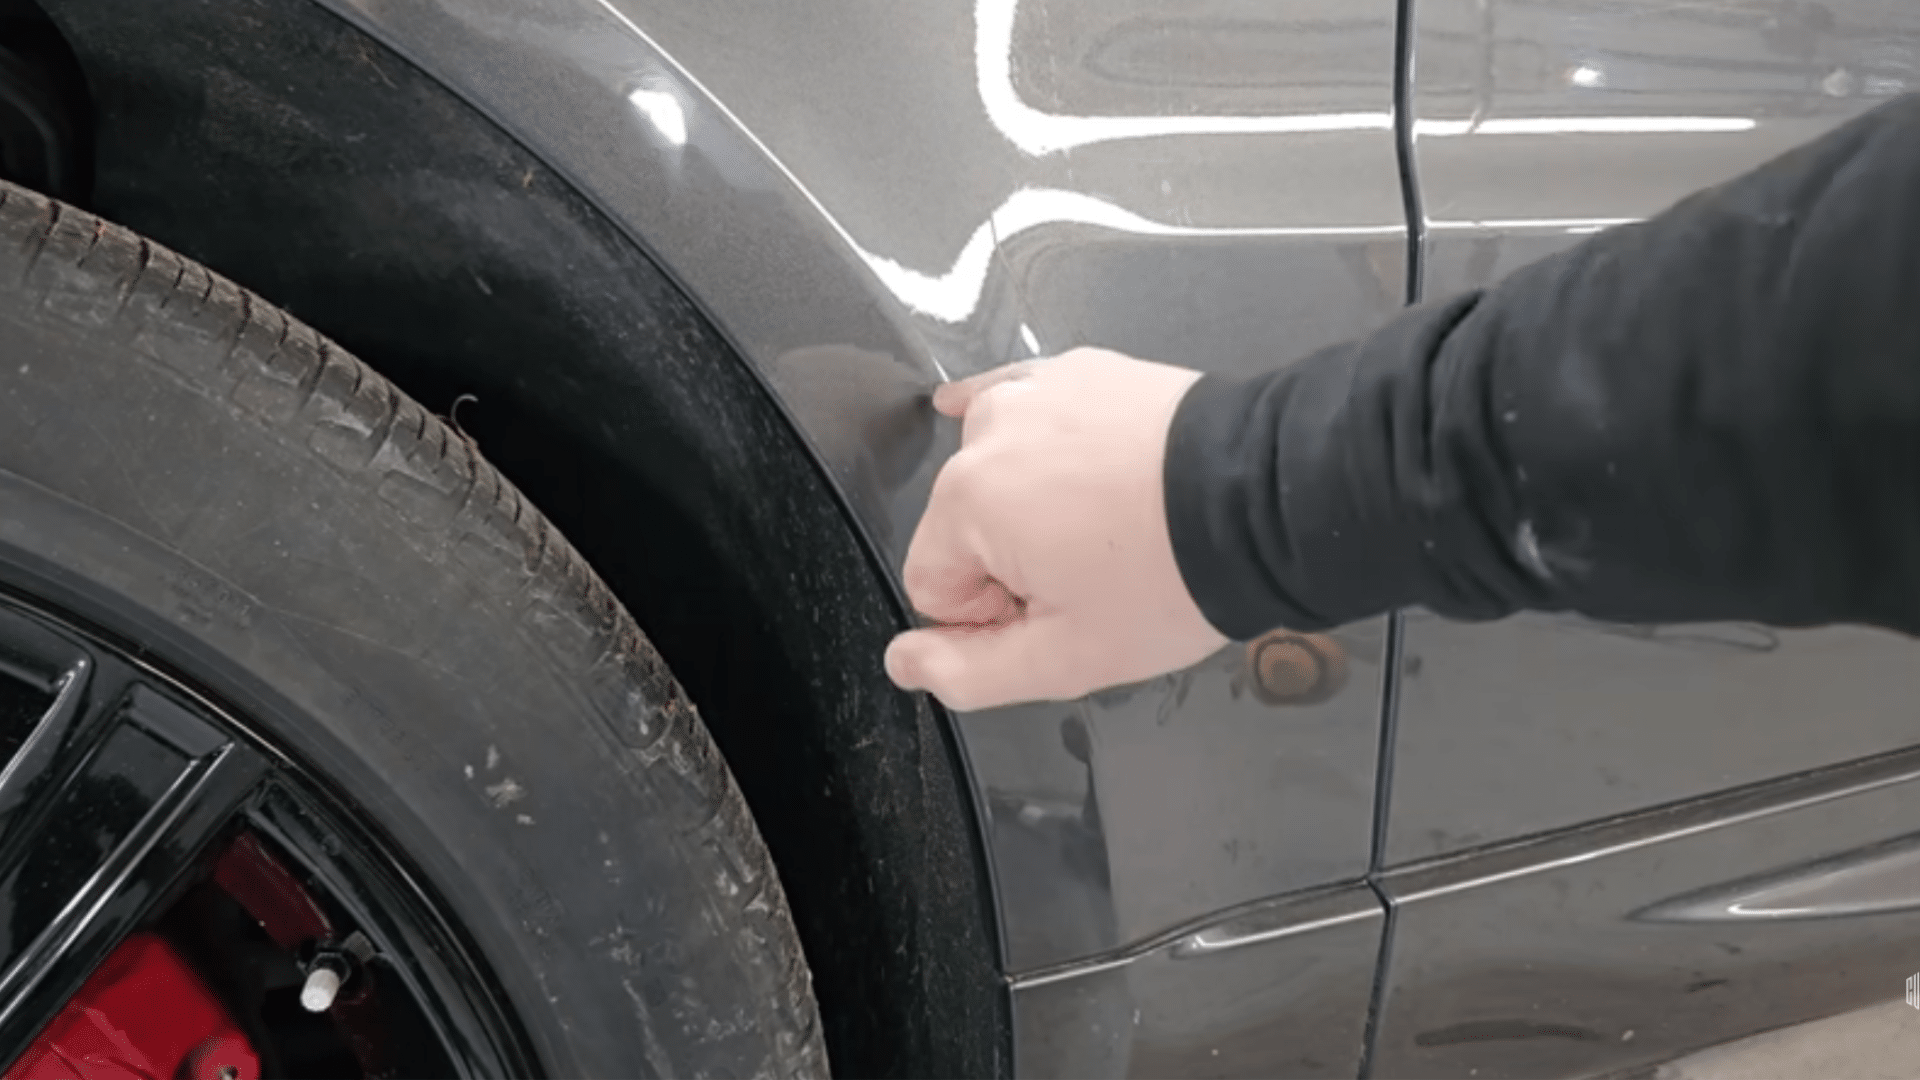
You should now see a major improvement, often reducing the scratch by 90–98%. This method helps you avoid a full panel repaint and keeps the original factory paint intact.
It works well on fine scratches, fresh scuffs, and thin paint breaks. It may not be suitable for large missing chunks, but for most everyday scratches, this approach gives impressive results with minimal tools.
With practice, you can use this method on other minor marks around your car.
This tutorial is based on a helpful video by CVR POV. A big thanks to the creator for providing such a clear and detailed walkthrough. You can check out the original video on their YouTube channel here or watch it below.
DIY Cost vs Professional Repair
Knowing the cost difference helps you decide whether to fix the scratch yourself or take it to a shop.
Here’s a simple breakdown so you can choose the option that fits your budget.
1. DIY Repair Costs
Fixing the scratch yourself is usually the cheapest option. Most people already have a drill, and the remaining items, like a backing pad, buffing pad, paint, and cutting compound, cost far less than a shop visit.
You only buy these items once, and they can be reused for future repairs.
This makes DIY a wise choice when the scratch is shallow, manageable, and doesn’t require complete panel restoration.
2. Professional Repair Costs
A body shop charges more because they sand, prime, repaint, and blend the repaired area into the surrounding panels. This process is especially costly for metallic colors, which require precise matching.
A single-panel repair can range from moderate to high depending on size and depth.
While the professional route is more expensive, it delivers exact color matching and complete surface restoration when the damage is beyond simple at-home repair methods.
3. When a Professional Is Worth It
Choosing a shop makes sense if the scratch is deep, wide, or exposes bare metal. These situations require more than touch-up paint and polishing, since the surface needs proper protection and a long-lasting finish.
A professional can rebuild damaged layers and ensure the color blends perfectly, especially on lighter or hard-to-match shades.
This option gives you safer, more durable results when the damage goes beyond what simple DIY tools can handle.
Tips to Prevent Future Scratches
Once you fix a scratch, simple habits can help you avoid new ones. These quick tips protect your paint and keep your car looking better for longer.
- Wash your car using a soft wash mitt and pH-balanced soap to avoid dragging dirt across the paint.
- Rinse the surface often while washing so that loose debris doesn’t scratch the finish.
- Dry the car with a clean microfiber towel instead of rough fabrics that can leave marks.
- Park away from tight spots, shopping carts, overgrown bushes, and crowded areas to reduce the risk of accidental scrapes.
- Add a layer of wax or a synthetic sealant to create a protective barrier that helps prevent light scratches.
- Avoid leaning objects like bags or tools against your car, since even small items can leave marks.
- Keep the car free of dust using a gentle duster or microfiber cloth to stop grit from scratching the surface.
Conclusion
I know how frustrating it feels to notice a scratch on your car, but fixing it doesn’t always mean heading to a shop. By using simple tools and taking your time with each step, you can make a big difference on your own.
I like this method because it lets you fill the damaged area with fresh paint and then polish it until it blends in smoothly. It saves money, keeps your original paint, and gives you control over the repair.
Once you try it, you’ll see that minor scratches don’t have to be stressful or expensive. With a bit of patience, you can handle them yourself and keep your car looking better for longer.
If you follow these steps, you’ll feel more confident every time you notice a new mark.
Frequently Asked Questions
How Can I Tell if a Scratch Is Too Deep for DIY Repair?
A scratch is too deep for DIY repair when your fingernail catches on it, the paint layers are clearly broken, or bare metal is visible, which requires professional attention.
Do I Need Special Tools to Fix a Scratch on My Car?
You do not need special tools. A drill, a backing pad, a buffing pad, matching automotive paint, and a cutting compound are enough for most small repairs you can handle confidently.
Can This Method Fix Scratches on Metallic Paint?
Yes, this method works on metallic paint. As long as the scratch is not extremely deep or missing large paint areas, the filled and polished repair blends surprisingly well.
How Long Does a DIY Scratch Repair Usually Take?
A typical scratch repair usually takes under an hour. Drying time for the paint and careful polishing are the longest parts, but the overall process remains manageable and straightforward.
Will Polishing Too Often Damage My Car’s Paint?
Yes, polishing too often can thin the clear coat. Use polishing only when necessary, avoid repeated heavy cutting, and always check the area carefully before doing multiple passes.