A fire does not send a warning text before it starts. It happens fast, spreads faster, and in those first few minutes, your only real advantage is early detection.
That is exactly why proper fire alarm installation is not just another weekend project. It is a serious safety upgrade for your home.
Many homeowners delay it, thinking it is complicated or expensive. The truth is, with the right advice, fire alarm system installation can be straightforward and manageable.
No matter if you are replacing an old smoke detector or setting up interconnected alarms throughout your house, doing it correctly can make all the difference when seconds count.
In this blog, you will learn how to handle fire alarm installation step by step, without confusion, without shortcuts, and without putting your safety at risk.
What to Know Before Installing a Fire Alarm?
Before starting any fire alarm installation, take a few minutes to understand the basics. First, check your local building codes.
Some areas require hardwired units, interconnected alarms, or specific placement inside bedrooms and hallways. Skipping these rules can lead to fines or safety risks.
Next, decide between a battery-powered and a hardwired system. Battery units are easier to install, while hardwired options are more reliable long term.
You also need to choose between a single alarm and an interconnected fire alarm system, which sounds all units together.
Tools and materials checklist: drill, screws, mounting bracket, wire connectors, voltage tester, batteries, ladder, and safety gloves.
Fire Alarm Types and Their Uses
Not all fire alarms work the same, and choosing the right one makes a real difference. Understanding the types helps you avoid false alarms and improve overall safety.
- Ionization: Responds faster to flaming fires. Suitable for living rooms and areas with fast-burning materials. Can be sensitive to cooking smoke.
- Photoelectric: Better at detecting slow, smoldering fires. Ideal for bedrooms, hallways, and common spaces.
- Smoke and CO Combo: Provides dual protection in one unit. Best for homes with fuel-burning appliances or attached garages.
- Smart Alarms: Send mobile alerts and allow remote monitoring. Useful for larger homes or frequent travelers.
Step-by-Step Fire Alarm Installation Process
Use these practical steps to complete your fire alarm installation safely and correctly. Move carefully through each stage to avoid errors and ensure the alarm works properly when needed.
Step 1: Turn Off Power
Switch off the correct breaker if installing a hardwired unit, and confirm there is no live current using a non-contact voltage tester.
Never assume power is off without checking. Keep a flashlight nearby for visibility. For battery units, keep batteries out until mounting is complete.
Read the manual carefully, focusing on wiring diagrams and placement instructions to avoid mistakes during installation.
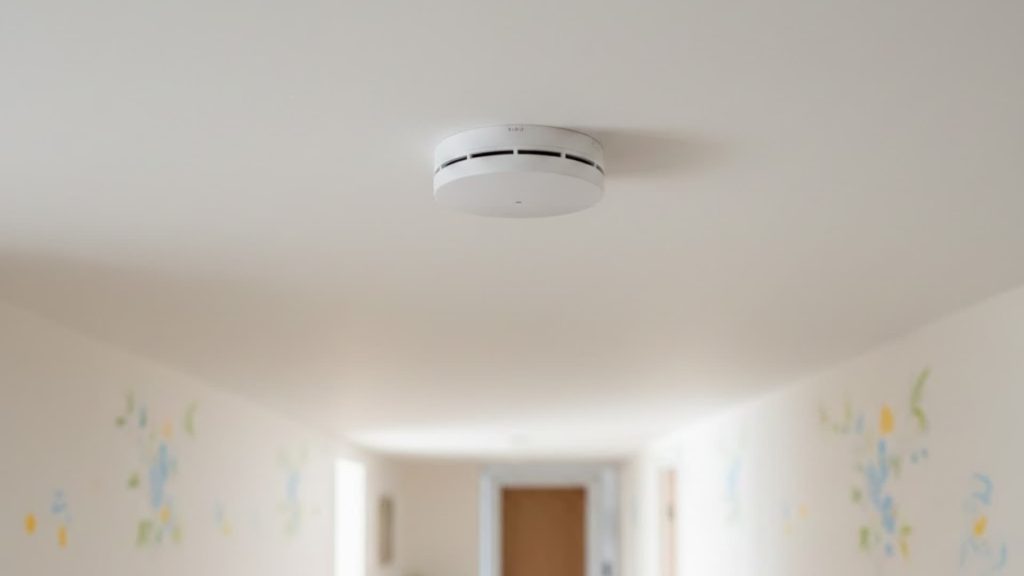
Step 2: Mark Placement
Proper placement ensures early smoke detection. Install alarms on the ceiling, several inches away from walls, corners, vents, and fans.
Airflow can delay detection and reduce effectiveness. Hold the mounting plate in position, level it properly, and mark screw holes with a pencil.
If replacing an old alarm, confirm alignment with existing holes or prepare to drill new ones for a secure fit.
Step 3: Mount Bracket
Drill pilot holes at the marked spots. If not drilling into a stud, insert wall anchors for stronger support.
Secure the mounting bracket firmly so it does not shift or loosen over time. A stable base prevents false alerts or alignment issues.
For hardwired models, gently pull the house wires through the bracket opening, leaving enough length for safe and easy connections.
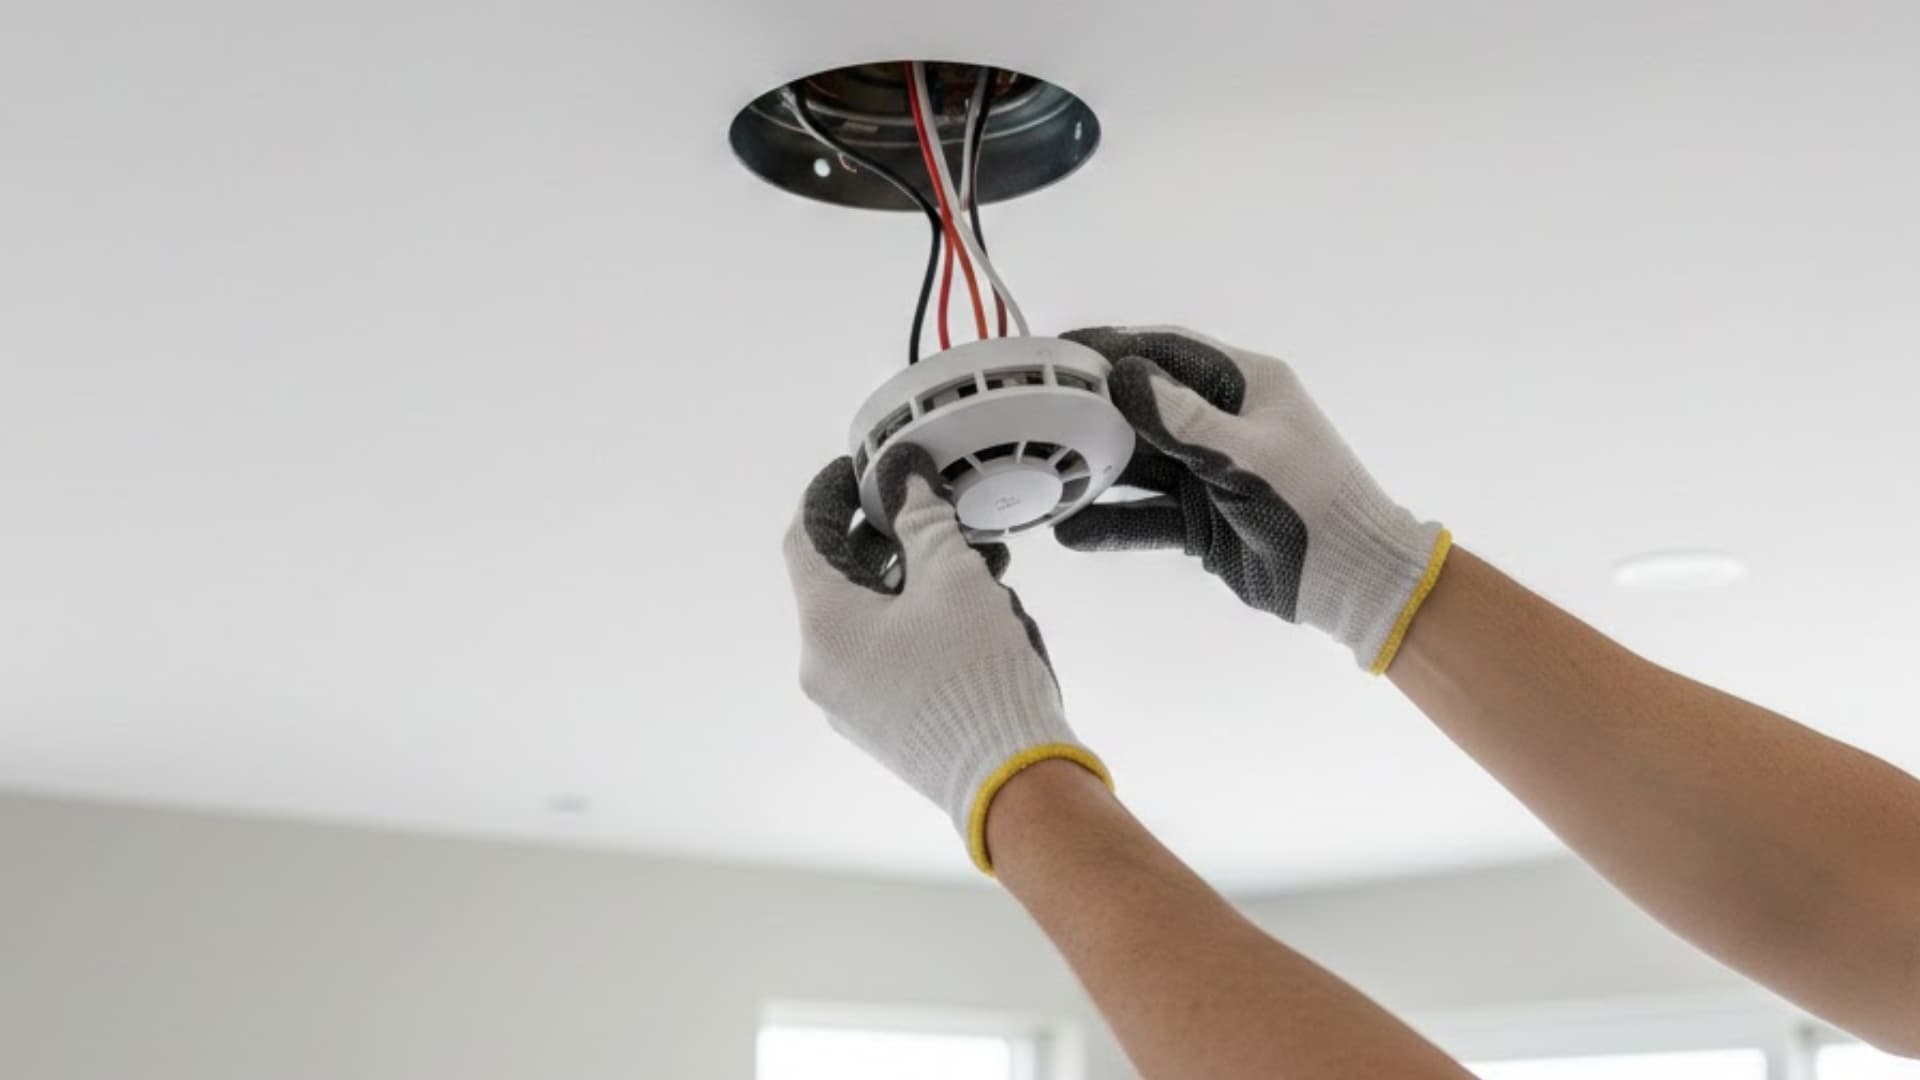
Step 4: Connect Wires
Match the house wires to the alarm harness, typically black to hot, white to neutral, and red to interconnect.
Secure each connection tightly using approved connectors. Loose wiring can cause malfunction or chirping sounds.
Carefully tuck wires into the box without pinching them. Insert fresh batteries if required, then attach the alarm to the bracket until it locks firmly in place.
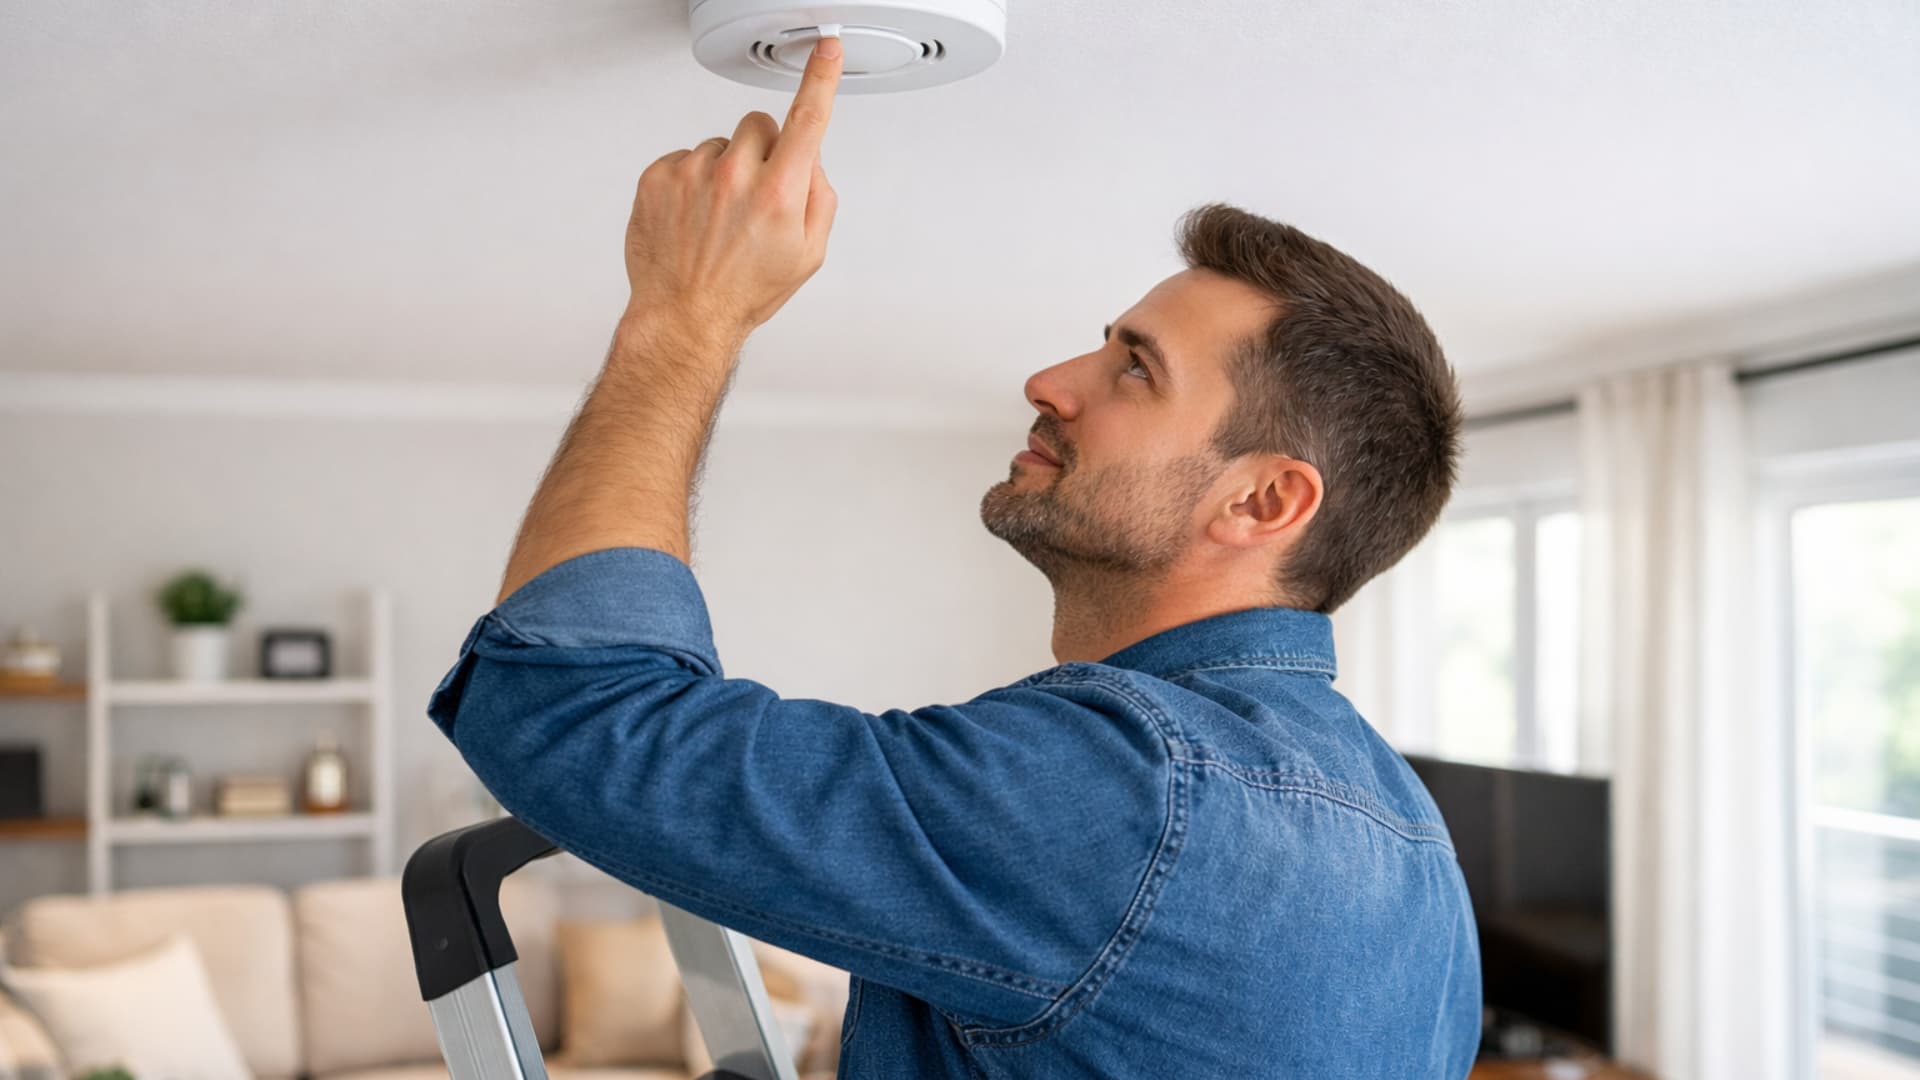
Step 5: Test Alarm
Press and hold the test button until the alarm sounds clearly. For interconnected systems, confirm all units activate together.
This ensures full home coverage during emergencies. Test the hush feature if available to understand its function.
Write the installation date inside the unit and set a monthly testing reminder. Clean up debris and store the manual safely for future reference.
Installing Multiple Fire Alarms in One System
When installing more than one unit, proper interconnection becomes important. In a connected setup, when one alarm detects smoke, all alarms in the house sound at the same time.
This improves safety, especially in larger homes or multi-level properties. For hardwired systems, alarms are linked using an interconnect wire, usually the red wire, that runs between units.
Each alarm must be compatible with the others to function correctly. Wireless interconnected options are also available.
These models sync via radio frequency, eliminating the need for additional wiring. After installation, test the entire system to confirm every unit activates together without delay.
Common Mistakes During Fire Alarm Installation
Even small installation errors can reduce alarm performance, cause false alerts, or can put your home and family at serious risk.
- Installing Too Close to Kitchens: Placing alarms near cooking areas often triggers false alerts due to steam or smoke. Install them at a safe distance to reduce nuisance alarms.
- Ignoring Manufacturer Instructions: Skipping the manual can lead to incorrect wiring and improper placement. Always follow the provided specifications carefully for reliable operation.
- Forgetting to Test After Installation: Failing to test the alarm immediately after installation leaves you unsure whether it works. Always press the test button to confirm proper function.
- Mixing Incompatible Models: Combining different models can prevent the interconnection from working correctly. Use compatible units designed to operate within one system.
- Improper Mounting or Loose Brackets: A loose bracket can cause alignment issues or random chirping. Ensure the mounting base is tight and stable.
Cost of Installing a Fire Alarm System
The cost of installing a fire alarm depends on the type of unit and the complexity of the setup. Hardwired alarms range from $50 to $120 each, excluding labor.
For DIY projects, a basic battery-powered smoke alarm typically costs between $20 and $60 per unit.
If hiring an electrician, installation labor can add $150 to $400 per alarm, depending on wiring needs and home layout.
A full fire alarm system installation with interconnected units across a larger home may cost between $1,000 and $ 3,000. Smart or panel-based systems can further increase the total.
Testing and Maintenance After Installation
Once your fire alarm installation is complete, regular maintenance keeps the system reliable.
Test each alarm once a month by pressing the test button until you hear a strong, clear sound. If you have interconnected units, confirm they all activate together.
Replace batteries at least once a year, or immediately when you hear a low-battery warning chirp. Even hardwired alarms usually have backup batteries that need attention.
Most fire alarms should be replaced every 8 to 10 years, depending on manufacturer recommendations.
To prevent false alarms, clean the unit every few months using a vacuum or soft brush to remove dust and debris from vents.
When to Call a Professional for Installation?
While many homeowners can handle basic fire alarm installation, certain situations demand professional expertise to ensure compliance, reliability, and complete system coverage.
- Large Homes: Bigger properties often need centralized panels, advanced wiring, and zone setup. These systems are complex and require trained technicians for safe installation.
- Commercial Buildings: Offices and retail spaces must meet strict fire codes. Professional installation is usually required to pass inspections and meet legal standards.
- Code Requirements: Some areas legally require licensed electricians for hardwired or interconnected systems. Ignoring this can lead to penalties or failed inspections.
- System Malfunctions: Ongoing false alarms or wiring issues signal deeper problems. A professional can diagnose and safely fix faults.
- Smart System Upgrades: Integrated systems connected to security or automation platforms need technical configuration to ensure proper performance.
Conclusion
Fire safety is not something to delay or treat casually. A properly installed fire alarm ensures your home is protected the moment smoke is detected.
Whether you choose a single unit or a complete fire alarm system installation with interconnected alarms, taking the time to install and test everything correctly makes a real difference.
Small steps like correct placement, secure wiring, and regular testing add up to reliable protection. If you ever feel unsure, calling a professional is always a smart move.
Have questions or want to share your experience with fire alarm installation? Drop your comments below and join the conversation.