Many computer users feel intimidated by the prospect of replacing hardware components, but with the right guidance, you can confidently upgrade your system yourself. Whether you’re looking to boost your computer’s performance with additional RAM, replace an aging hard drive with a speedy SSD, or replace any other internal component, this comprehensive guide will walk you through each process step-by-step. You’ll discover that hardware replacement is more accessible than you might think, saving you money on professional services while giving you valuable technical skills. However, if you encounter complex issues or prefer expert assistance, professionals specializing in PC troubleshooting and component upgrades are available to ensure everything is installed correctly. By following our detailed instructions, you’ll learn proper safety procedures, component compatibility, and installation techniques that ensure your upgrades go smoothly.
Key Takeaways:
- Upgrading RAM and storage drives (HDD to SSD) are among the most cost-effective ways to significantly boost computer performance, with detailed replacement guides making these tasks accessible even for beginners with basic tools and safety precautions.
- Proper component compatibility checking before purchase is vital-matching RAM specifications (DDR type, speed, capacity) to your motherboard and ensuring storage drive interfaces (SATA, NVMe, M.2) align with available slots prevents costly mistakes and installation failures.
- Following anti-static procedures, disconnecting power sources, and documenting cable connections with photos during disassembly streamlines the replacement process and protects sensitive electronic components from damage during hardware upgrades.
Types of Hardware Components
Your computer relies on several key hardware components that work together to deliver optimal performance. Understanding these components helps you make informed decisions when upgrades become necessary. Each part serves a specific function, from storing data to processing information at lightning speed.
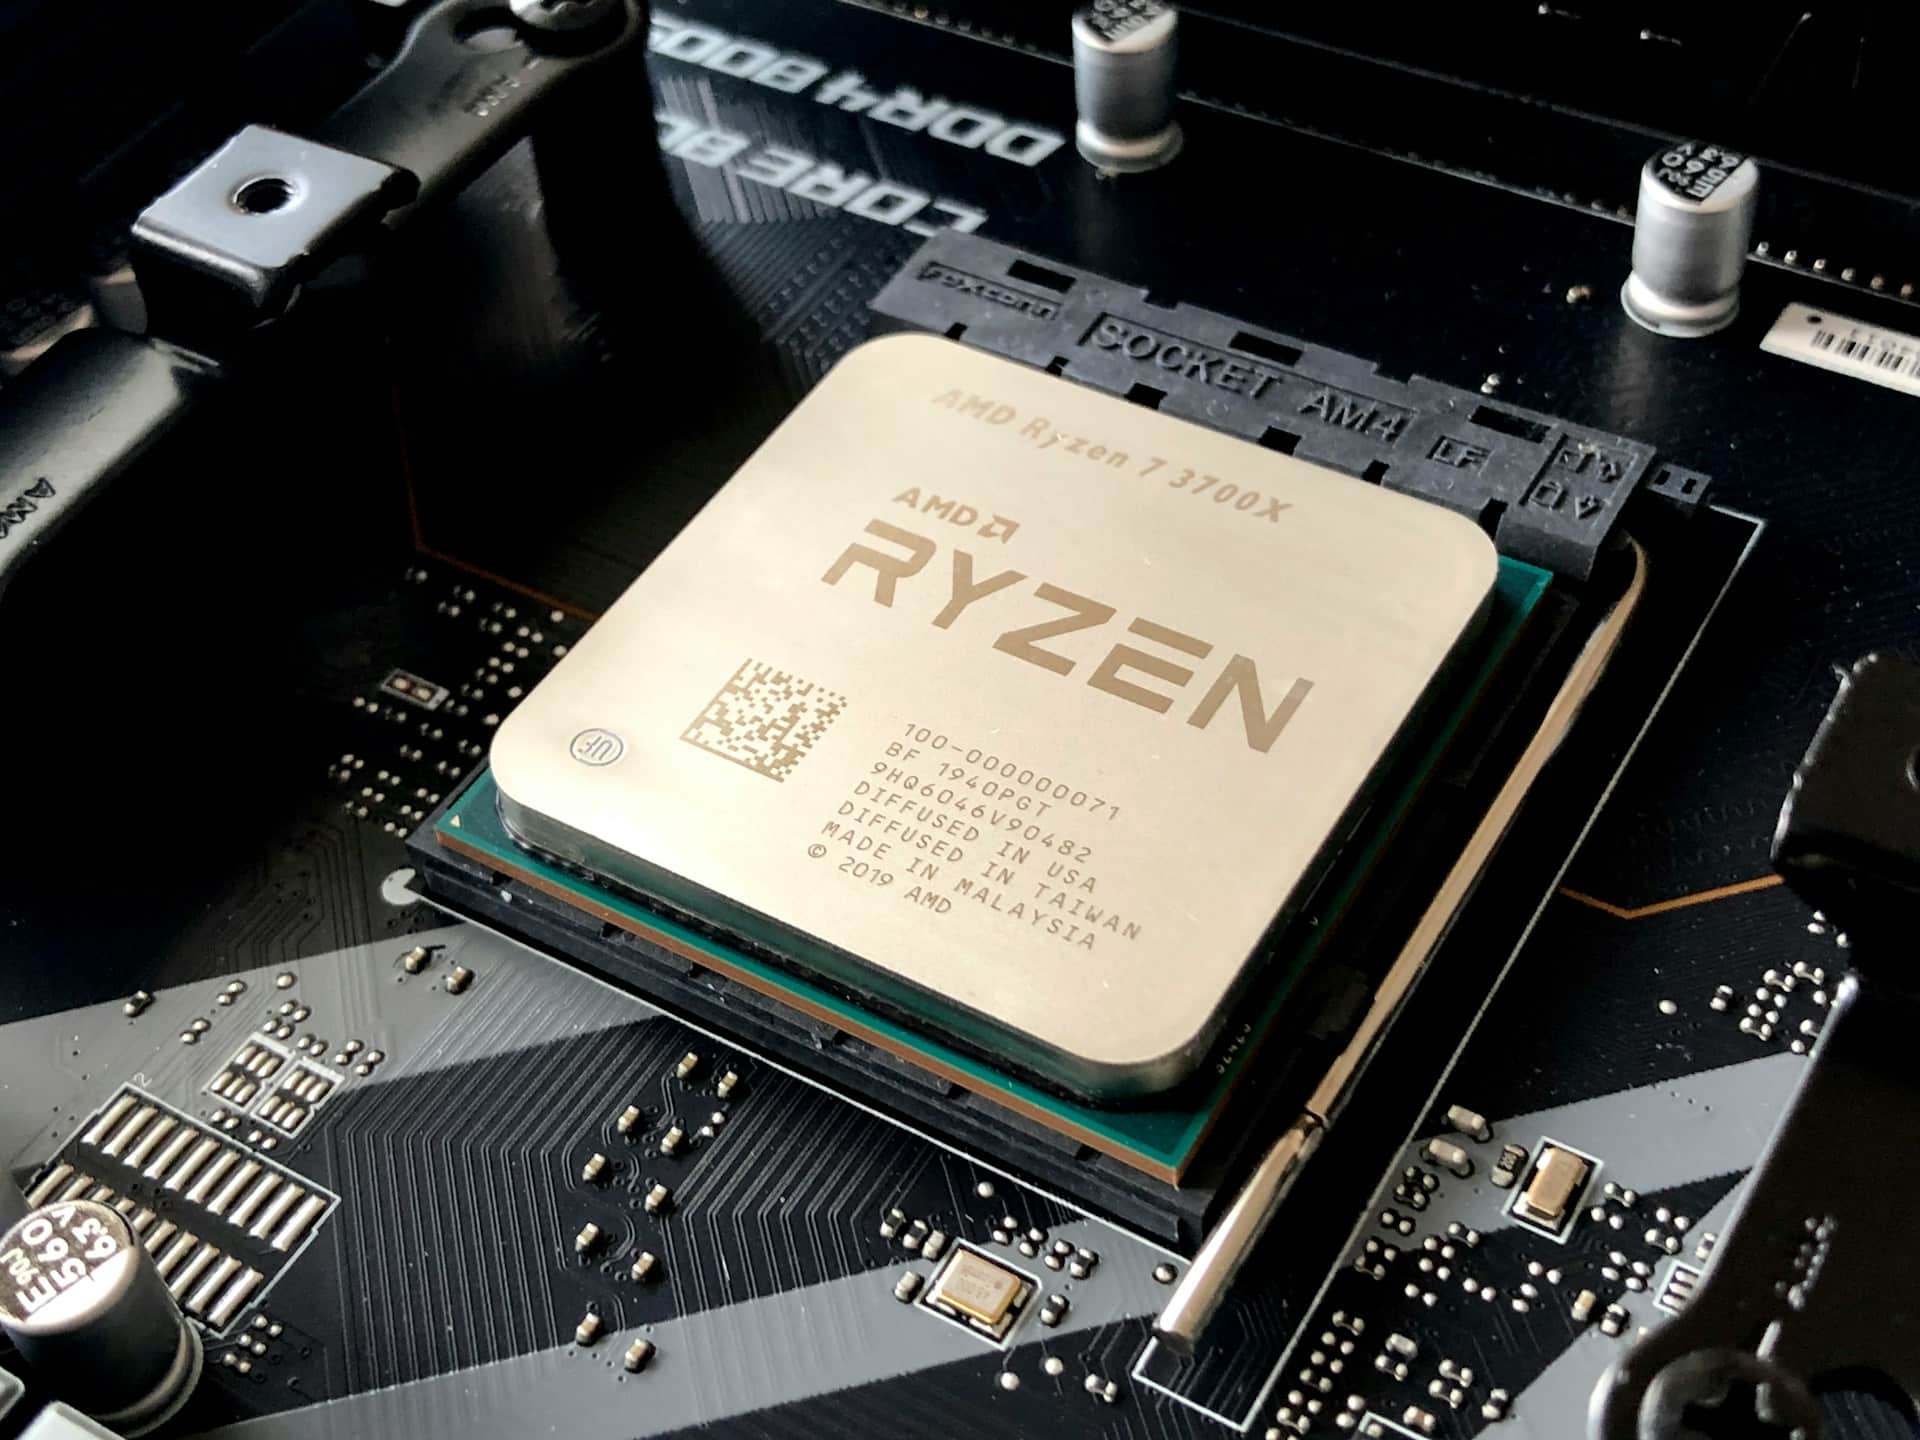
- Central Processing Unit (CPU) – the brain of your computer
- Random Access Memory (RAM) – temporary storage for active processes
- Hard Disk Drive (HDD) – traditional mechanical storage
- Solid State Drive (SSD) – modern flash-based storage
- Graphics Processing Unit (GPU) – handles visual rendering
Assume that replacing any of these components requires proper research and compatibility checks before purchase.
|
Component |
Primary Function |
|---|---|
|
RAM |
Temporary data storage for running applications |
|
HDD |
Long-term mechanical data storage |
|
SSD |
High-speed solid-state data storage |
|
CPU |
Processes all computational tasks |
|
GPU |
Renders graphics and visual content |
Random Access Memory (RAM)
Your RAM serves as your computer’s short-term memory, holding data that your processor needs immediate access to. Modern systems typically require 8GB for basic tasks, while gaming and professional work demand 16GB or more. DDR4 remains the standard, though DDR5 is gaining traction with speeds reaching 6400MHz. When you close applications, RAM clears that data, making it volatile storage, unlike your hard drive.
Hard Disk Drive (HDD)
HDDs use spinning magnetic platters to store your data permanently, operating at speeds between 5400 and 7200 RPM for consumer models. These mechanical drives offer substantial storage capacity at affordable prices, with 1TB to 4TB being common sizes. Your HDD contains read/write heads that move across platters to access information, making them slower than solid-state alternatives.
The mechanical nature of HDDs makes them susceptible to physical damage from drops or impacts. You’ll notice audible clicking or whirring sounds during operation, which is normal behaviour. Enterprise-grade HDDs can reach 10,000 RPM and offer better reliability with Mean Time Between Failures (MTBF) ratings exceeding 1 million hours. Desktop models typically use 3.5-inch form factors, while laptops utilize smaller 2.5-inch drives. Your HDD’s lifespan averages 3-5 years under normal usage, though this varies based on workload and environmental conditions.
Solid State Drive (SSD)
SSDs revolutionize storage with flash memory chips instead of moving parts, delivering read speeds up to 7000MB/s on PCIe 4.0 models. Your system boots in seconds rather than minutes when running on an SSD. These drives come in SATA, M.2, and NVMe formats, with NVMe offering the fastest performance. You’ll experience dramatically reduced application load times and file transfers compared to traditional HDDs.
The absence of mechanical components makes SSDs more durable and energy-efficient than their HDD counterparts. Your laptop battery lasts longer when using an SSD due to lower power consumption, typically 2-3 watts versus 6-7 watts for HDDs. Modern SSDs use 3D NAND technology, stacking memory cells vertically to increase capacity and endurance. Write endurance is measured in Terabytes Written (TBW), with consumer drives rated between 150-600 TBW depending on capacity. You should expect 5-7 years of reliable service, though SSDs can fail suddenly without warning signs unlike HDDs that often show gradual degradation.
Tips for Successful Replacement
Planning your hardware upgrade carefully prevents costly mistakes and system damage. You’ll need adequate workspace with proper lighting, anti-static protection, and organized storage for screws and components. Document your disassembly process with photos on your phone-this visual reference proves invaluable during reassembly. Power down completely and disconnect all cables before opening your system. Verify component compatibility using your motherboard’s specification sheet or the manufacturer’s website. Assume that rushing through installation causes 80% of DIY hardware failures.
- Always ground yourself before touching internal components
- Keep track of different screw types and their locations
- Consult your device manual for specific disassembly procedures
- Test new components immediately after installation
- Maintain a clean, clutter-free workspace
Pre-Installation Considerations
Checking compatibility specifications saves you from purchasing incompatible hardware. Your motherboard manual lists supported RAM speeds, maximum capacity, and specific slot configurations. For storage upgrades, verify whether your system uses SATA III, M.2 NVMe, or PCIe interfaces. Desktop systems typically offer more flexibility than laptops, where proprietary designs may limit your options. Back up all data before beginning – even straightforward replacements carry risks. Download necessary drivers beforehand, especially for NVMe SSDs that might need specific controller drivers for older systems.
Essential Tools Required
Your basic toolkit should include Phillips head screwdrivers (#0 and #2), an anti-static wrist strap, plastic prying tools, and thermal paste for CPU cooler reseating. Magnetic parts trays keep tiny screws organized and prevent loss. A flashlight or headlamp illuminates tight spaces inside your case. For laptop repairs, precision screwdriver sets with Torx and hex bits become necessary since manufacturers use security screws.
Professional-grade tools enhance your success rate significantly. Investing in an electric screwdriver with adjustable torque settings speeds up disassembly while preventing over-tightening that strips threads. Spudgers and plastic opening tools protect delicate clips and connectors that metal implements might damage. A can of compressed air removes dust buildup that impedes cooling performance. Cable ties and Velcro straps organize internal wiring for improved airflow. Quality tools last through multiple upgrades – a $50 toolkit pays for itself after two or three successful replacements compared to repair shop labour costs.
Step-by-Step Replacement Guides
Understanding the proper sequence and safety measures ensures successful hardware upgrades without damaging your components. Each replacement process follows specific protocols that protect both you and your equipment from electrostatic discharge and physical damage. The following guides detail the exact steps needed for common hardware replacements, with timing estimates based on typical desktop and laptop configurations.
|
Component |
Average Replacement Time |
|---|---|
|
RAM Module |
5-10 minutes |
|
HDD (Desktop) |
15-20 minutes |
|
HDD (Laptop) |
10-15 minutes |
|
SSD (2.5-inch) |
10-15 minutes |
|
SSD (M.2 NVMe) |
5-8 minutes |
Replacing RAM
Power down your system completely and unplug the power cable before opening the case. Locate the RAM slots on your motherboard and push down the retention clips at both ends of the occupied slot. The module will pop up at a 30-degree angle, allowing you to pull it straight out. Insert your new RAM stick at the same angle, aligning the notch with the slot’s key, then press down firmly until both clips snap into place with an audible click.
Replacing HDD
Disconnect all power and data cables from your existing hard drive after shutting down your computer. Remove the mounting screws securing the drive to the chassis-typically four screws on desktop bays or two to four on laptop configurations. Slide the drive out carefully, avoiding any contact with other components. Position your new HDD in the same orientation, secure it with screws, and reconnect both the SATA data cable and power connector.
Desktop systems often use 3.5-inch drive bays with tool-less mounting mechanisms that require you to slide rails onto the drive sides before clicking them into the bay. Laptops typically position the HDD in an accessible compartment near the bottom panel, though some ultrabooks require complete disassembly to access the drive. You’ll need to clone your existing drive beforehand if you want to preserve your operating system and files, using software like Macrium Reflect or Clonezilla. Most modern motherboards automatically detect the new drive during POST, but you may need to adjust boot order in BIOS if installing a fresh operating system.
Replacing SSD
For 2.5-inch SATA SSDs, follow the same physical installation process as HDDs, using the same mounting points and cable connections. M.2 NVMe drives require a different approach: locate the M.2 slot on your motherboard, remove the tiny mounting screw at the end, insert the drive at a 30-degree angle into the slot, then press down and secure with the screw. Your drive should sit flat against the motherboard.
M.2 slots come in different key configurations-B-key, M-key, and B+M-key-so verify your drive matches your motherboard’s slot before purchasing. The slot length also matters, with common sizes being 2242, 2260, and 2280 (the numbers indicate millimeter dimensions). Some motherboards include heatsinks for M.2 drives, which you should attach to prevent thermal throttling during intensive operations. NVMe drives can reach speeds of 7,000 MB/s on PCIe 4.0 interfaces, compared to SATA’s 550 MB/s limit, making proper installation worthwhile for performance gains. Check your BIOS settings after installation to enable NVMe boot support if you’re using the SSD as your primary drive.
Factors to Consider When Replacing Components
Before purchasing replacement hardware, you need to evaluate several key aspects that will determine whether your upgrade succeeds or fails. Your motherboard specifications, power supply capacity, and physical case dimensions all play significant roles in component selection. Budget constraints often influence decisions, but prioritizing quality over cost prevents future headaches and additional expenses. The right research upfront saves you from compatibility issues and disappointing performance gains.
- Motherboard socket type and chipset limitations
- Power supply wattage and connector availability
- Physical dimensions and clearance space
- Budget allocation for current and future upgrades
- Warranty coverage and return policies
Compatibility
Your motherboard dictates what components will actually work in your system. DDR4 RAM won’t fit in DDR3 slots, and an LGA 1200 processor won’t mount on an AM4 socket. Check your motherboard manual or use CPU-Z to identify exact specifications before ordering parts. NVMe drives require M.2 slots with PCIe support, while SATA SSDs need available SATA ports and power connectors. The manufacturer’s website typically lists qualified vendor lists (QVLs) showing tested compatible components for your specific model.
Performance
Matching component capabilities to your workload ensures you get measurable improvements. Installing 32GB of 3200MHz RAM benefits video editors and 3D modelers, while gamers typically see minimal gains beyond 16GB. Your processor speed and core count matter more for productivity tasks than storage upgrades. An NVMe SSD delivers 3500MB/s read speeds compared to SATA’s 550MB/s, but everyday users won’t notice the difference in basic computing tasks.
Bottlenecks occur when one component limits others from reaching full potential. Pairing a high-end GPU with an older quad-core processor creates CPU bottlenecking, where your graphics card sits idle waiting for the processor. Similarly, installing fast RAM on a motherboard that only supports lower speeds means you’re paying for performance you can’t access. Balanced upgrades yield better results than splurging on a single premium component while neglecting others. Professional benchmarking tools like Cinebench, Crystal Disk Mark, and 3DMark help you measure actual performance improvements after installation. Your specific use case determines which specifications matter most-content creators benefit from more RAM and faster storage, while gamers prioritize GPU performance and high-speed memory.
Pros and Cons of Upgrading Hardware
Making informed decisions about hardware upgrades requires weighing multiple factors that affect both your system’s performance and your budget. Understanding these trade-offs helps you determine whether an upgrade aligns with your computing needs and financial constraints. The following breakdown examines key advantages and disadvantages you’ll encounter when considering component replacements.
|
Pros |
Cons |
|---|---|
|
Improved system performance and speed |
Upfront costs can be significant |
|
Extended lifespan of the existing computer |
Risk of compatibility issues with older systems |
|
Cost-effective compared to buying new |
Time investment for research and installation |
|
Enhanced multitasking capabilities |
Potential warranty voidance on newer machines |
|
Better gaming and graphics performance |
May require additional upgrades (PSU, cooling) |
|
Increased storage capacity |
Learning curve for DIY installations |
|
Lower power consumption with newer parts |
Diminishing returns on very old systems |
|
Ability to customize to specific needs |
Risk of component damage during installation |
|
Reduced boot and load times |
Some upgrades require BIOS updates |
|
Environmental benefit of reducing e-waste |
Not all components are user-replaceable |
Benefits of Upgrading
Your computer’s performance can see dramatic improvements with strategic hardware upgrades. Adding RAM from 8GB to 16GB typically costs $40-$80 but delivers noticeable multitasking improvements, while swapping an HDD for an SSD reduces boot times from 60 seconds to under 10 seconds. These upgrades extend your system’s useful life by 2-4 years, delaying the need for a complete replacement that could cost $800-$1500.
Potential Drawbacks
Hardware upgrades aren’t without complications that you need to consider carefully. Compatibility issues frequently arise when mixing old and new components, particularly with motherboards manufactured before 2015. Your warranty may become void if you open sealed components, especially on laptops and all-in-one systems, where manufacturers explicitly prohibit user modifications.
Beyond compatibility concerns, you might encounter unexpected costs that inflate your budget significantly. Installing a high-performance GPU often necessitates upgrading your power supply unit, adding $60-$150 to your expenses. Older systems with DDR3 RAM face limited upgrade paths since DDR4 and DDR5 require new motherboards, effectively forcing a complete platform change. Your DIY installation attempts carry inherent risks: static discharge can destroy sensitive components, and improper mounting can cause overheating or physical damage. Studies show that 15%-20% of first-time upgraders damage at least one component during installation, turning a $100 upgrade into a $200-$300 repair. Additionally, BIOS updates required for newer components sometimes fail, potentially damaging your motherboard and requiring professional recovery services.
Troubleshooting After Replacement
Hardware replacements don’t always go smoothly on the first attempt, even when you’ve followed every step correctly. Your system might refuse to boot, display error messages, or exhibit unexpected behavior that wasn’t present before the upgrade. Understanding how to diagnose and resolve these post-installation issues will save you time and prevent unnecessary trips to a repair shop. Most problems stem from a handful of common causes that you can identify and fix within minutes once you know what to check.
Common Issues
Your computer may fail to recognize newly installed RAM, showing only a portion of the total capacity or refusing to boot entirely with continuous beeping sounds. SSDs and HDDs sometimes don’t appear in BIOS or Windows, leaving you staring at a “No Boot Device” error. Graphics cards can trigger display problems ranging from no video output to artifacts and screen flickering. These issues typically result from incompatible components, improper seating, or configuration oversights rather than defective hardware.
Solutions and Tips
Start by reseating your components-remove and reinstall them with firm, even pressure until you hear the retention clips click into place. Check that RAM sticks occupy the correct slots according to your motherboard manual, typically slots 2 and 4 for dual-channel configuration. Verify all power connectors are fully inserted, particularly the 24-pin motherboard connector and 8-pin CPU power cable.
- Reset your BIOS to default settings by removing the CMOS battery for 30 seconds
- Update your motherboard BIOS to the latest version for improved hardware compatibility
- Run Windows Memory Diagnostic or MemTest86 to identify faulty RAM modules
- Initialize new drives through Disk Management before formatting and partitioning
- This resolves approximately 80% of post-installation problems without requiring component replacement
When basic troubleshooting doesn’t resolve your issues, systematic testing helps isolate the problem component. Install one RAM stick at a time in different slots to identify whether you’re dealing with a bad module or faulty slot. For storage drives that won’t appear, try different SATA ports and cables since ports can fail independently. Your PSU might lack sufficient wattage for power-hungry components like high-end graphics cards. Calculate your system’s total power draw and ensure your power supply provides at least 20% overhead. Temperature monitoring software reveals whether inadequate cooling causes stability problems, with CPUs throttling at 90°C and GPUs at 83°C on average.
- Test components in another compatible system to confirm they’re functioning properly
- Check Windows Event Viewer for specific error codes that pinpoint hardware failures
- Ensure your operating system has the latest chipset and device drivers installed
- Verify component compatibility with your motherboard using the manufacturer’s QVL (Qualified Vendor List)
- This methodical approach identifies the root cause without guesswork or unnecessary spending
Summing Up
Considering all points, upgrading your computer hardware doesn’t have to be intimidating when you follow proper procedures. Whether you’re installing new RAM modules, swapping out an aging HDD for a faster SSD, or replacing other important components, the key lies in understanding your system’s specifications and taking appropriate safety precautions. You now have the knowledge to identify compatible parts, use the right tools, and execute replacements with confidence. By maintaining careful handling practices and following manufacturer guidelines, you can successfully extend your computer’s lifespan and boost its performance without professional assistance.
Frequently Asked Questions (FAQ)
What are the important steps for safely replacing RAM in my computer?
Before replacing RAM, power down your computer completely and unplug it from the electrical outlet. Press the power button several times to discharge residual electricity. Open your computer case and locate the RAM slots on the motherboard. Press down on the clips at both ends of the existing RAM module to release it, then gently pull it out at a slight angle. When installing new RAM, align the notch on the module with the ridge in the slot, insert it at a 30-degree angle, then press down firmly until the clips snap into place on both sides. Ensure the RAM is fully seated before closing the case and powering on your system.
How do I migrate my operating system when upgrading from HDD to SSD?
Migrating to an SSD requires cloning your existing drive or performing a fresh installation. For cloning, connect your new SSD via USB adapter or install it in a secondary drive bay. Use disk cloning software such as Macrium Reflect, Clonezilla, or manufacturer-provided tools to copy your entire HDD contents to the SSD. After cloning completes, shut down your computer, physically remove the old HDD, and install the SSD in its place using the appropriate mounting brackets. Connect the SATA data cable and power connector. Boot into BIOS to verify the SSD is detected, then start your computer normally. Alternatively, you can perform a clean Windows installation on the SSD and manually transfer your files from the old drive.
What tools and precautions do I need when replacing internal computer components?
A Phillips-head screwdriver is the primary tool needed for most component replacements, though some cases may require Torx or hex drivers. Keep a magnetic parts tray or small container nearby to hold screws and prevent loss. An anti-static wrist strap connected to your computer case helps prevent electrostatic discharge damage to sensitive components. Work on a non-carpeted surface in a well-lit area with adequate space to organize parts. Take photos before disconnecting cables to reference proper reconnection. Handle components by their edges, avoiding contact with circuitry, pins, or gold connectors. Consult your motherboard manual to identify component locations and compatibility requirements before beginning any replacement procedure.