When I first tried to program a garage door opener, I had no idea where to begin.
The buttons and blinking lights were confusing, and every step felt like guesswork. I remember wondering if I was even pressing the right things.
If that sounds familiar, you’re not alone. Many people have a hard time setting up a basic garage door remote or linking their opener to the HomeLink buttons in their car.
This guide walks you through both tasks in a clear and simple way.
I’ll show you how to program a standard opener and then sync it with your vehicle’s HomeLink system.
You’ll also get quick fixes for the most common problems. By the end, you’ll know exactly how to get everything working.
Understanding Garage Door Opener Programming
Programming a garage door opener seems tricky at first, but it becomes clear once you know what each step does.
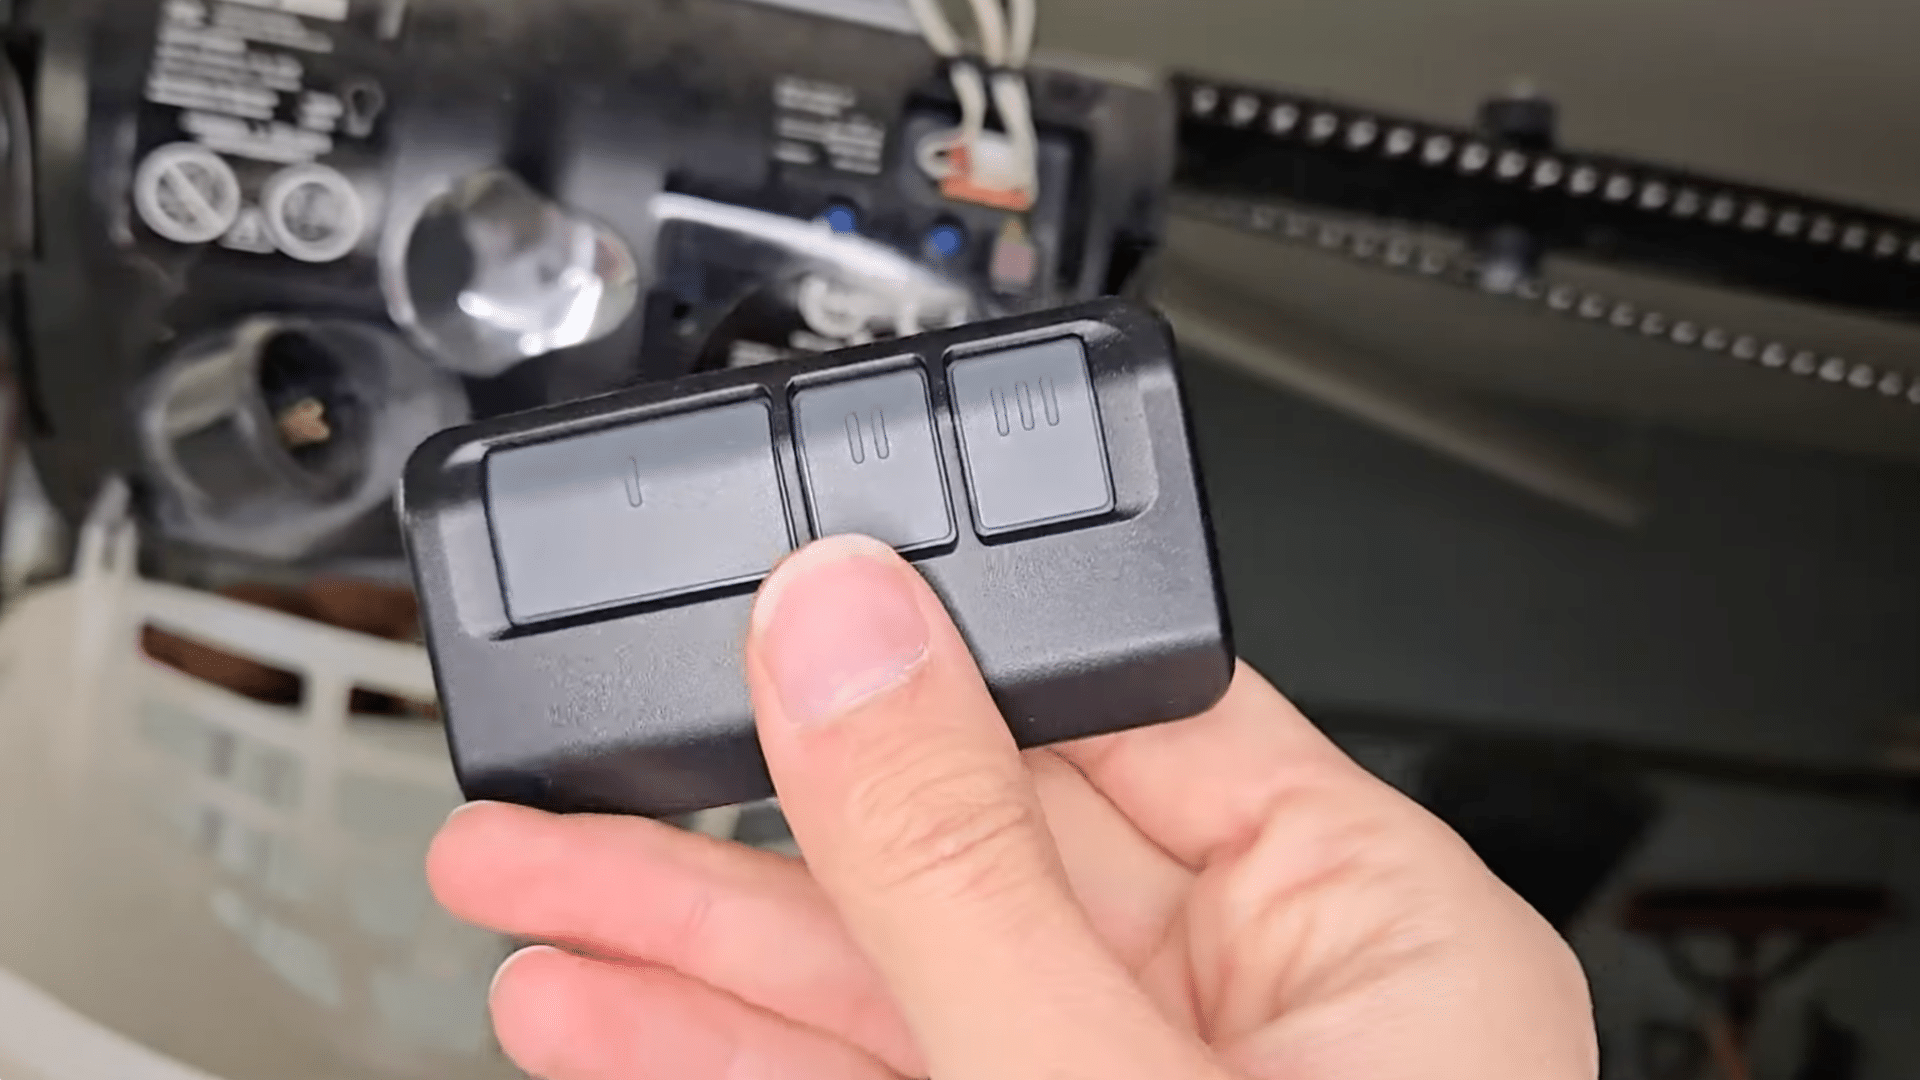
You start by finding the Learn button on the opener unit, which is the key to connecting everything. Press it once, then use the remote to send a signal back to the opener.
Some units respond right away, while others need a second try, so don’t worry if it takes a moment.
For cars with built-in buttons, the process is similar: hold the HomeLink button, wait for the light to blink, and sync it with the opener using the same Learn button.
Keep your actions steady and follow the steps in order.
Most issues come from timing or pressing the wrong button, so slowing down helps. With these basics, you can set up your opener without stress.
Program a Universal Garage Remote
Programming a universal garage remote becomes much easier when you follow each step in order. You’ll use the learn button on your opener and a short setup process on the remote to get everything working.
Step 1: Find the Learn Button
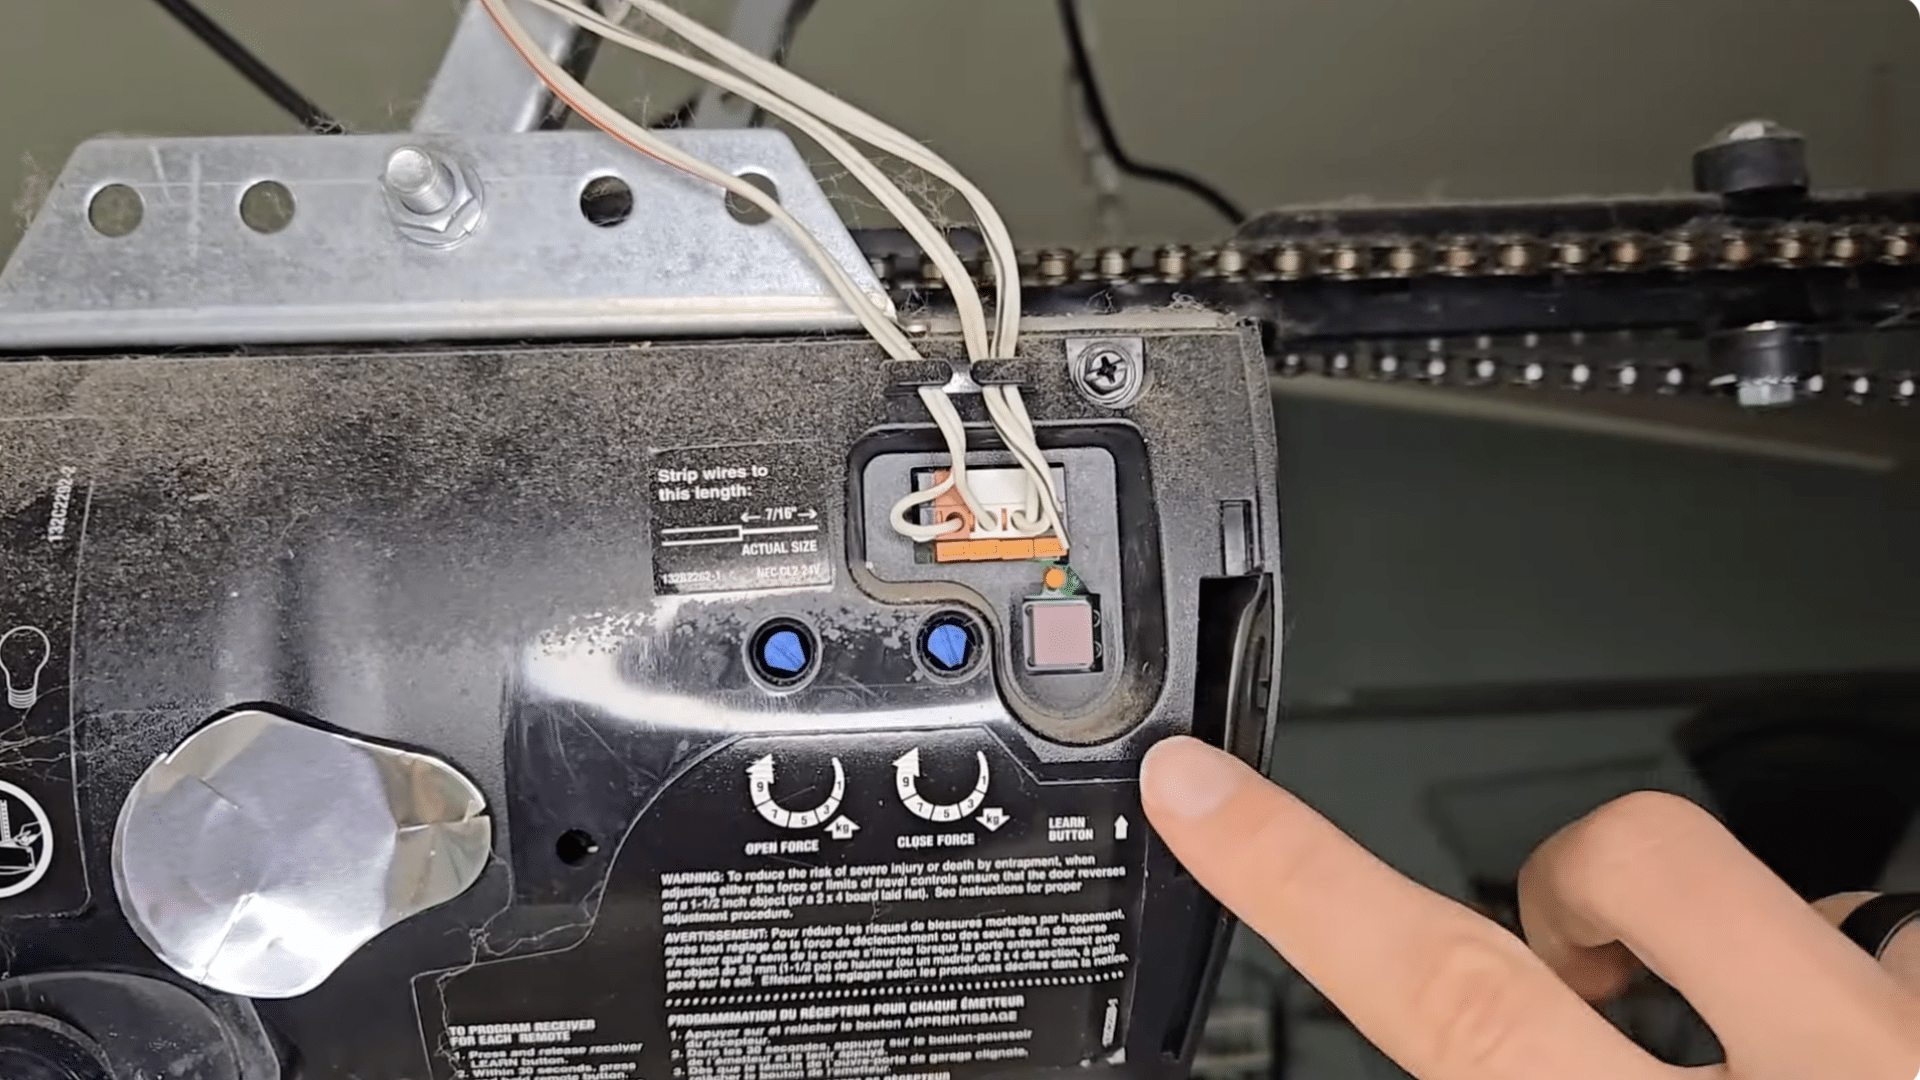
Start by opening the cover on your garage door opener and finding the small “Learn” button.
The color of this button matters because it tells you how many times to press your remote during setup.
Look closely to confirm the exact color, especially on older units where it may appear faded. Make sure it’s clear enough to read before continuing.
Then identify the color so you can match it with the correct number of remote presses in the next step.
Step 2: Check the Color Chart
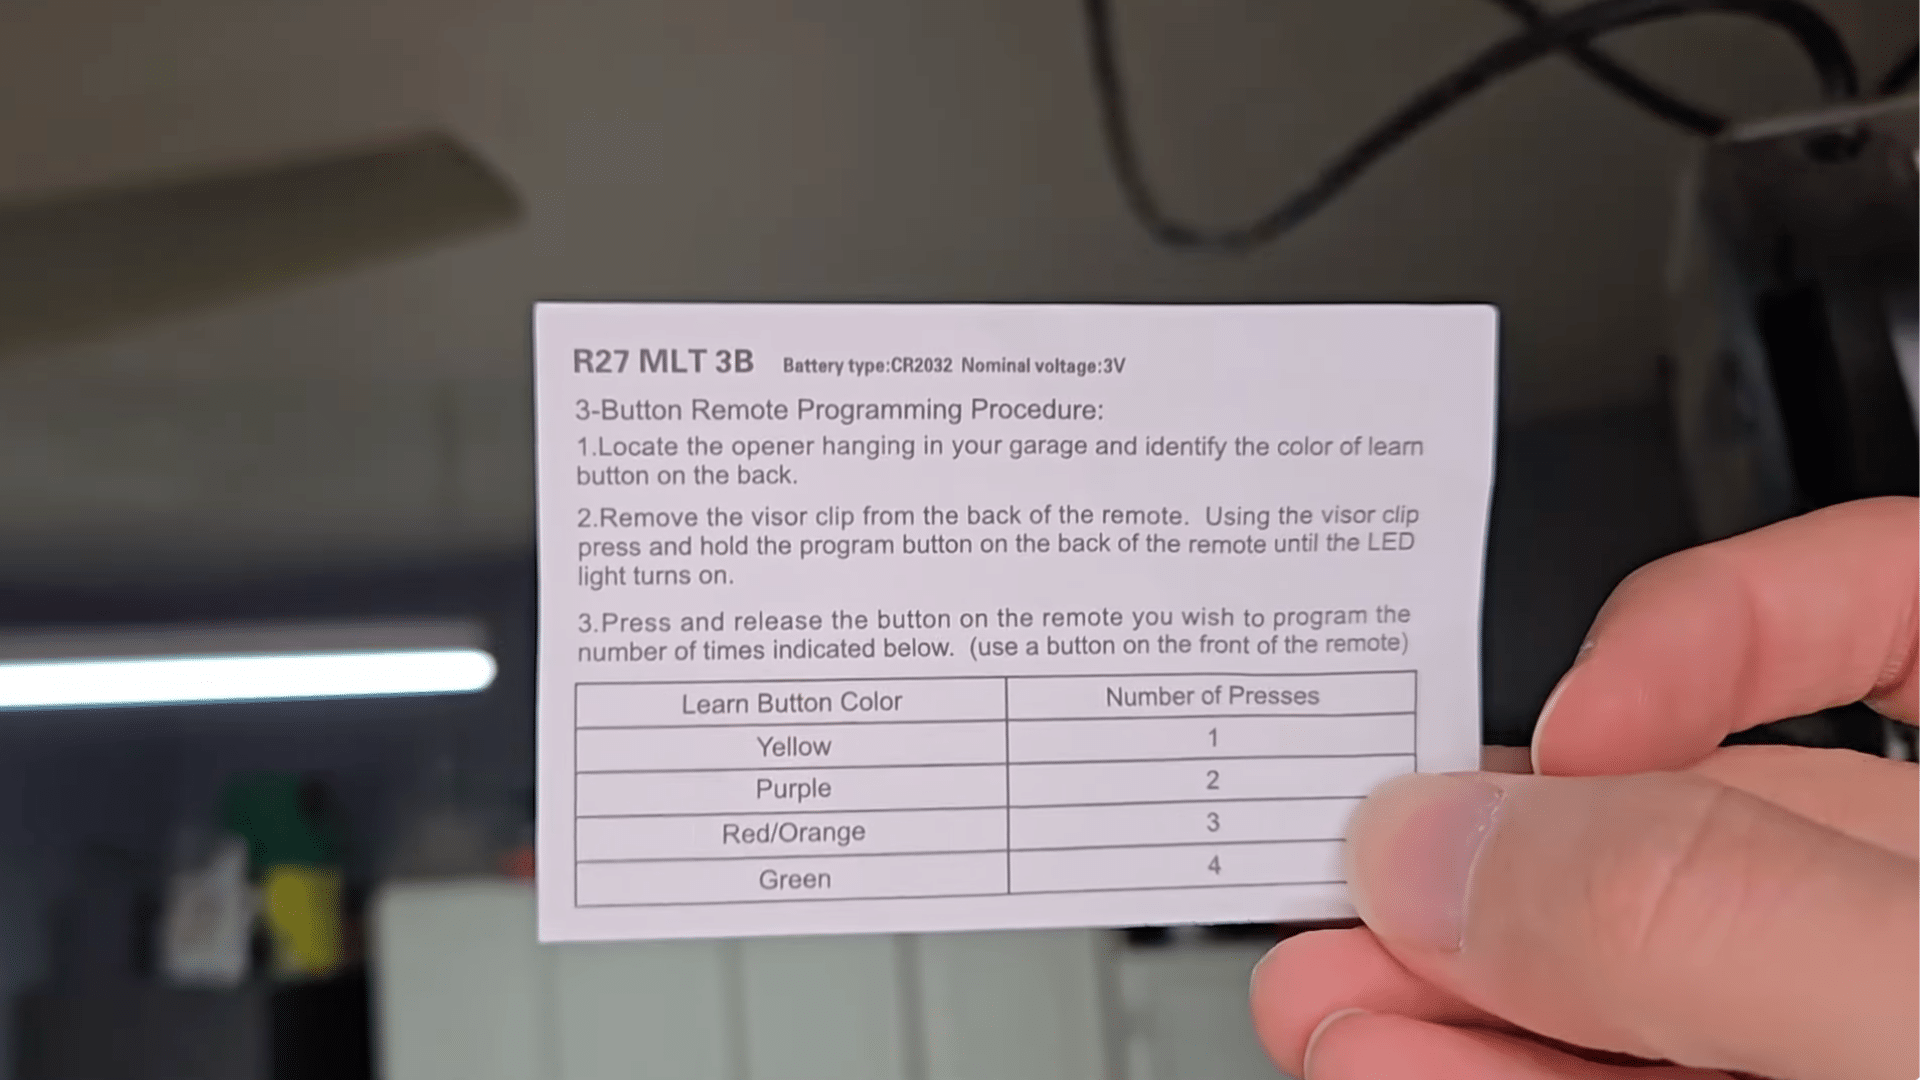
Check the chart that comes with your universal remote to find the number of presses that match your opener’s Learn button color.
Look for your opener’s color on the chart and note the number listed. For example, a purple Learn button often requires two presses.
Keep the chart nearby because you’ll use it more than once during programming.
Then match the number of presses correctly, since this helps the remote follow your opener’s signal style and makes the setup work the way it should.
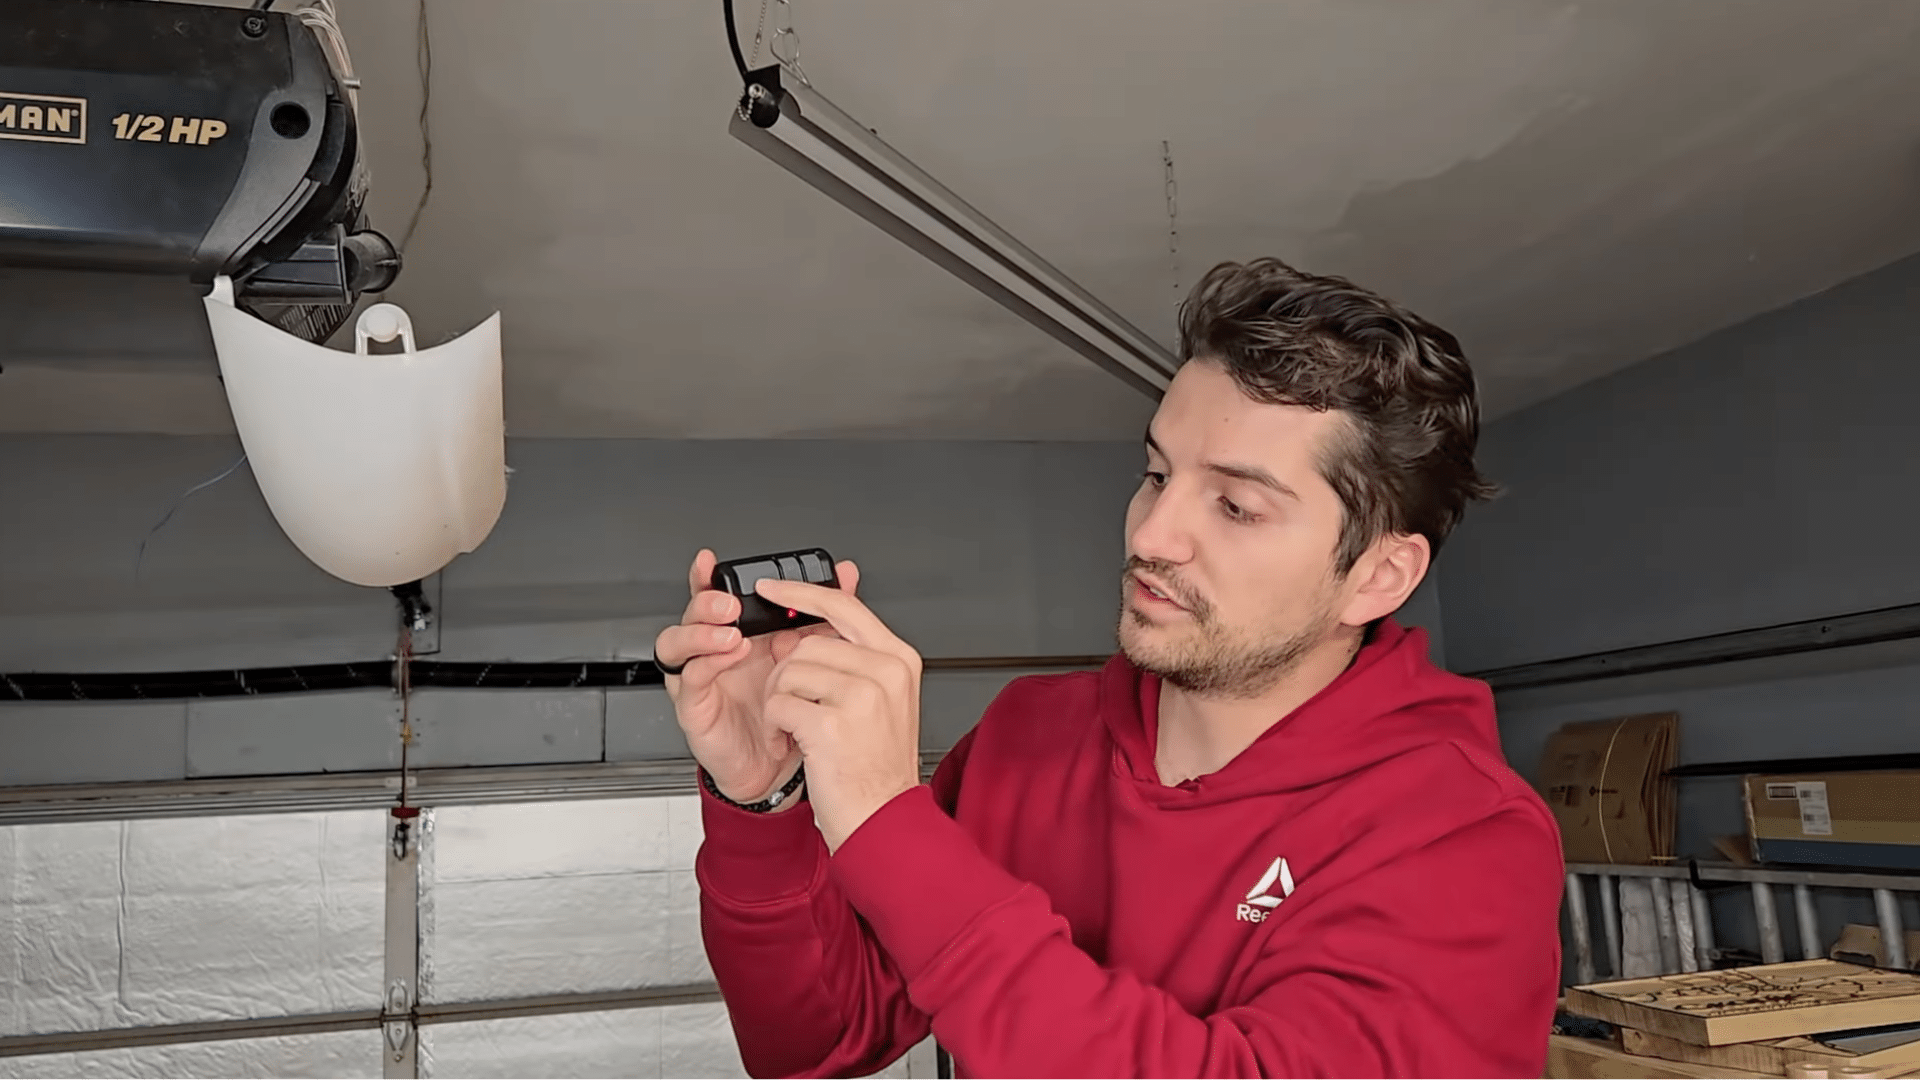
Step 3: Remove the Visor Clip
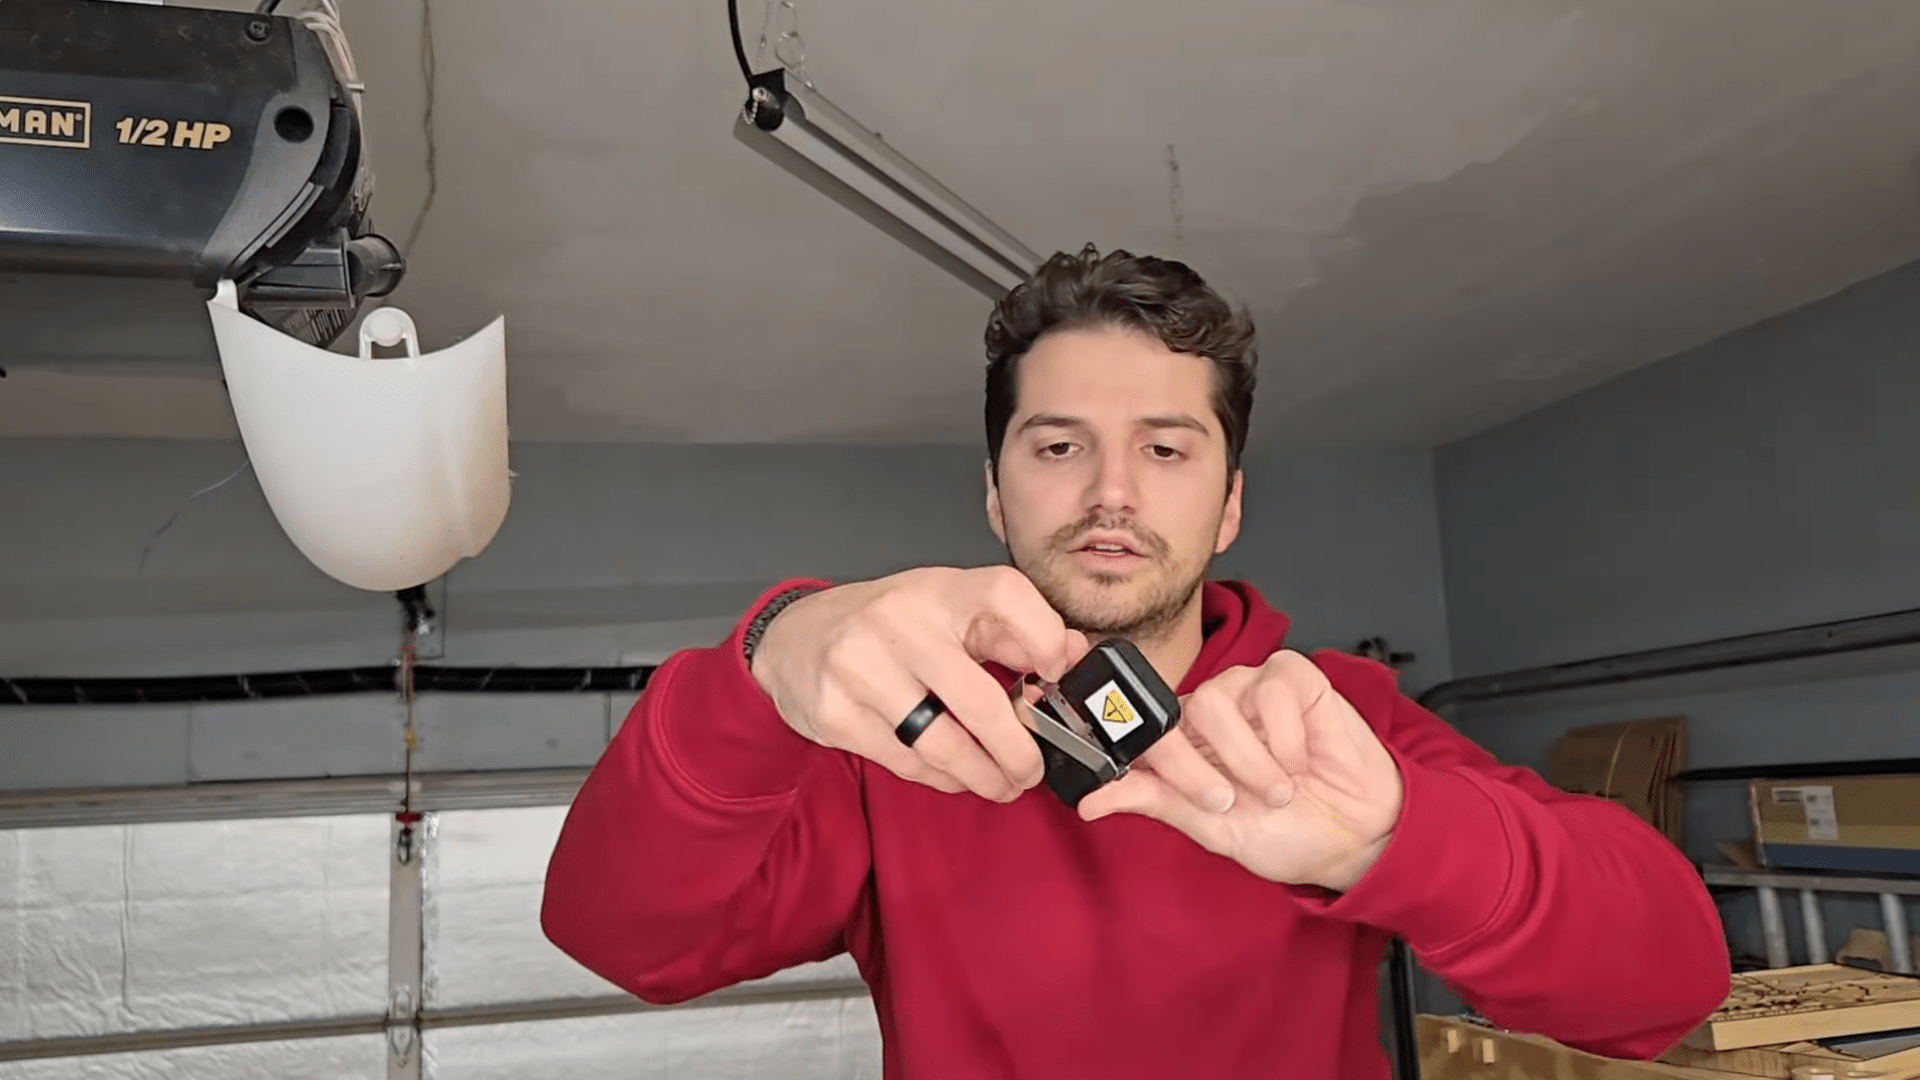
Before entering programming mode, take off the visor clip from the back of the remote.
This clip often hides the small rubber button you’ll need to reach. It typically slides or pops off easily, so you can remove it by hand.
Once it’s off, look for the round rubber button underneath. Use your nails to press it firmly.
This hidden button is what activates the programming LED on the front, so make sure you locate it before moving to the next step.
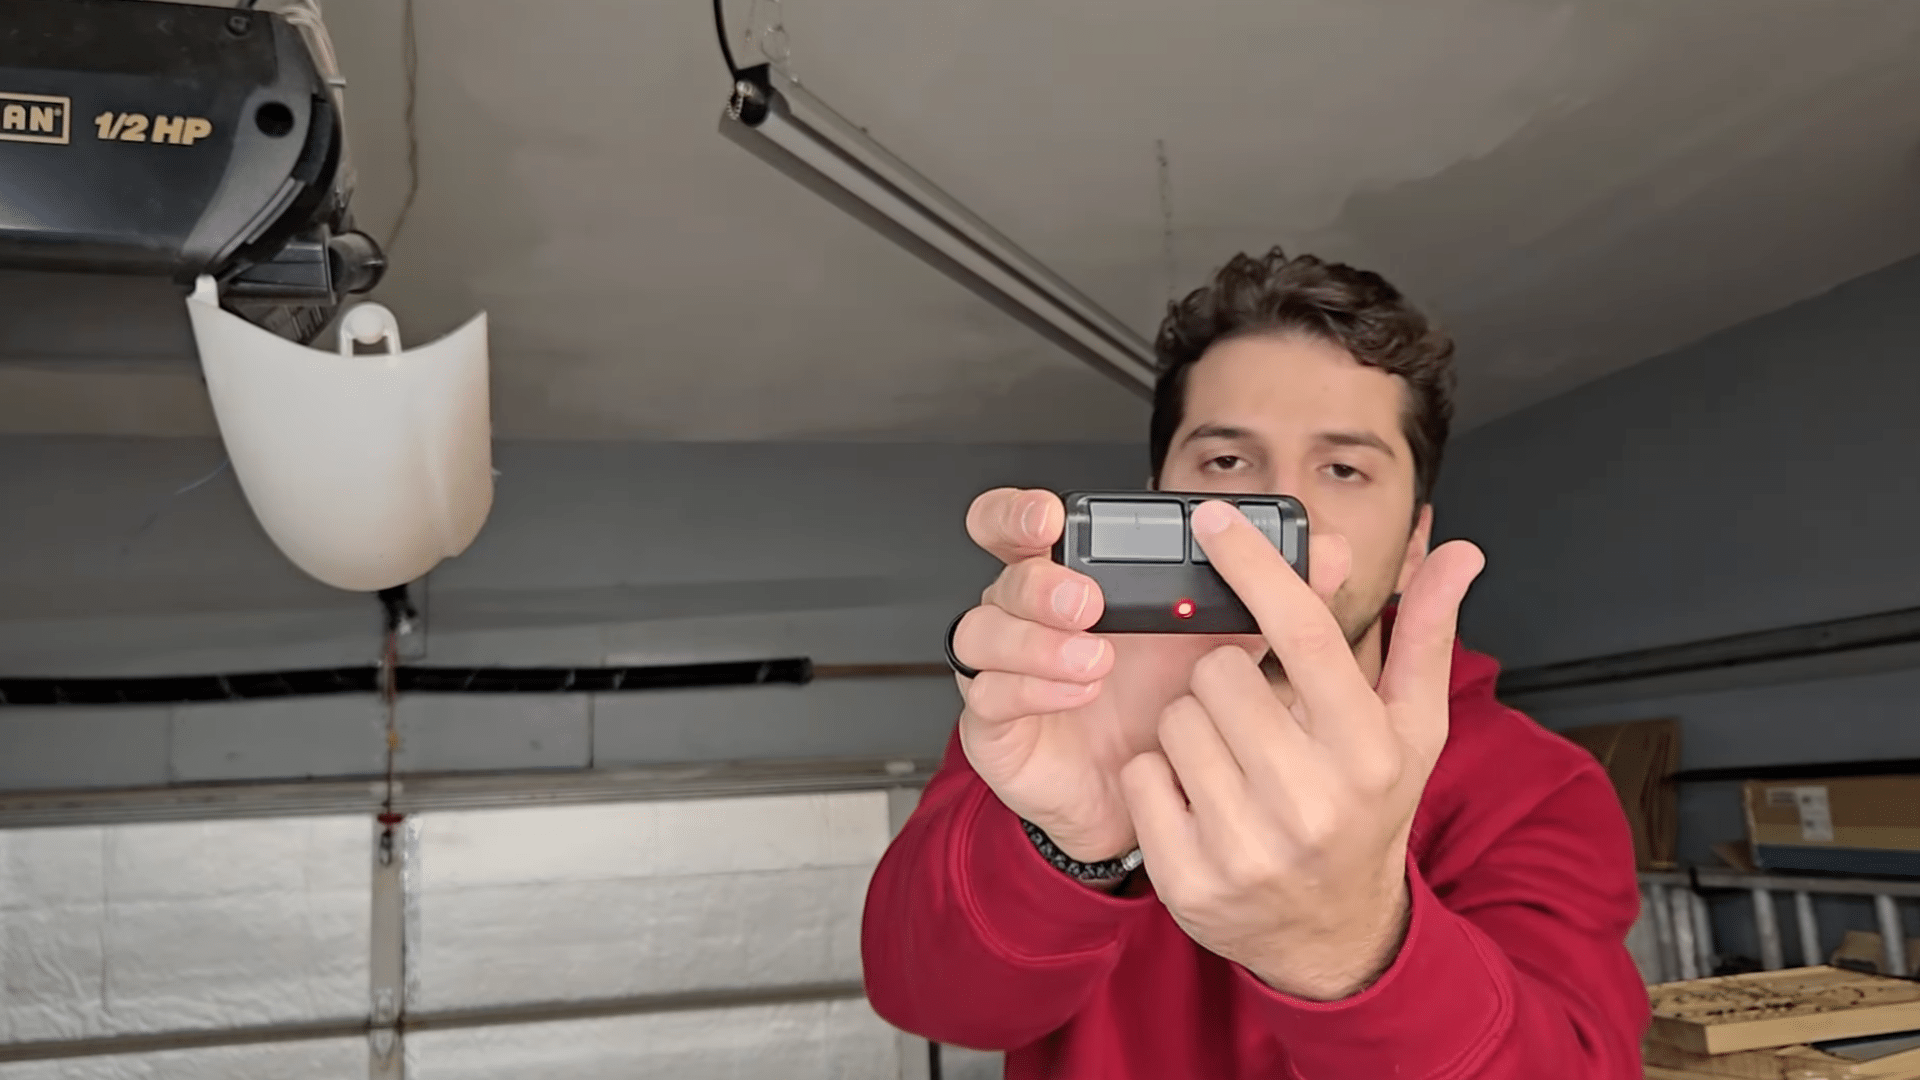
Step 4: Enter Program Mode
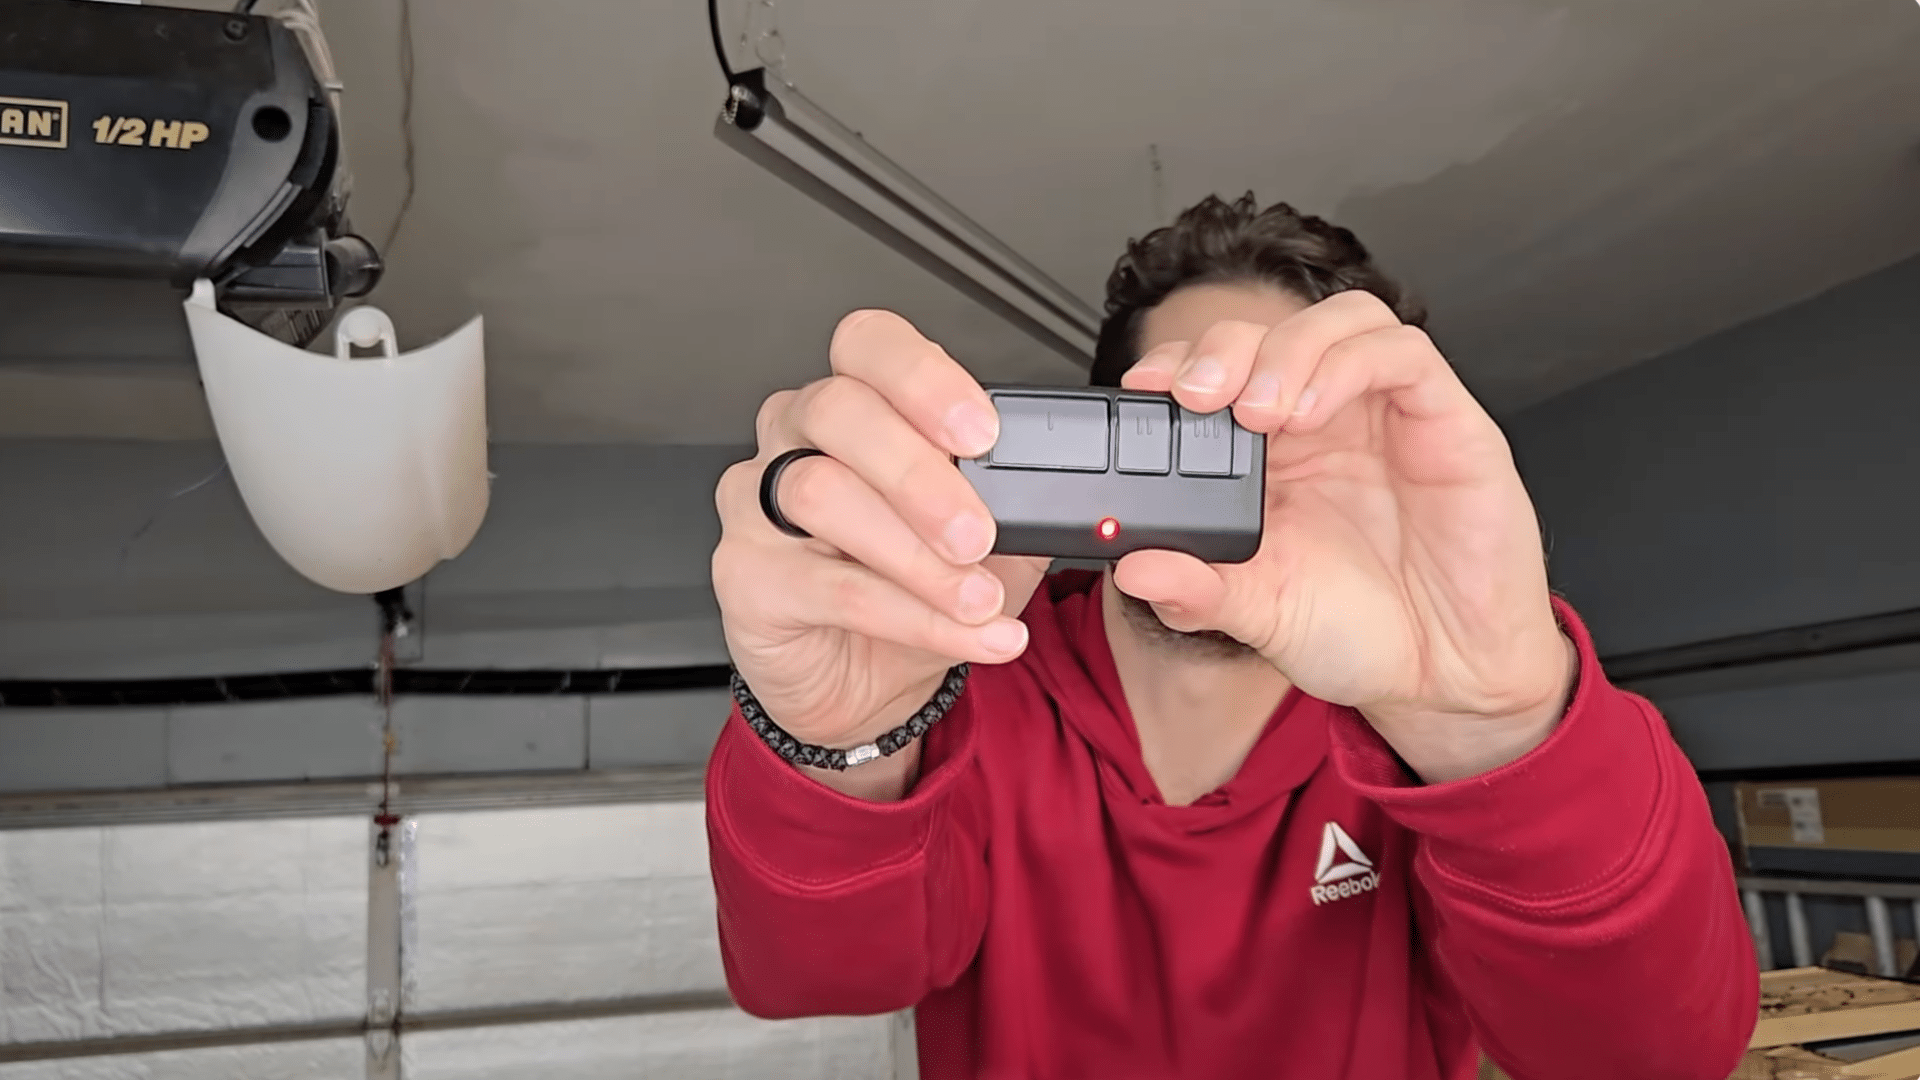
Press and hold the small rubber button on the back of the remote until the LED on the front turns on and stays lit.
A steady light means the remote is now in program mode. If the LED flickers or turns off quickly, press and hold the button again to make sure it stays solid.
This steady glow is important because it tells you the remote is ready to receive the next set of instructions.
Once the light holds steady, move on to choosing your programmed button.
Step 5: Press the Remote Button
Choose the button on your remote that you want to program. Press it the exact number of times shown on your color chart from earlier.
For example, if your opener has a purple learn button, you’ll press your chosen button twice.
Make sure each press is clear and spaced so the remote reads them properly. This step tells the remote which signal format to use.
Once you finish the correct number of presses, the remote stores that pattern and gets ready for syncing.
Step 6: Exit Program Mode
To exit program mode, press any of the remaining buttons on the remote.
When you do this, the LED on the front will turn off, confirming that the programming input has been saved.
This step is important because leaving the remote in program mode can cause it to ignore the next signal during syncing.
Make sure the light is fully off before moving on. Once the LED goes dark, your remote is ready to pair with the garage door opener.
Step 7: Press the Learn Button on the Opener
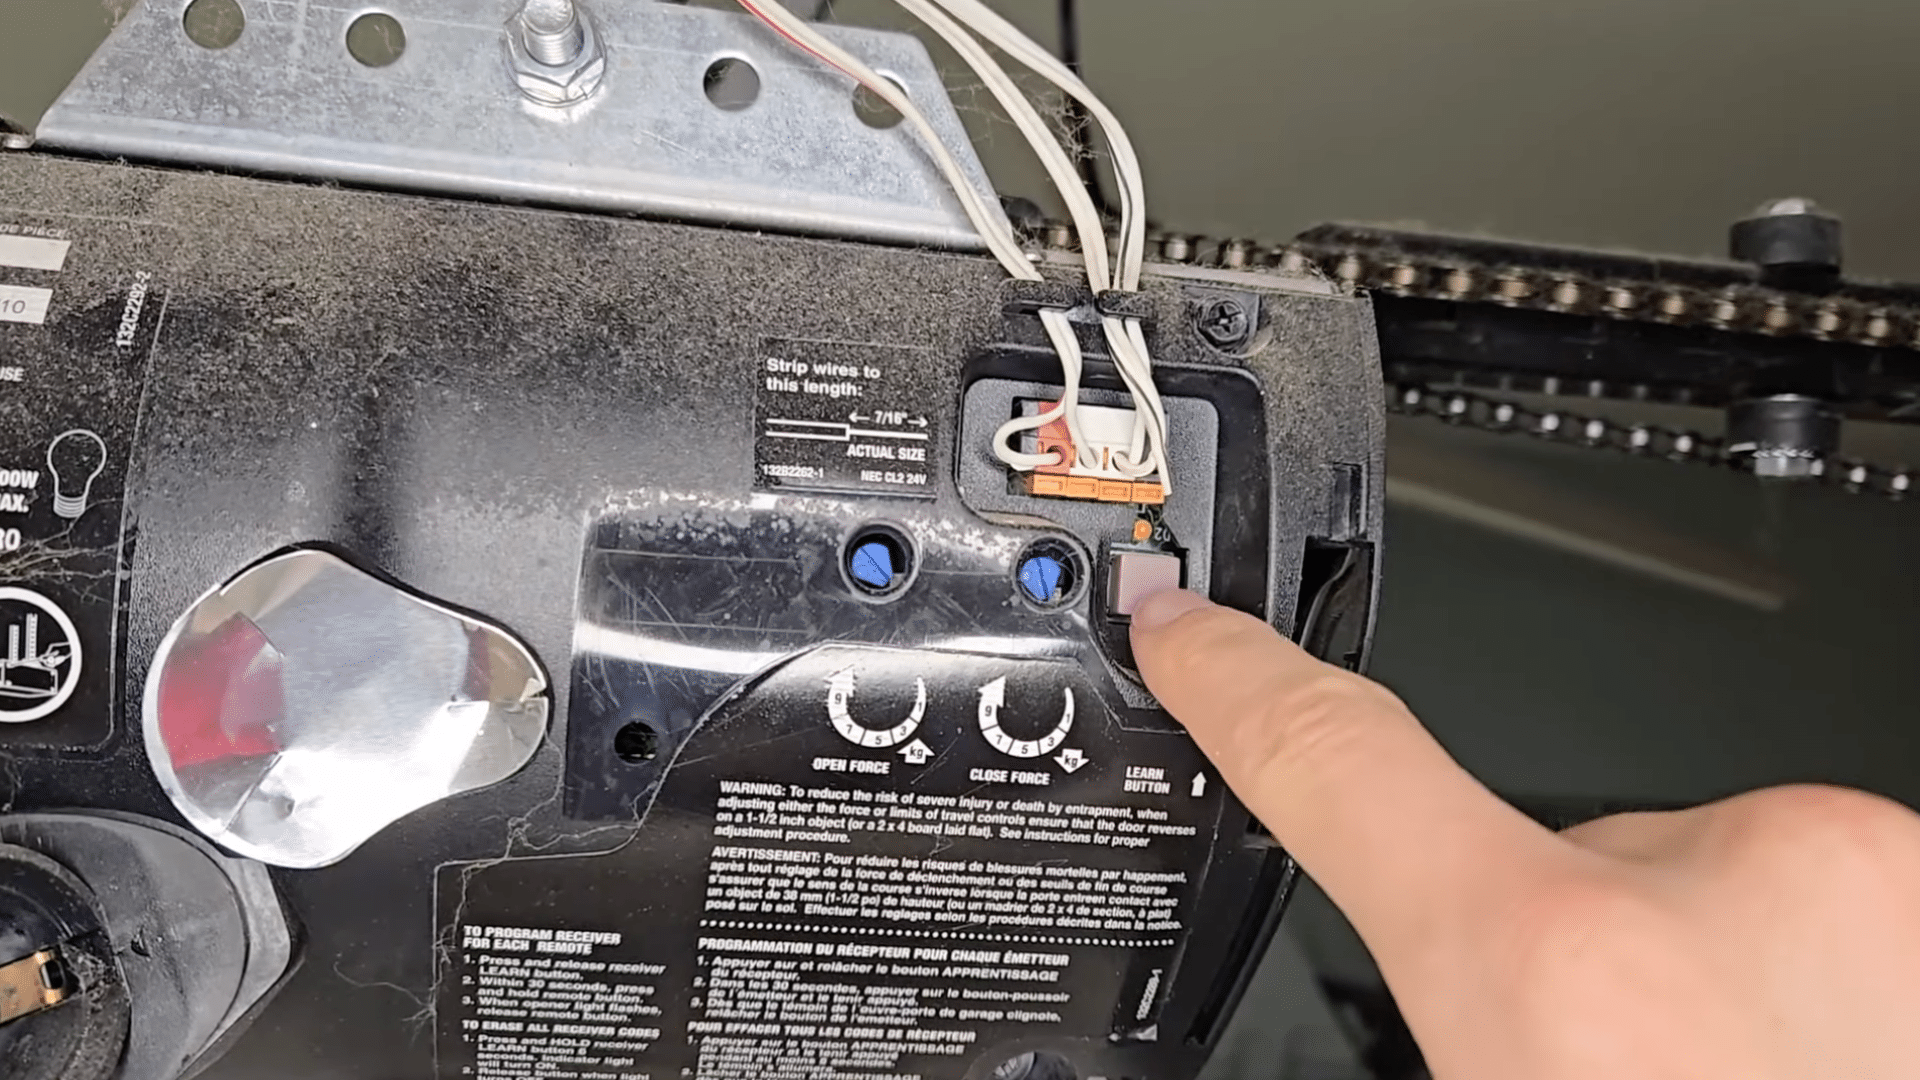
Go back to your opener and press the learn button until the LED turns on and stays lit.
This puts the opener into pairing mode so it can receive the signal from your remote.
Hold the learn button just long enough for the light to stay steady. Once it does, step down safely and get your remote ready.
The opener will remain in pairing mode for a short time, so you’ll need to move to the next step without waiting too long.
Step 8: Sync the Remote
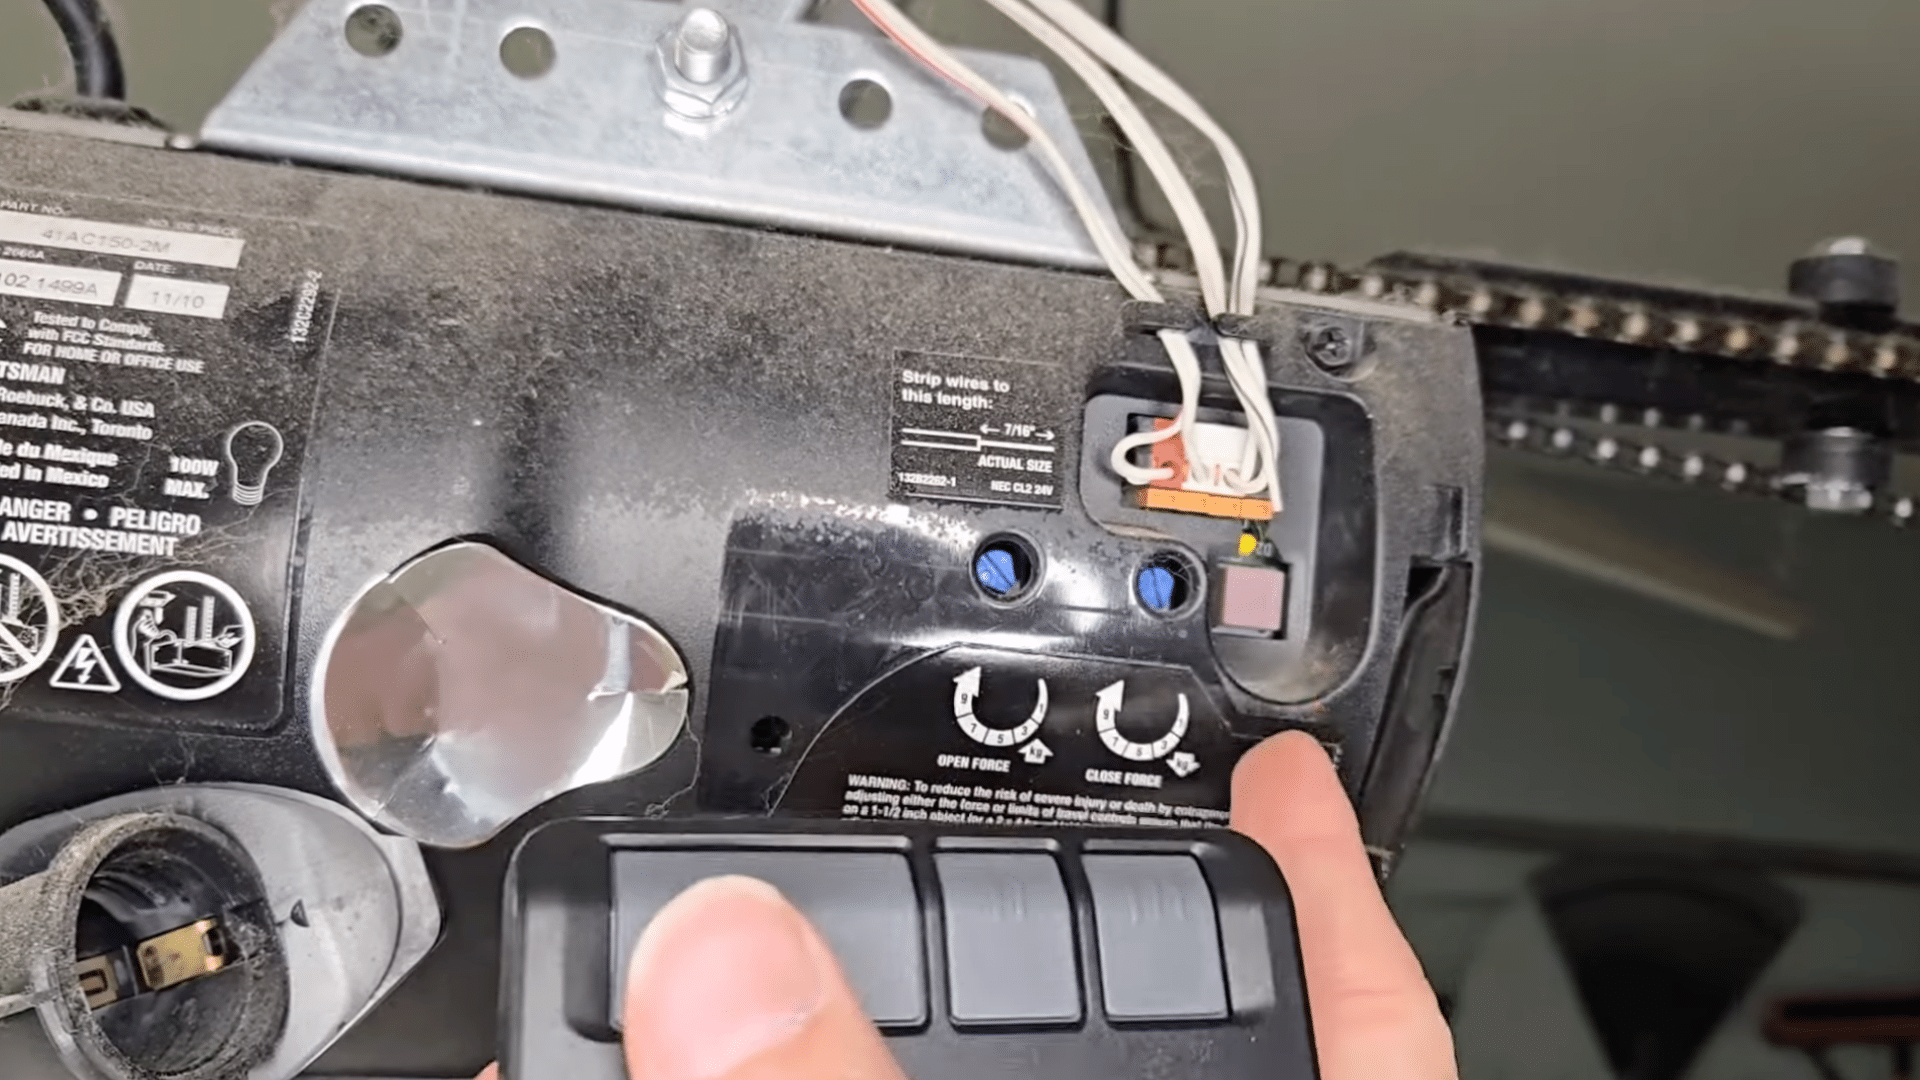
Press and hold the button you programmed on the remote. Keep holding it until you hear two clicks from the opener and see a quick flash from the light.
These two signs confirm that the remote has successfully synced with your opener.
If nothing happens at first, keep holding the button a little longer. If the opener still doesn’t respond, repeat the previous steps.
Once you hear the clicks and see the light flash, your remote is fully programmed and ready to use.
Step 9: Test the Remote
Press the programmed button to make sure the garage door opens. Then press it again to close the door.
The opener should respond right away. If the door doesn’t move, check your remote’s battery or repeat the syncing steps.
Testing helps confirm that the programming worked and that your signals are reaching the opener correctly.
Once the door opens and closes smoothly, your remote is ready for everyday use.
This tutorial is based on a helpful video by Filip Tech. You can check out the original video on their YouTube channel here or watch it below.
How to Program Multiple Garage Doors?
If your home has more than one garage door, you can often use the same universal remote to control each one by assigning a different button to every door.
The process is almost the same as programming a single door, but you repeat the steps for each opener.
- Start by clearing space on your universal remote, making sure each button is free to assign to a different door.
- Locate the Learn button on the first garage door opener and note its color.
- Follow the press sequence needed for that color and program the first remote button.
- Test the button to confirm the door opens and closes correctly.
- Move to the second garage door opener and repeat the same steps with a different remote button.
- Match the correct press sequence again and test it to confirm it works.
- Continue this process for any additional doors, using a new button each time to keep signals separate.
When to Reset Your Garage Door Opener?
I’ve learned that sometimes the opener just needs a fresh start, especially when the remote refuses to sync even after you follow every step correctly.
Older openers often keep old codes stored inside, and those leftover signals can block new remotes from pairing.
When this happens, holding the learn button for about 5 to 10 seconds clears everything at once.
The light will flash or turn off, showing the memory is wiped clean. I usually do this when moving into a new home, changing remotes, or after several failed attempts.
Once the opener is cleared, I go through the programming steps again, and the remote usually connects without trouble.
Resetting helps the opener read new signals the right way and makes the whole setup feel much smoother.
Helpful Tips for Smooth Programming
Before you repeat the setup, it helps to slow down and check a few small things that often get missed. These quick tips can fix common issues and keep you from going through the whole process again.
A little careful checking can make the remote respond much faster and help the opener read the signal the right way.
- Recheck your opener’s learn button color, especially if the opener is older or the color is worn or faded.
- Make sure the remote battery is strong, since a weak battery can stop the signal from reaching the opener during syncing.
- Clear the remote if it was used on another garage door earlier, because older codes can block new ones.
- Press and hold the programmed button a little longer if the opener doesn’t flash or click right away during the pairing step.
- If you have two garage doors, set each door on a different remote button so you can switch between them easily and avoid confusion.
Conclusion
Programming a garage door remote or connecting it to your HomeLink system doesn’t have to feel confusing.
Once you know where the learn button is, how many times to press your remote, and how to sync everything in the right order, the process becomes much easier to follow.
I’ve walked you through each step so you can set up your remote with confidence, even if it’s your first time working with a garage door opener.
If anything doesn’t work on the first try, checking your learn button color, battery strength, and timing usually solves the issue.
You can also set up more than one door on the same remote by repeating the same pattern.
With these steps, you should be able to get your opener working smoothly and rely on your remote every day.